Groups
In the cloud, you can manage Groups in the following ways:
- View All Groups
- Add a New Group
- Search a Group
- Edit a Group
- Delete a Group
- Assign Media to a Group
- Add Screens to a Group
- Check Total Screens in a Group
- Sort Groups by Created Date
- Check Selected Screens in a Group
- Delete an Existing Screen in a Group
Documentation
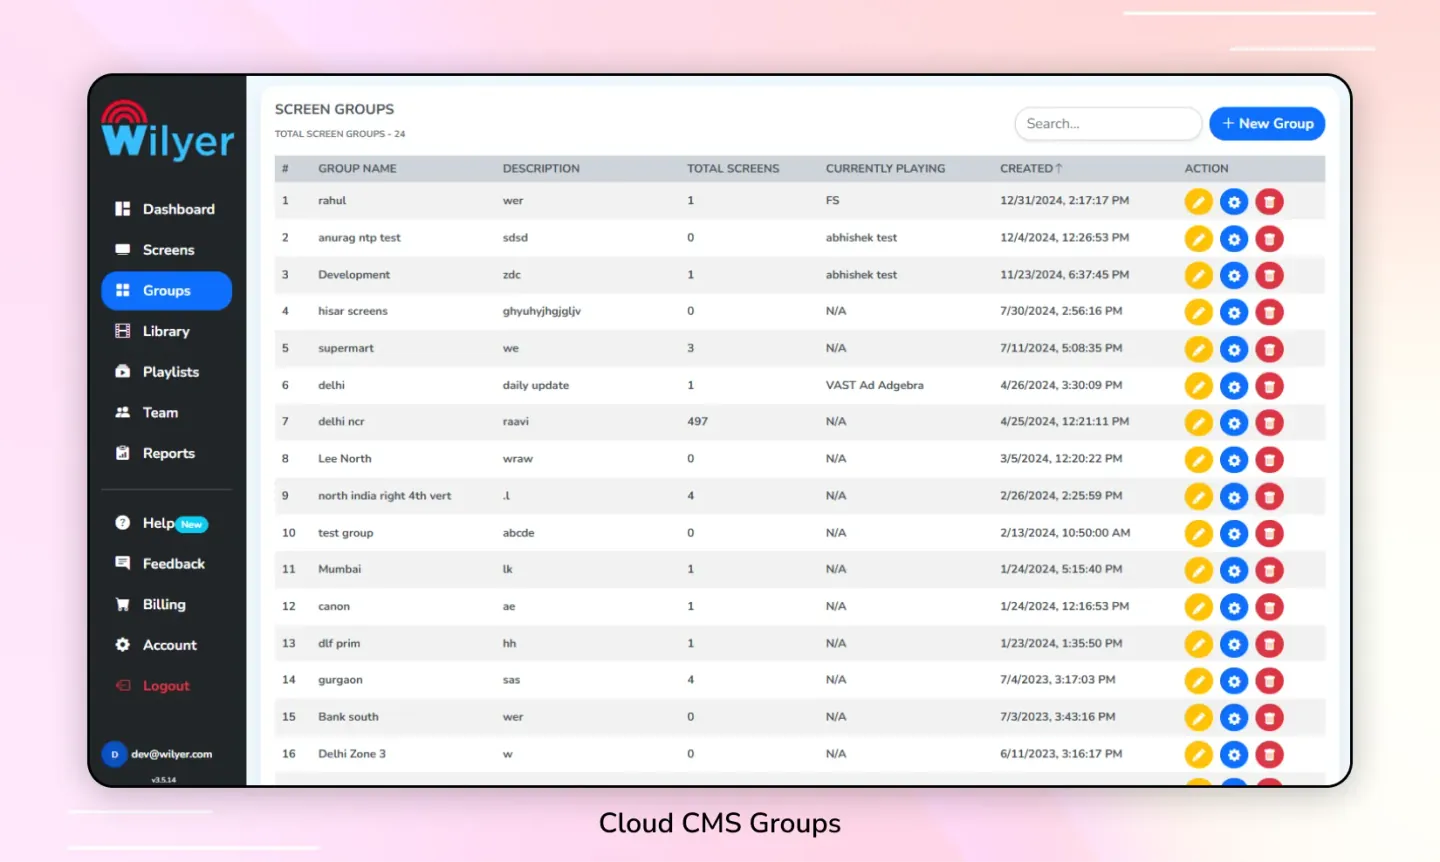
1. View All Groups
Click on the Groups tab in the left sidebar.
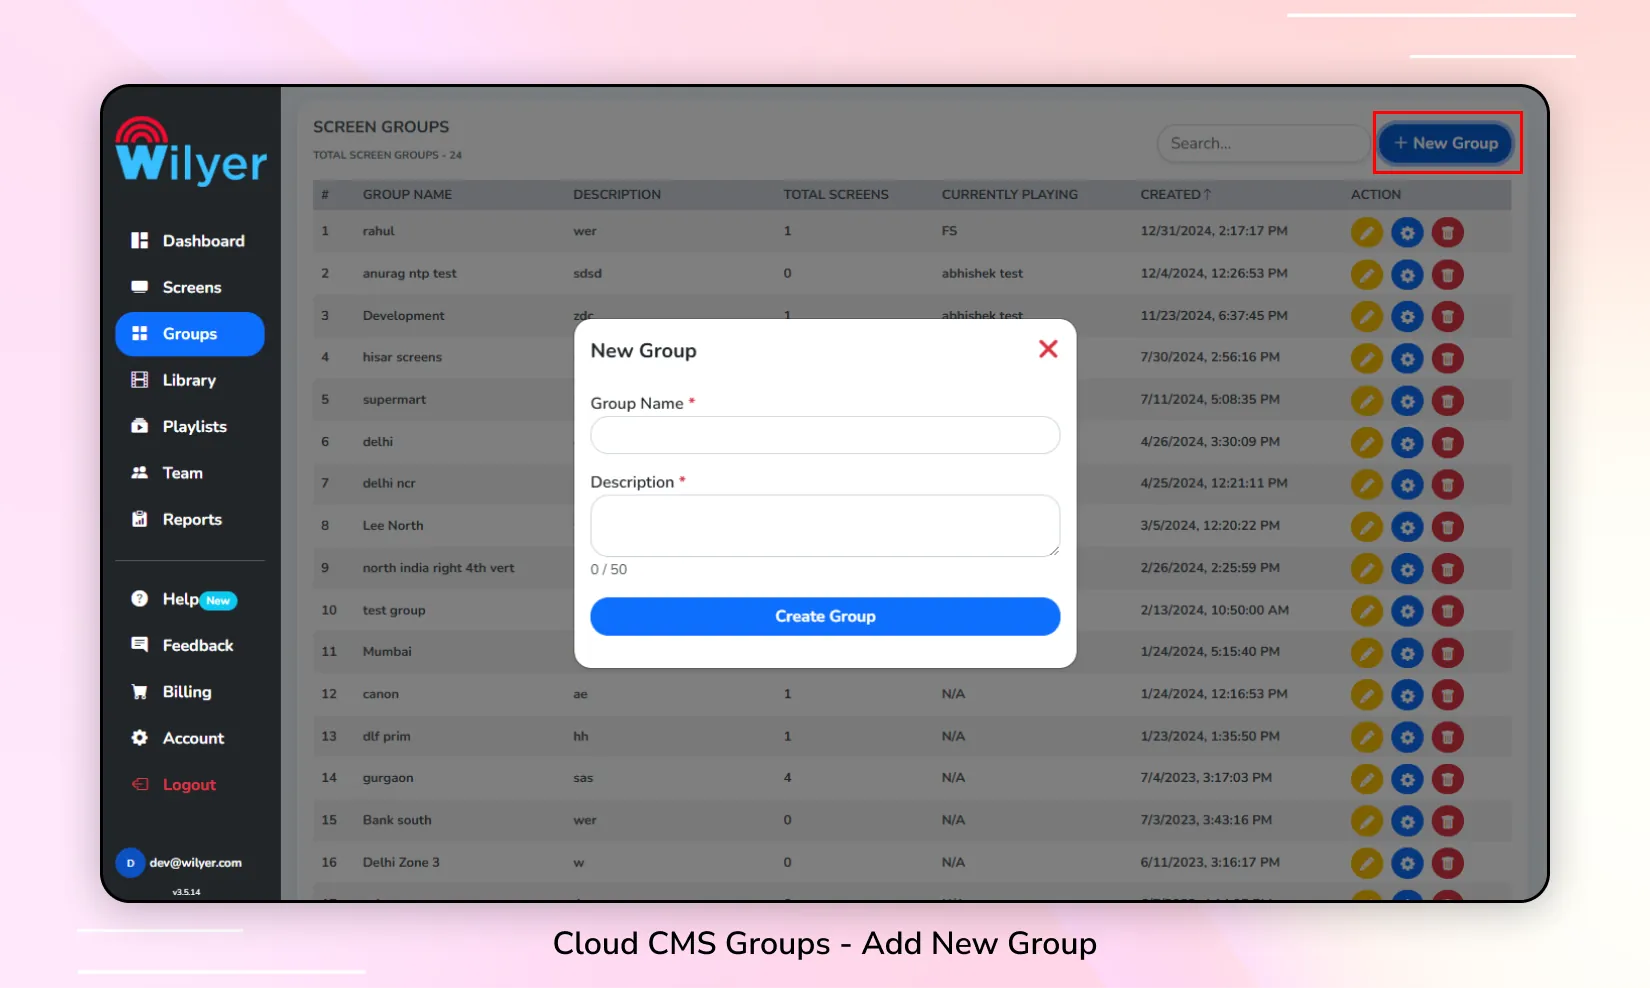
2. Add a New Group
Step 1: Click on the Groups tab in the left sidebar.
Step 2: Select the + New Group button.
Step 3: Enter the Group Name and Description.
Step 4: Click on Save Group to create the group.
Step 5: Once the group is created, click on the ⚙️ Settings button for the group.
Step 6: Select the Screens you want to add to the group and click Save.
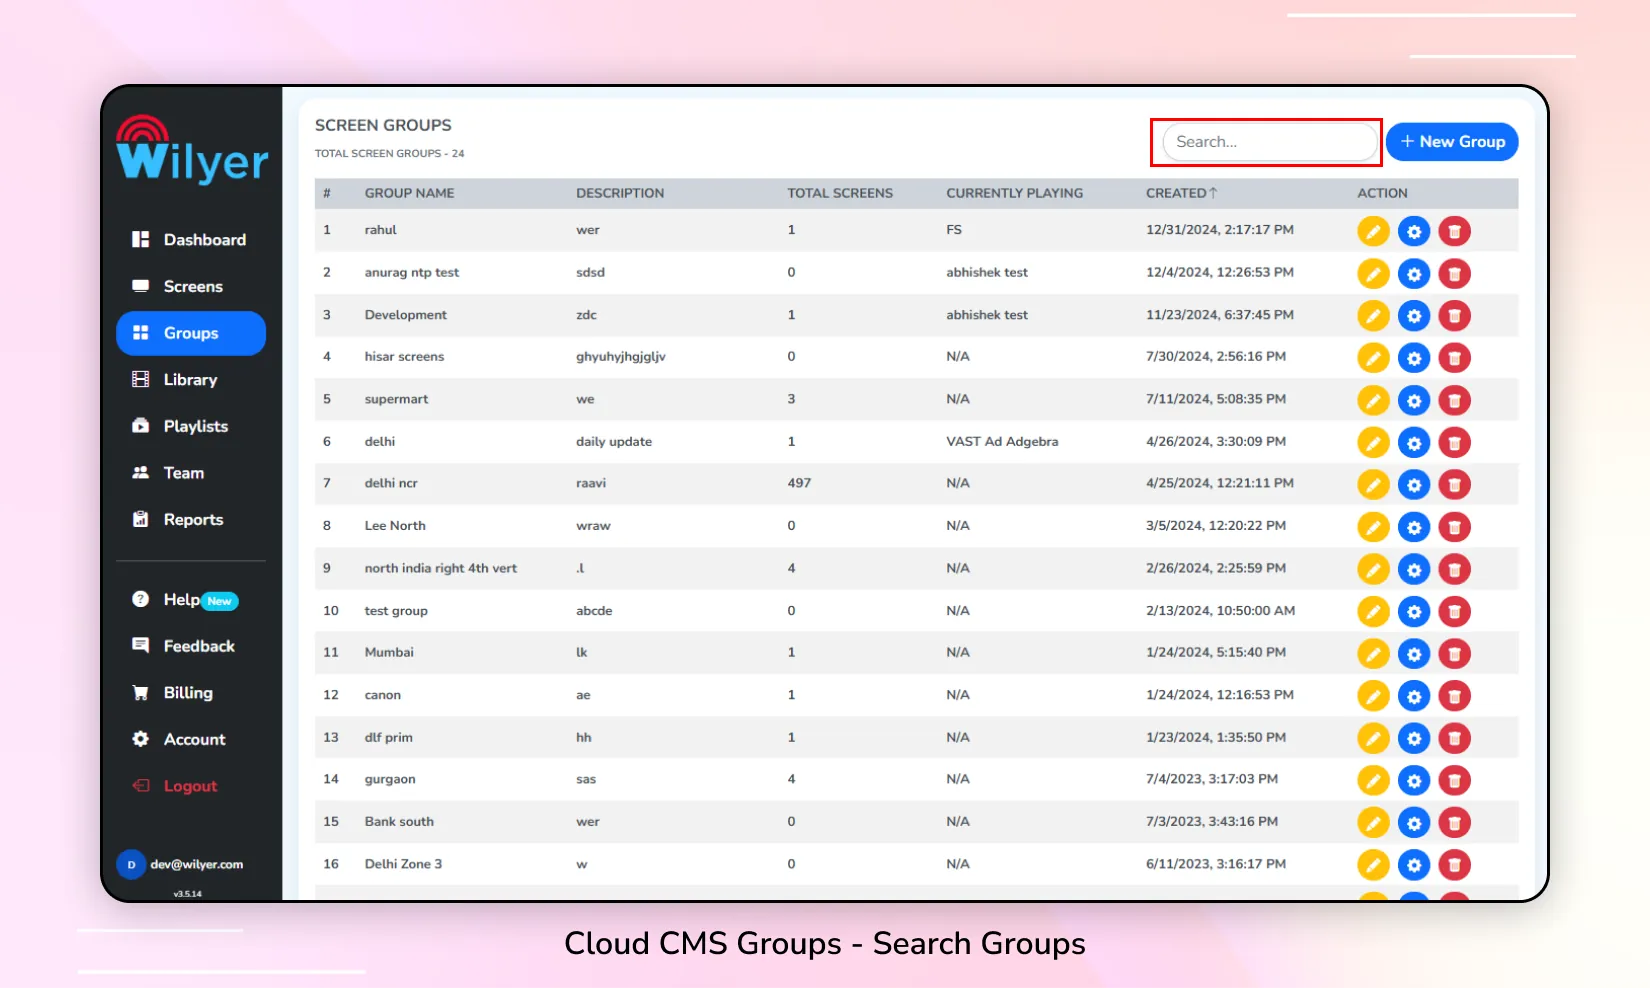
3. Search a Group
Step 1: Click on the Groups tab in the left sidebar.
Step 2: Use the Search input to search for a group by name.
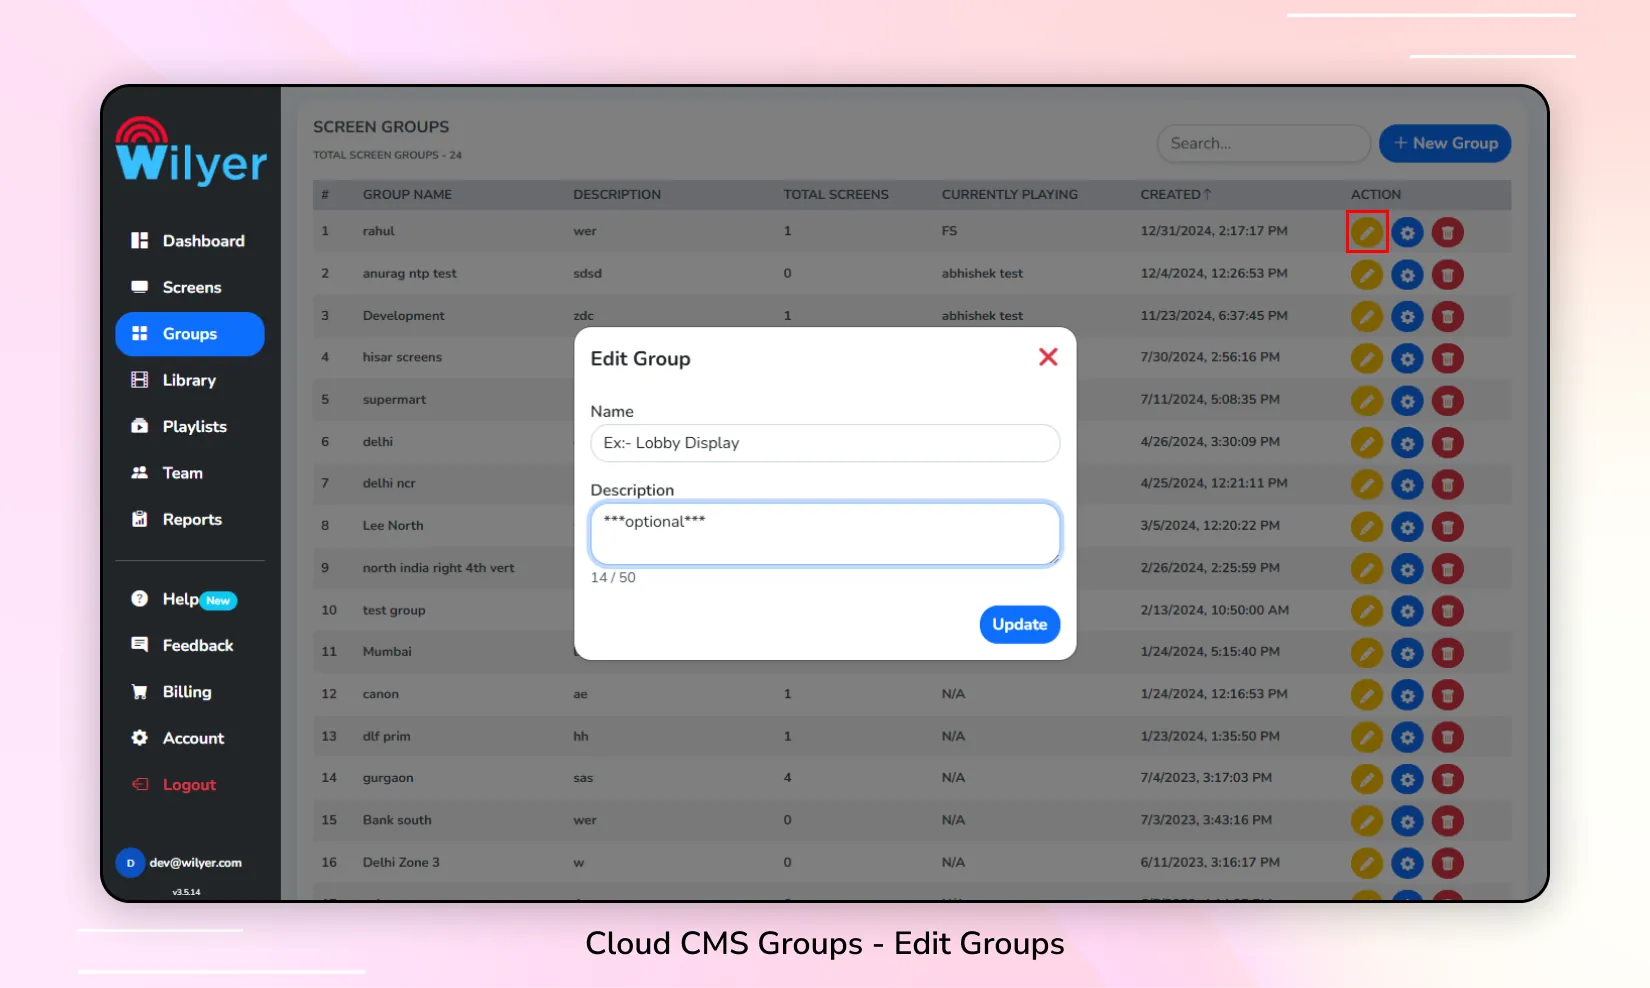
4. Edit a Group
Step 1: Click on the Groups tab in the left sidebar.
Step 2: Click on the ✏️ Edit button next to the group you want to modify.
Step 3: Update the Group Name or Description as needed.
Step 4: Click on the Update Group button to save your changes.
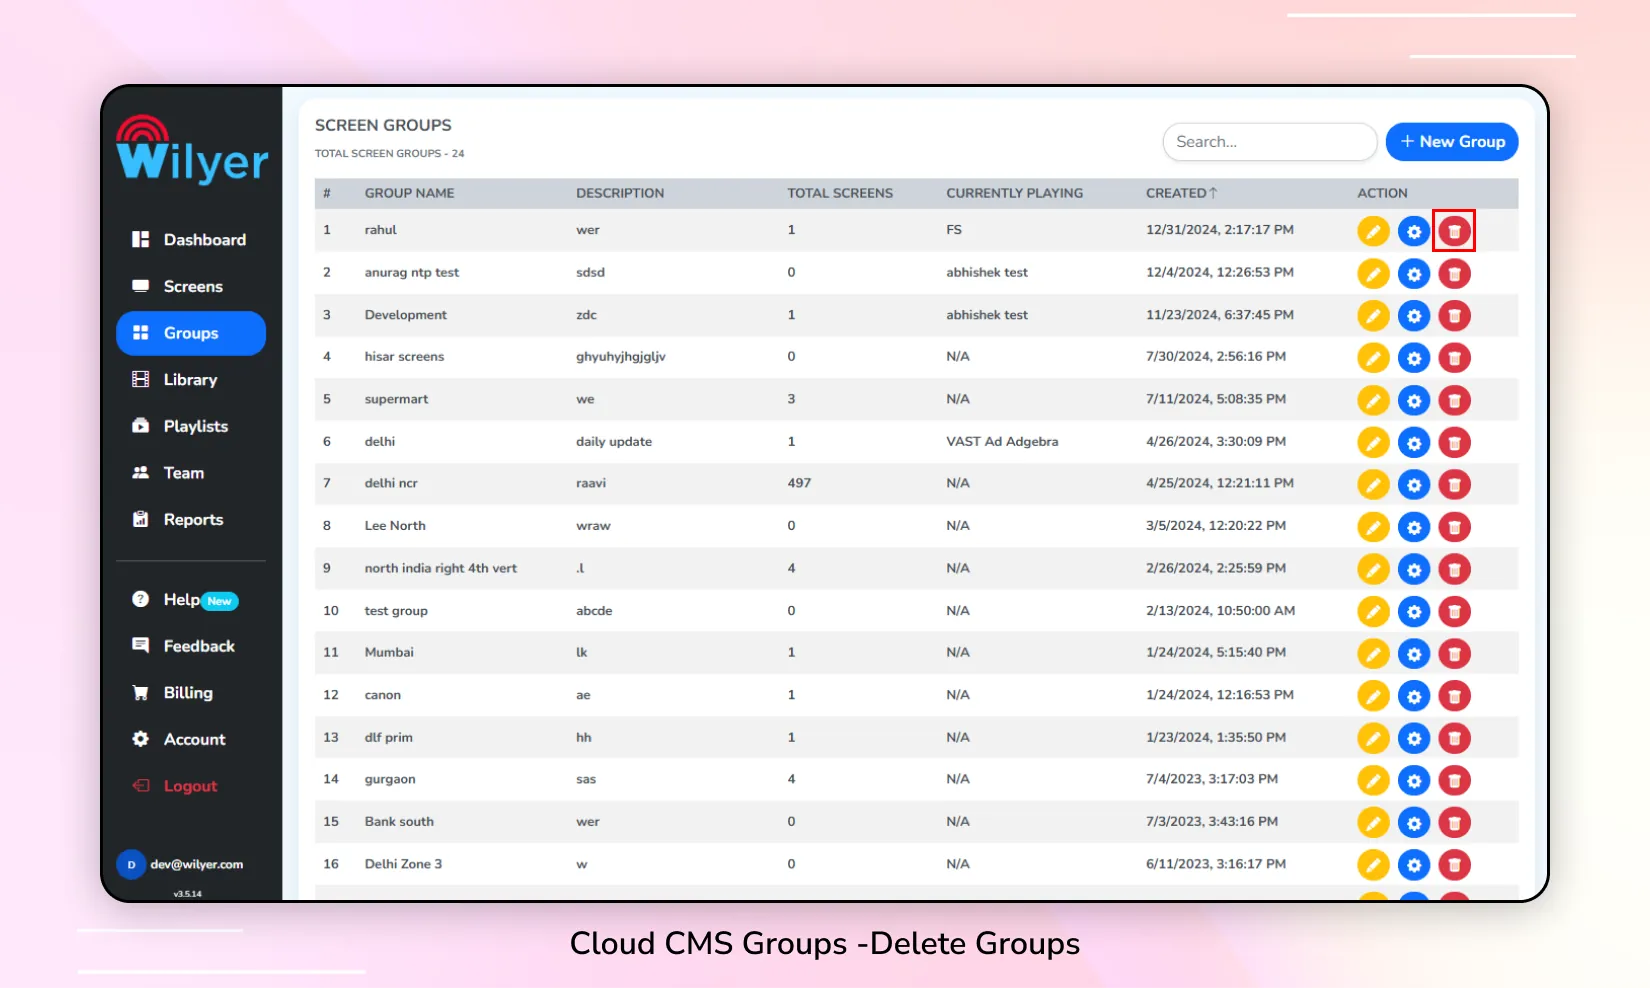
5. Delete a Group
Step 1: Click on the Groups tab in the left sidebar.
Step 2: Click on the 🗑️ Delete button next to the group you want to remove.
Step 3: Confirm the deletion by clicking on the Continue button in the confirmation prompt.
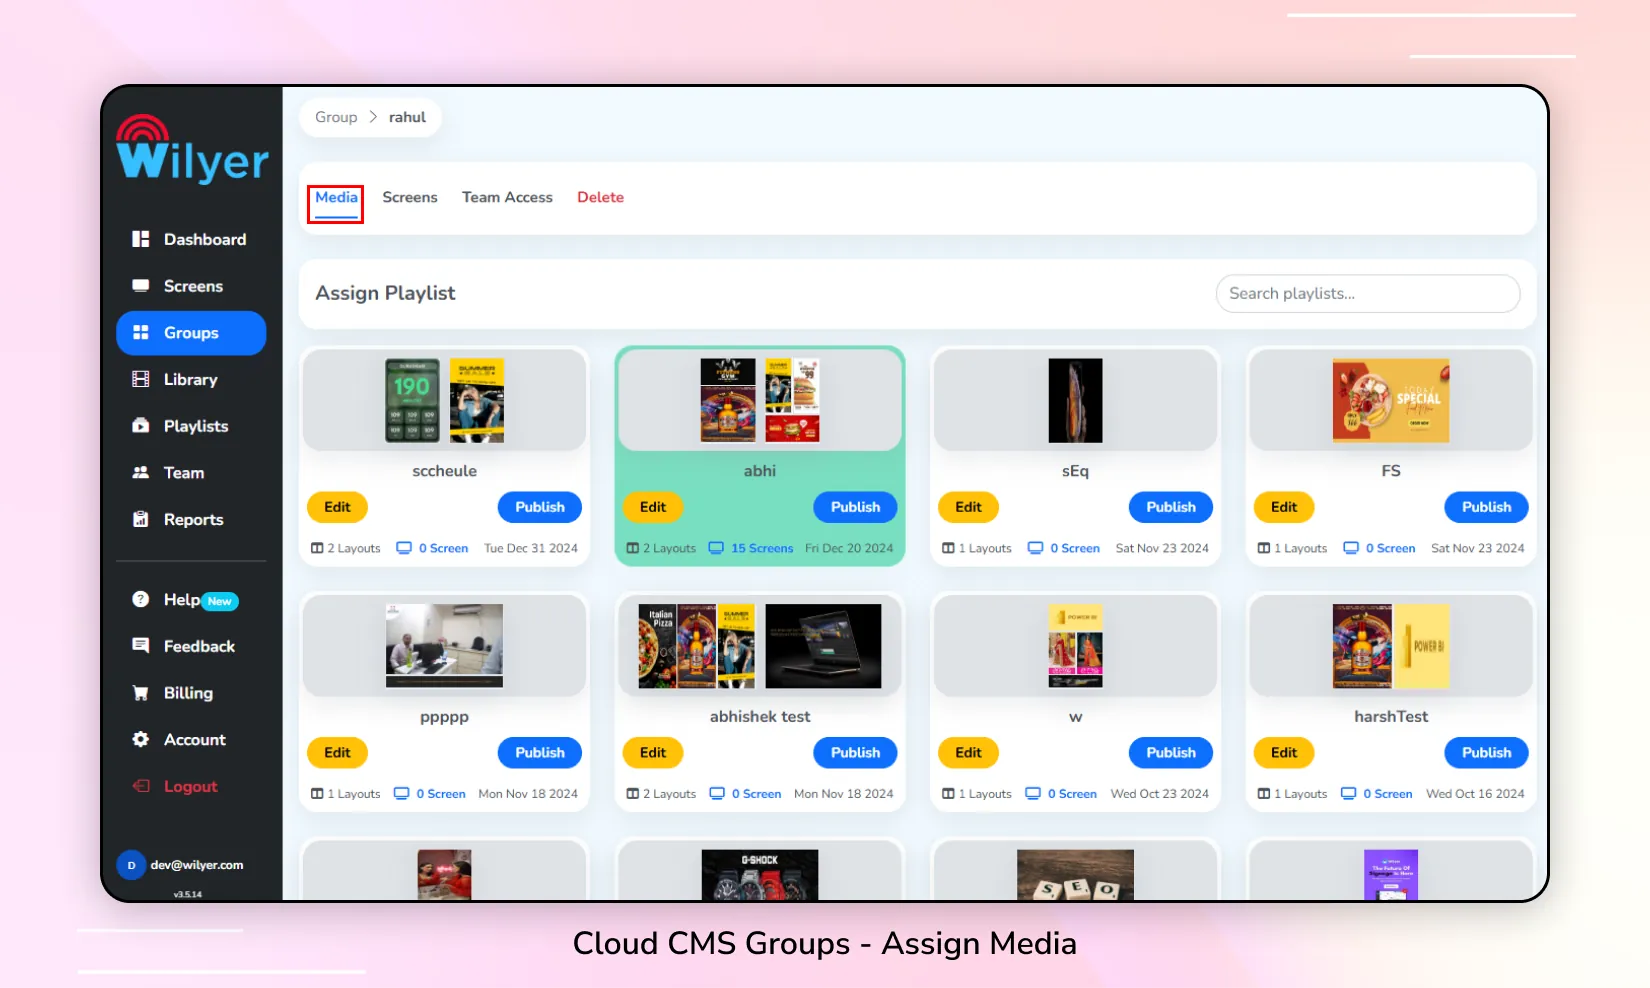
6. Assign Media to a Group
Step 1: Click on the Groups tab in the left sidebar.
Step 2: Click on the ⚙️ Settings button for the specific group.
Step 3: Select the Media option.
Step 4: Assign media by clicking the Publish button next to the desired media file.
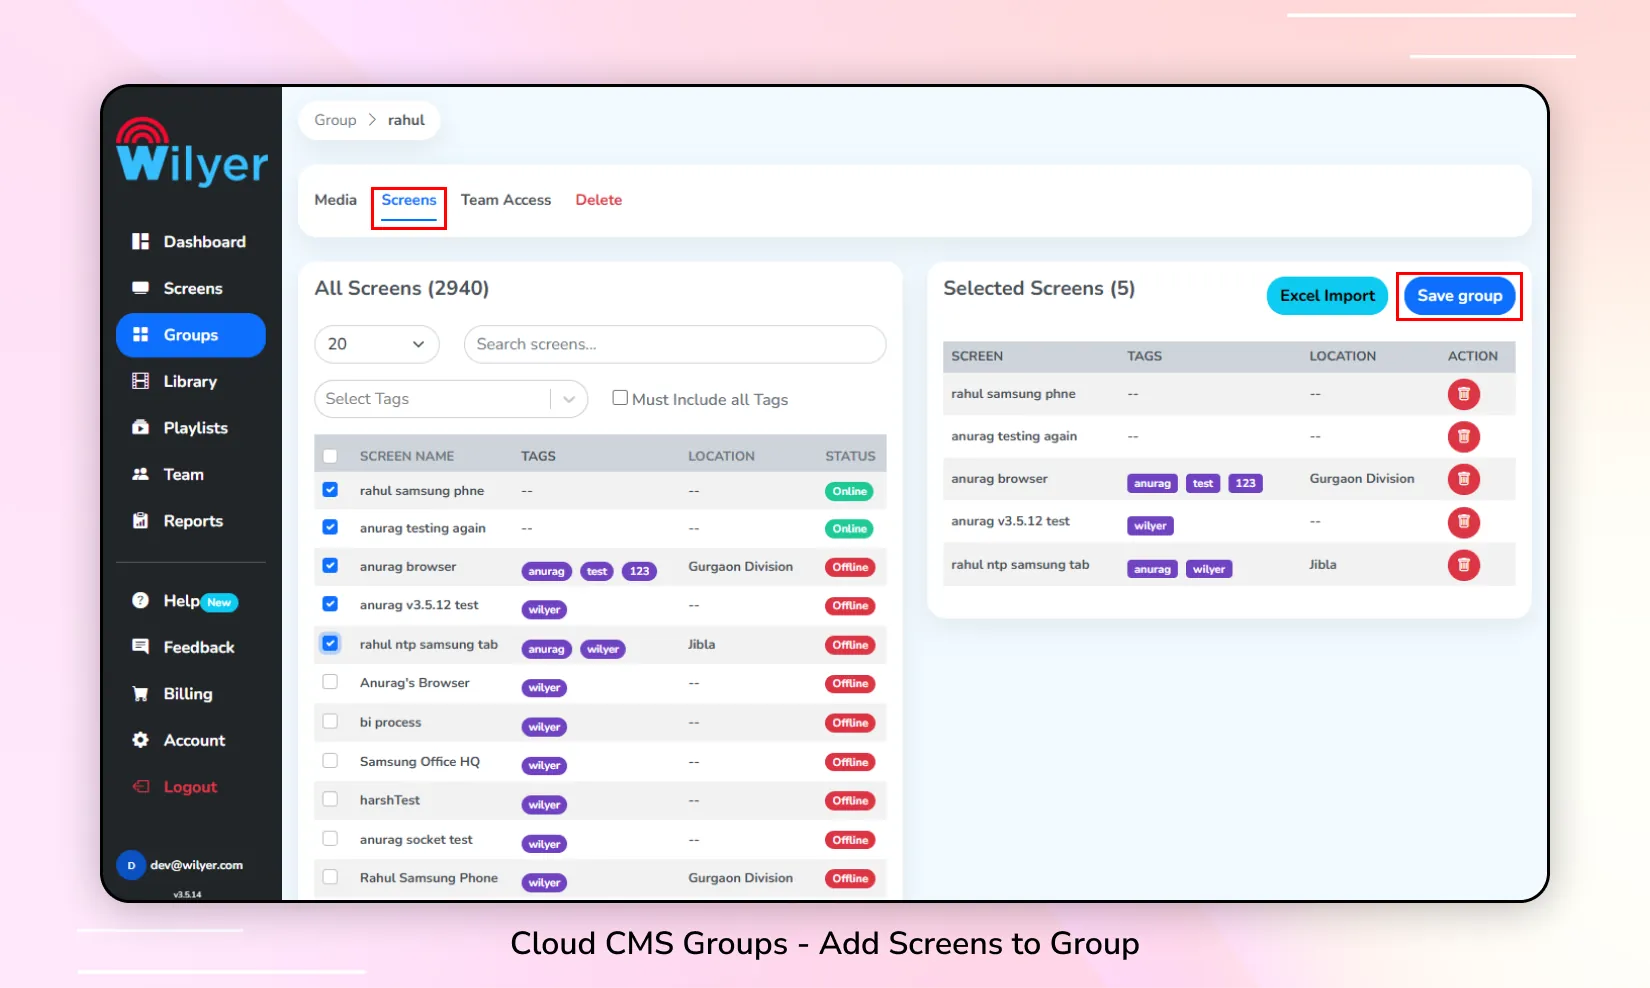
7. Add Screens to a Group
Step 1: Click on the Groups tab in the left sidebar.
Step 2: Click on the ⚙️ Settings button for the specific group.
Step 3: Select the Screens option.
Step 4: Choose the screens you want to add to the group.
Step 5: Click on the Save Group button to save the changes.
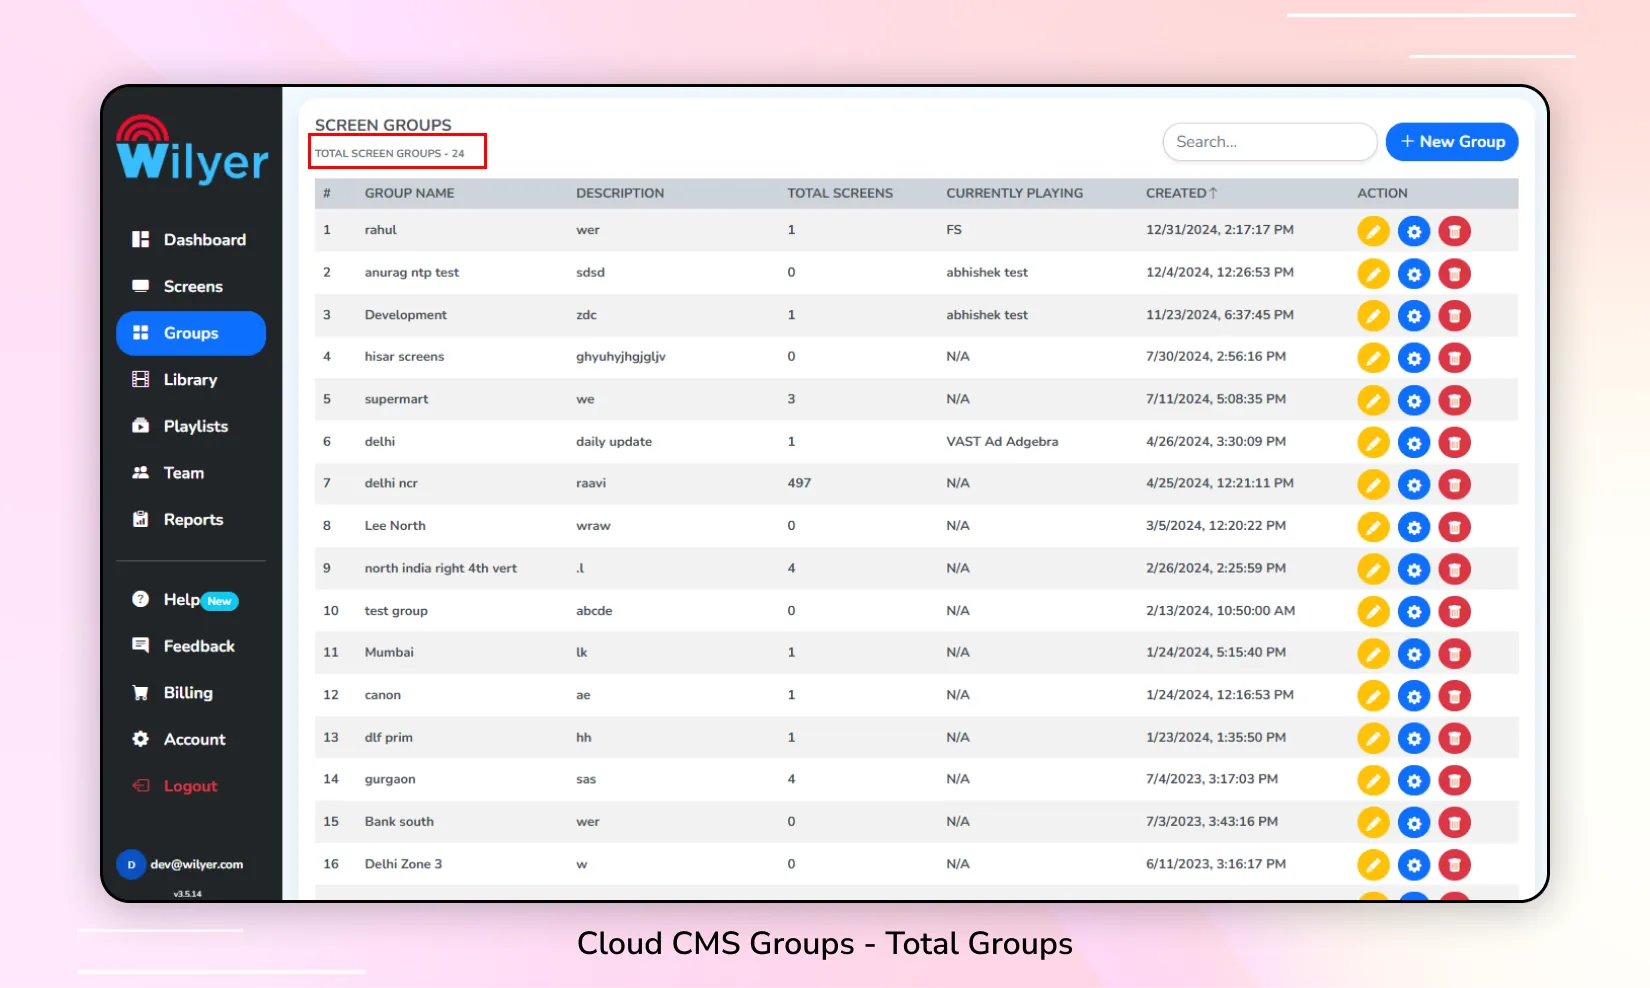
8. Check Total Screens in a Group
Step 1: Click on the Groups tab in the left sidebar.
Step 2: In the Screen Groups component, view the Total Screens column to see the number of screens in each group.
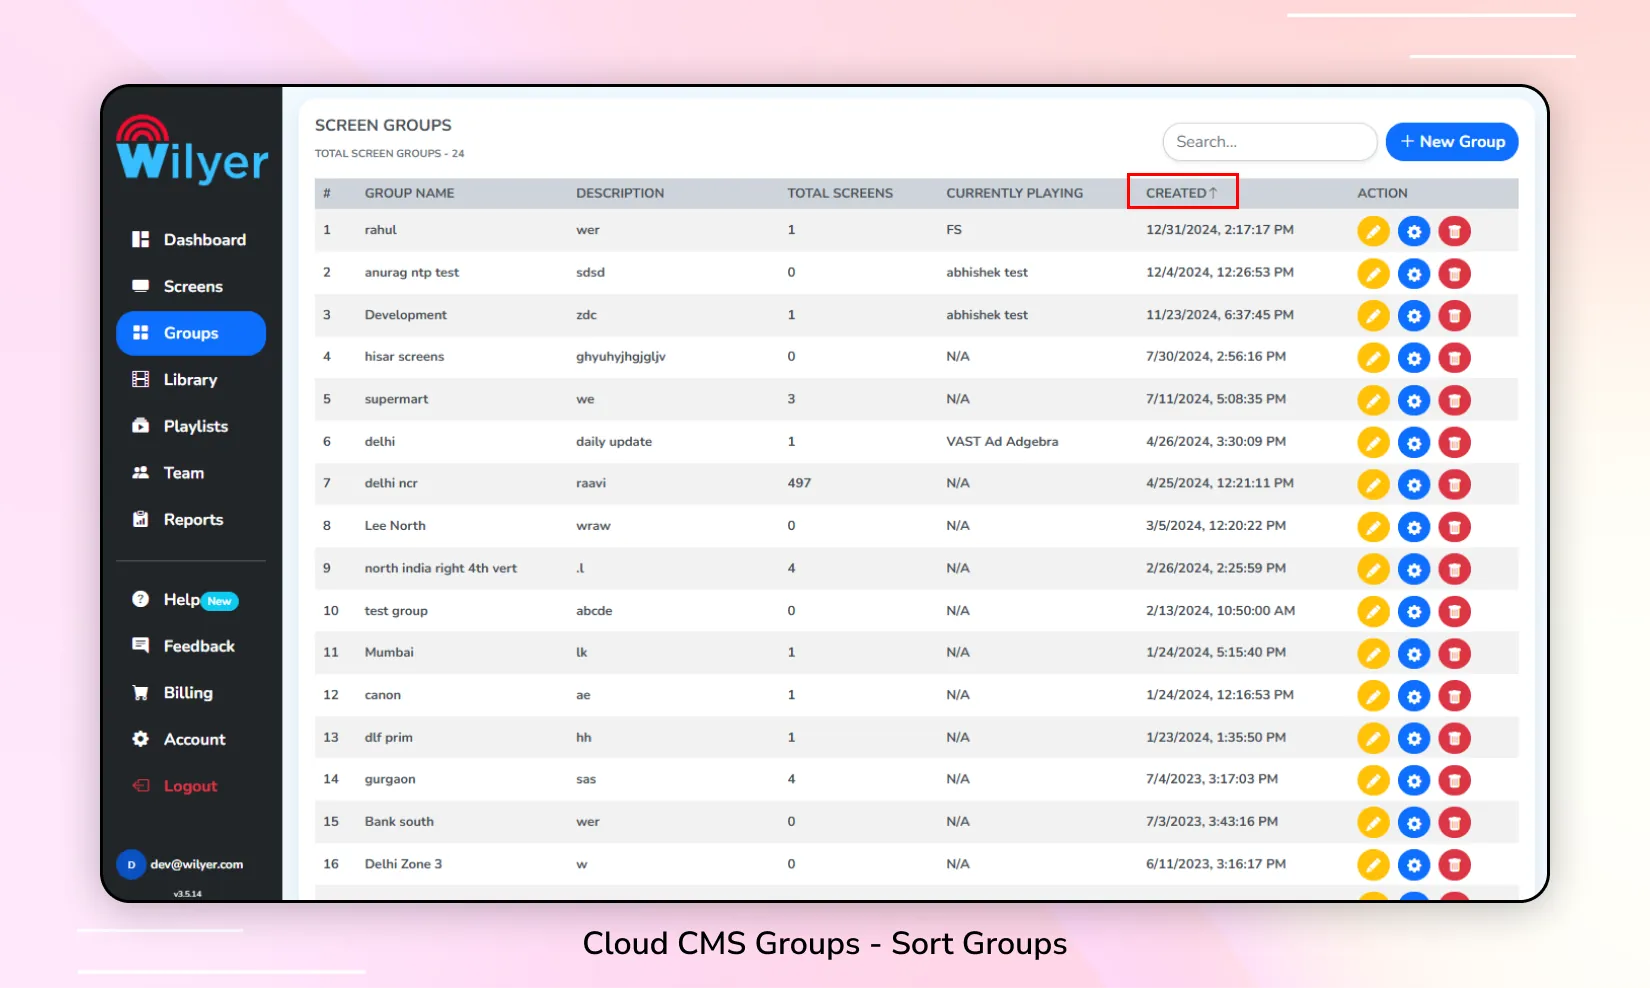
9. Sort Groups by Created Date
Step 1: Click on the Groups tab in the left sidebar.
Step 2: In the Screen Groups component, locate the Created column.
Step 3: Click the ⬆️ to sort the groups in ascending order by the created date, or the ⬇️ to sort them in descending order.
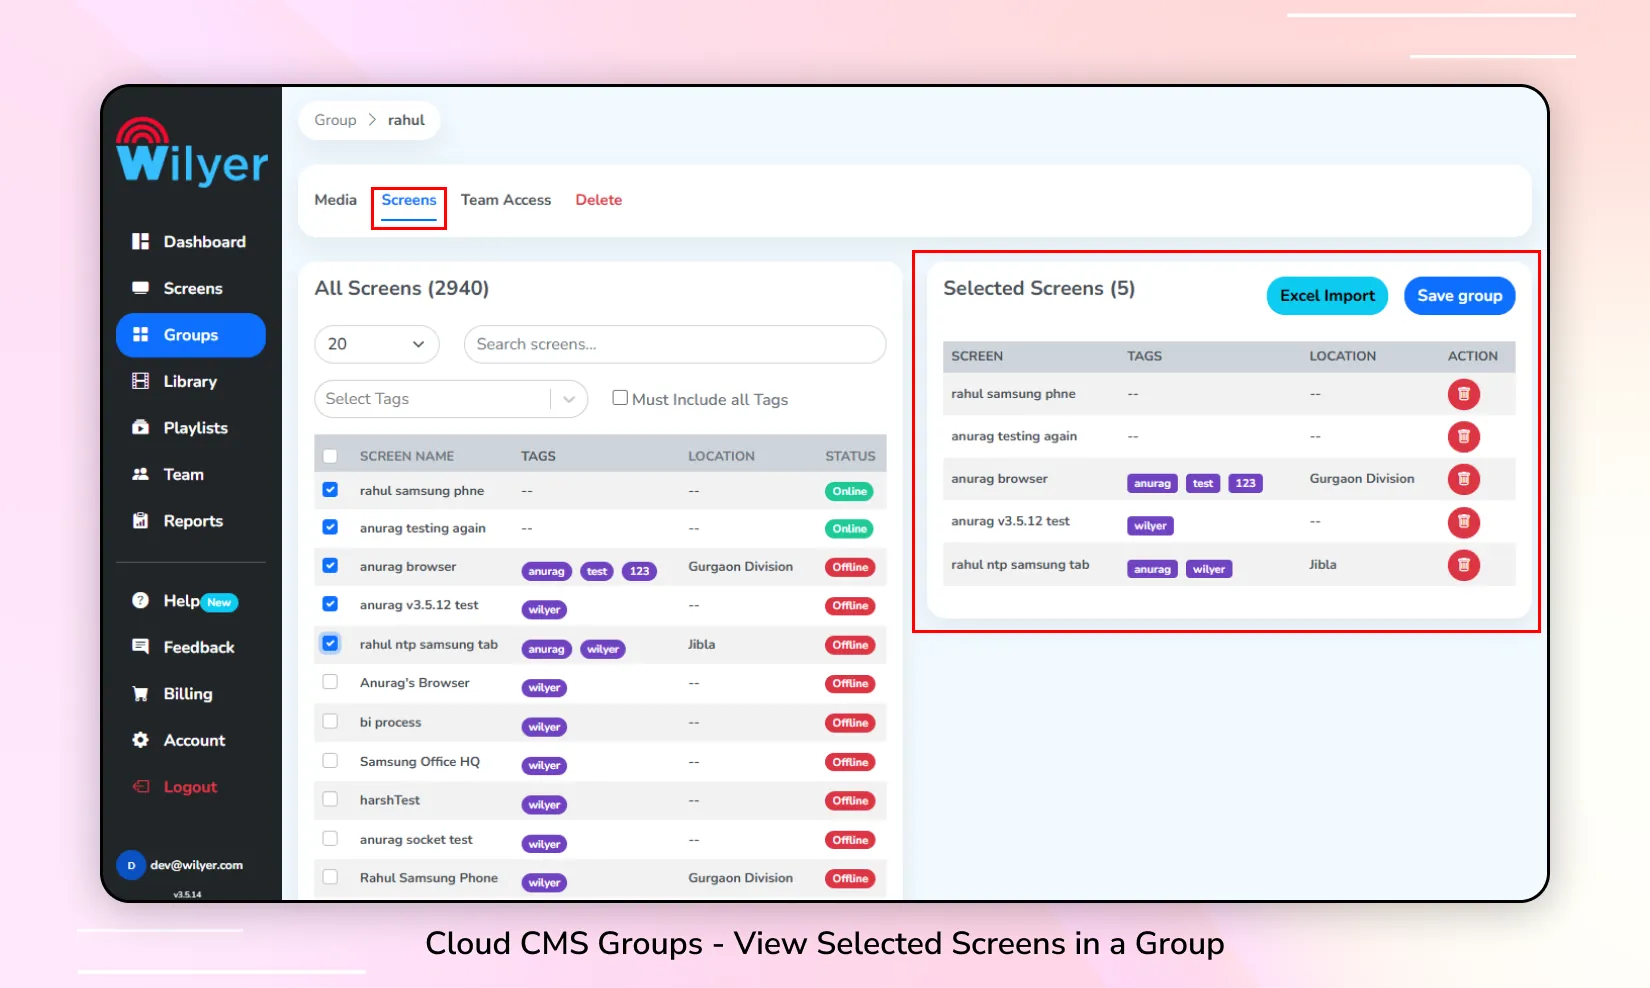
10. Check Selected Screens in a Group
Step 1: Click on the Groups tab in the left sidebar.
Step 2: Click on the ⚙️ Settings button for the specific group.
Step 3: Select the Screens option.
Step 4: View the list of screens that are currently selected for the group in the selected screens component.
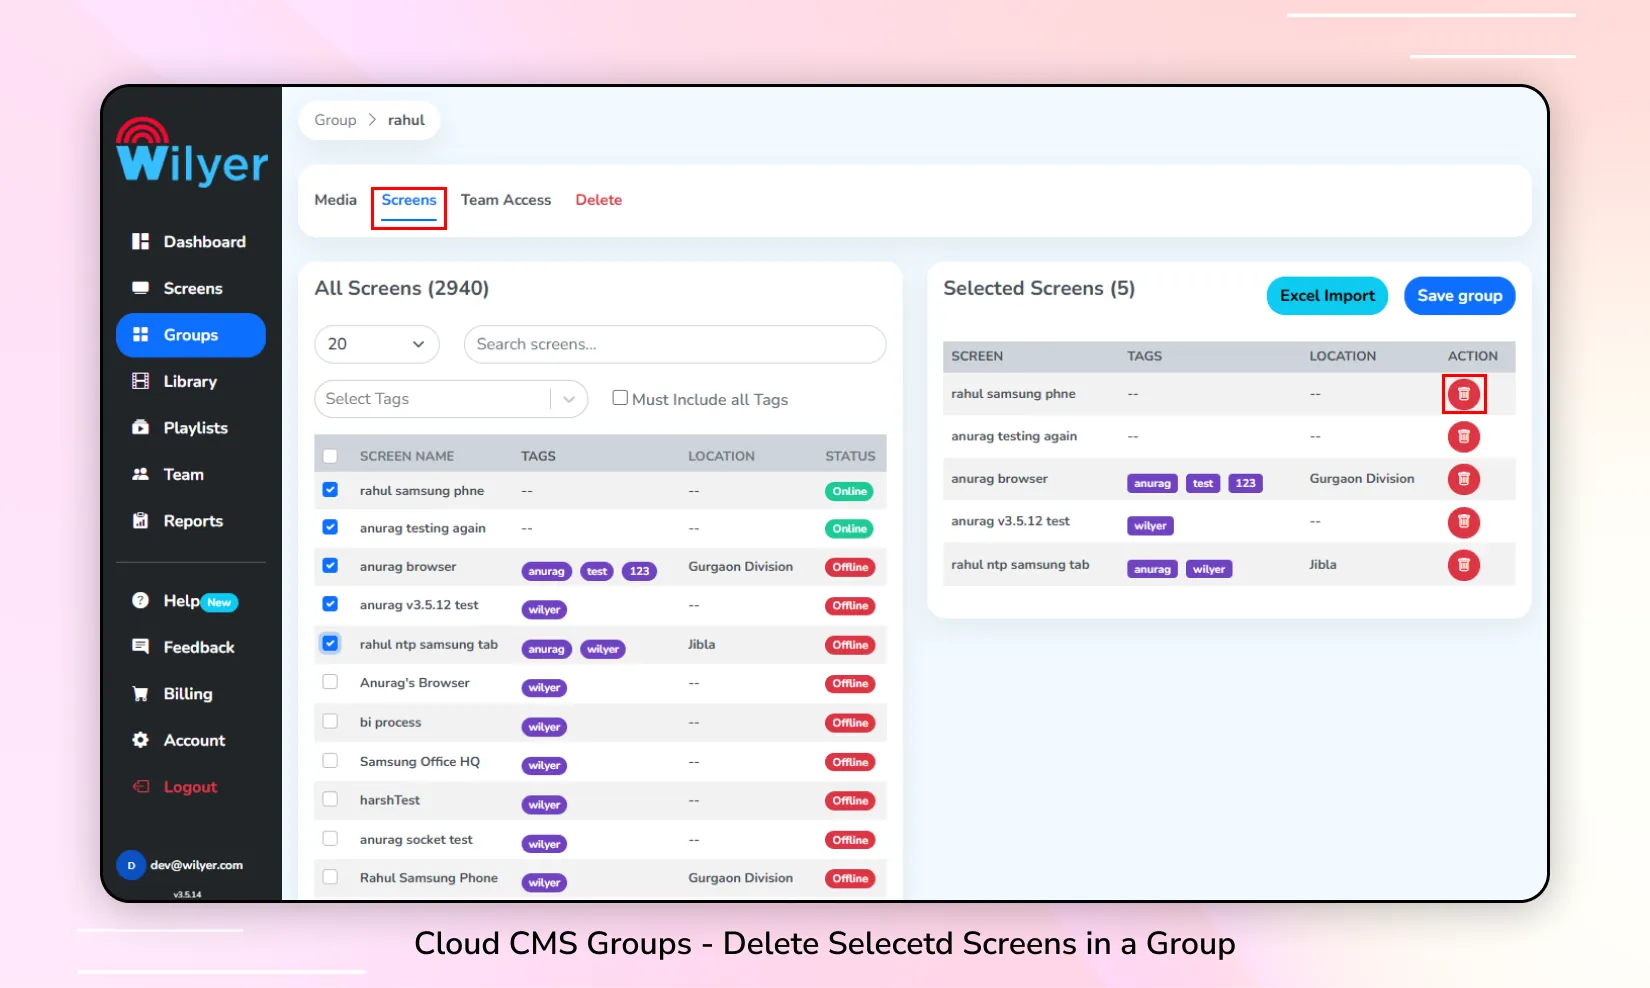
11. Delete an Existing Screen in a Group
Step 1: Click on the Groups tab in the left sidebar.
Step 2: Click on the ⚙️ Settings button for the specific group.
Step 3: Select the Screens option.
Step 4: In the list of Selected Screens, click on the 🗑️ Delete button next to the screen you want to remove.