Screens
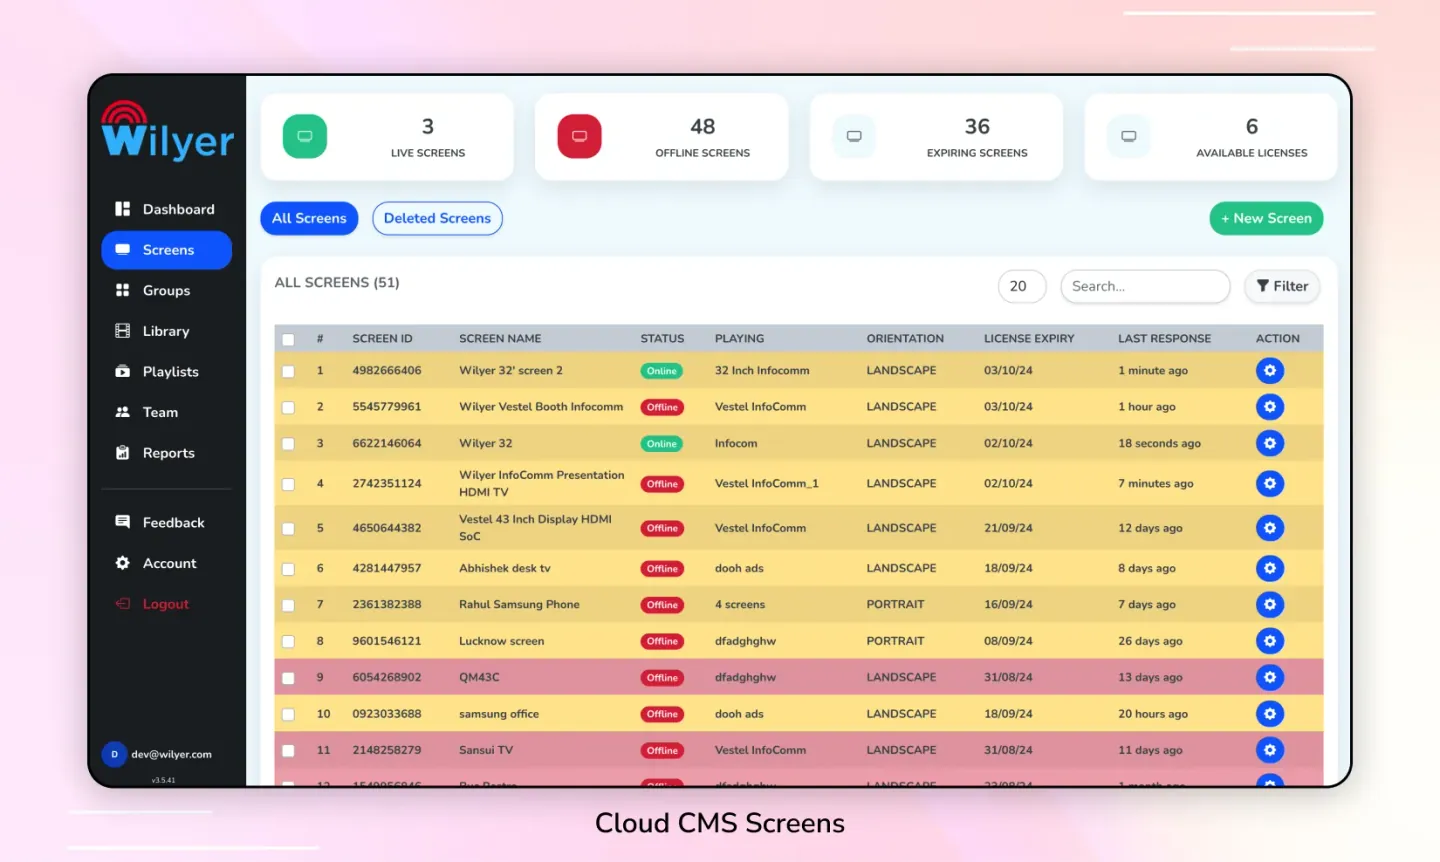
In the cloud, you can manage screens in the following ways:
- View All Screens
- View All Deleted Screens
- Recover a Deleted Screen
- Pair a New Screen
- Check the Online/Offline status of a Screen
- Check Available Licenses
- Search & Apply Filters
- Edit Screen Details
- Assign Media to a Screen
- View Available Schedules
- Update Screen Settings
- Apply an Update to a Screen
- Check Downloaded Files on a Screen
- Check Screen Uptime Reports
- Check Player Information
- Add Custom Fields to a Screen
- Restart a Screen
- Restart the Player App
- Transfer Screen License
- Delete a Screen
Documentation
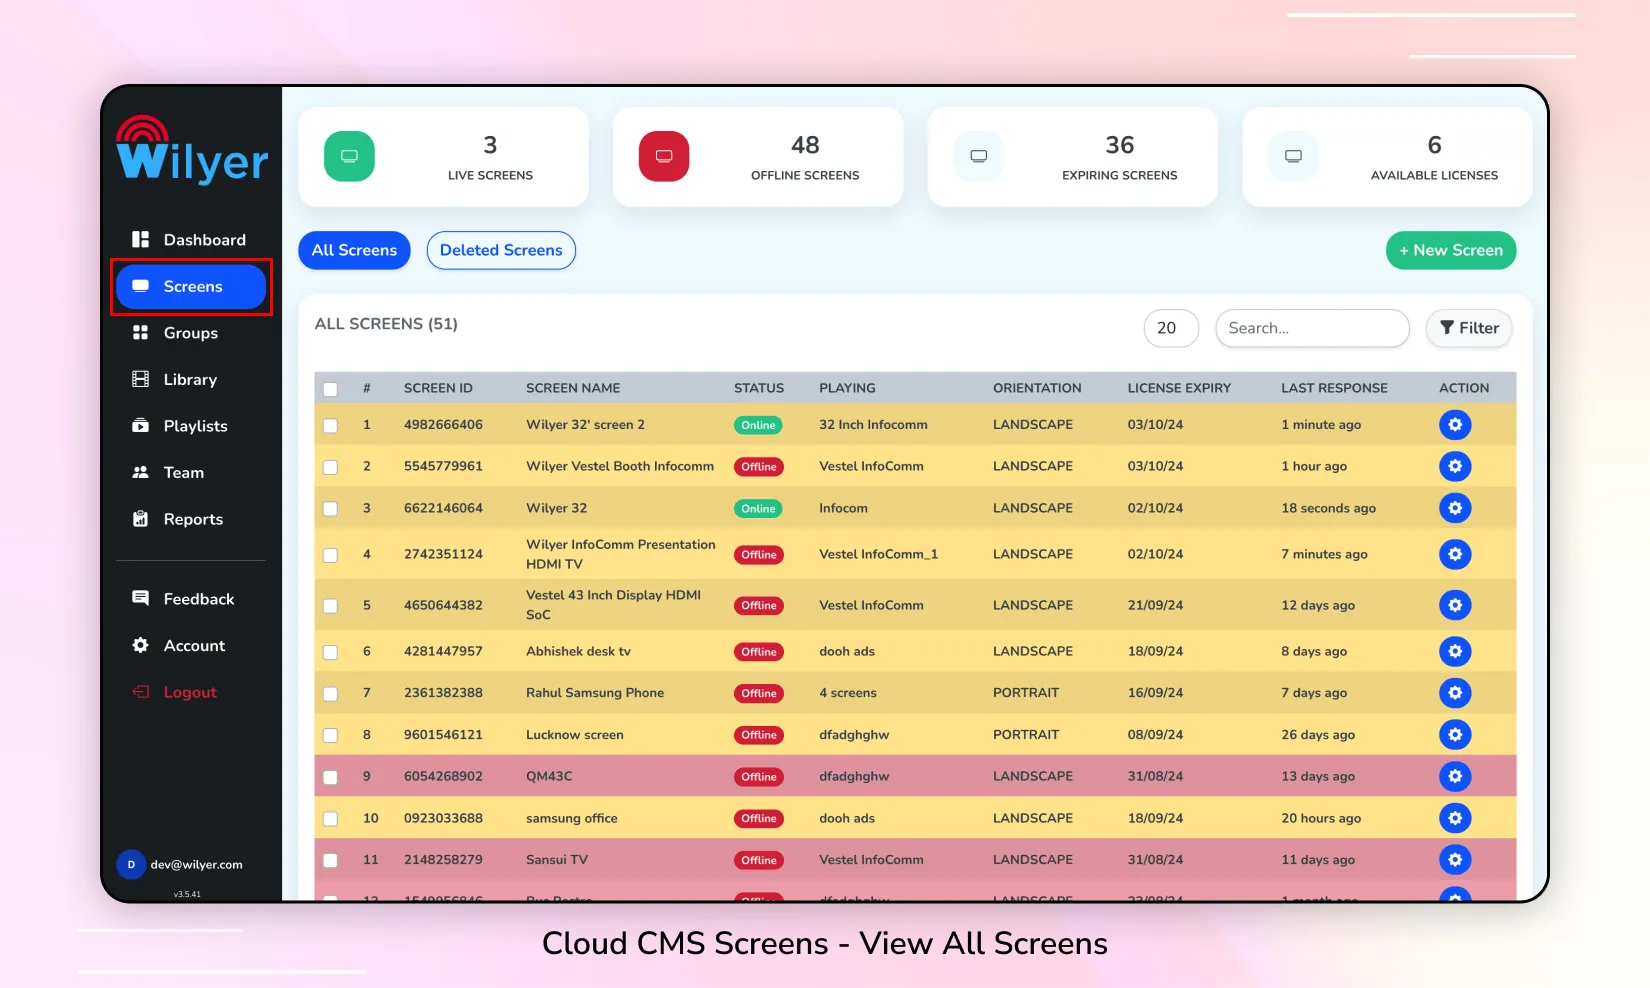
1. View All Screens
Click on the Screens tab in the left sidebar.
2. View All Deleted Screens
Step 1: Click on the Screens tab in the left sidebar.
Step 2: Click on the Deleted Screens tab.
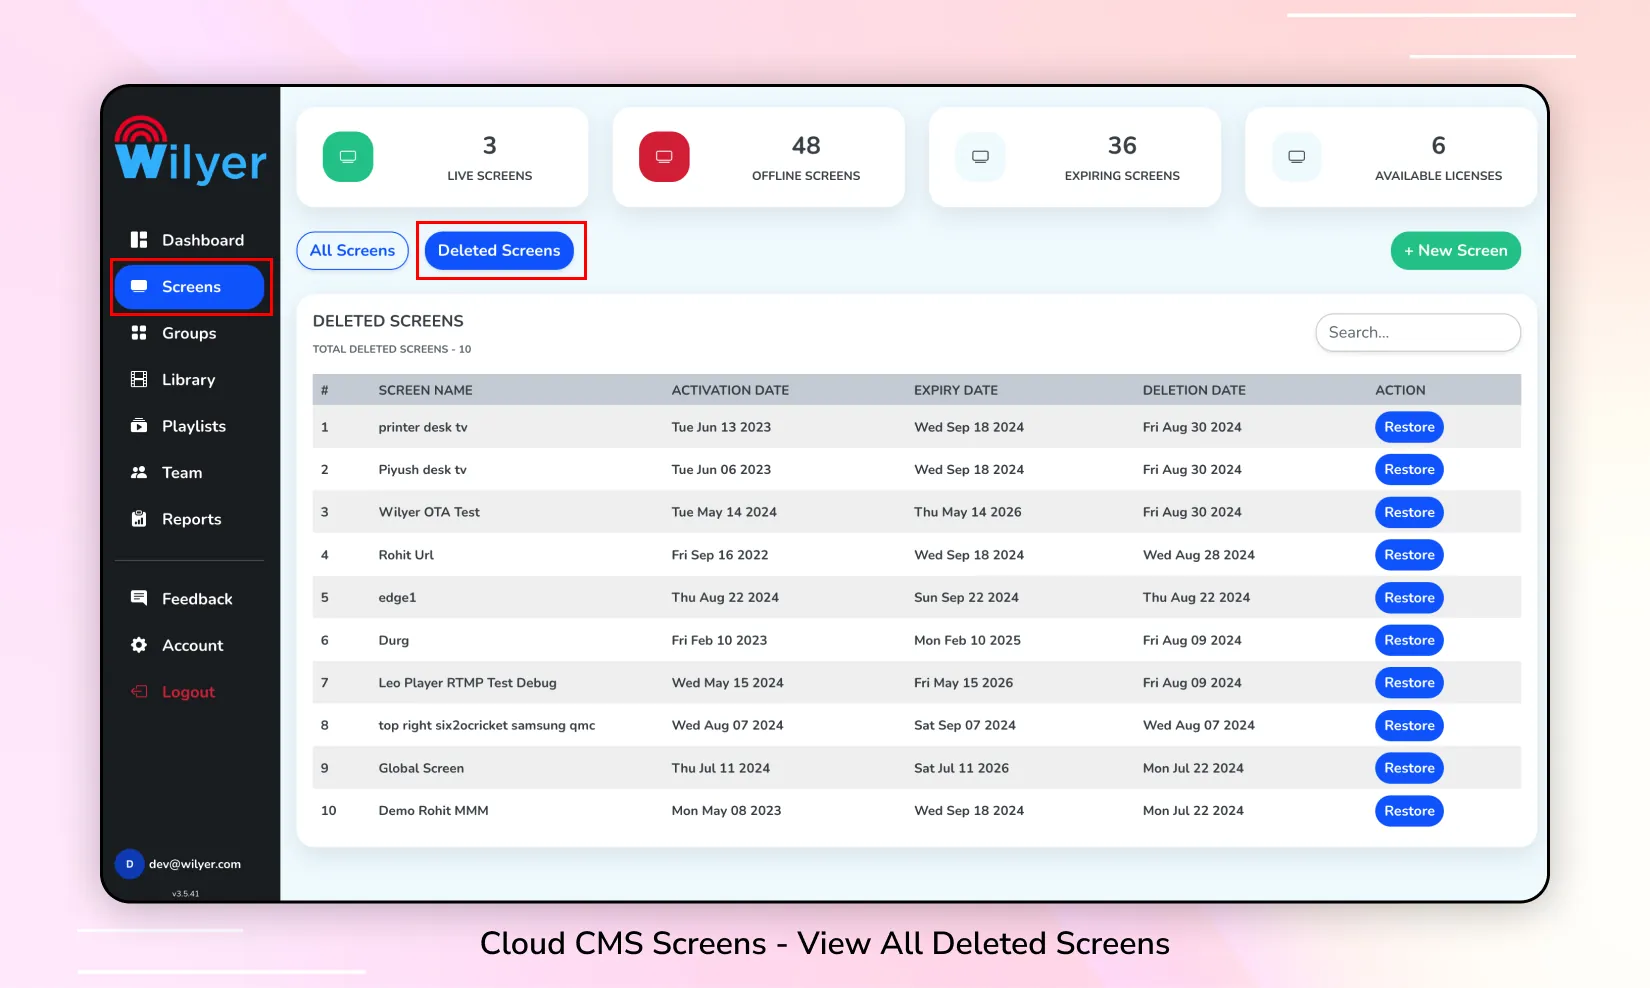
3. Recover a Deleted Screen
Step 1: Click on the Screens tab in the left sidebar.
Step 2: Click on the Deleted Screens tab.
Step 3: Click on the Restore button next to the screen you want to recover.

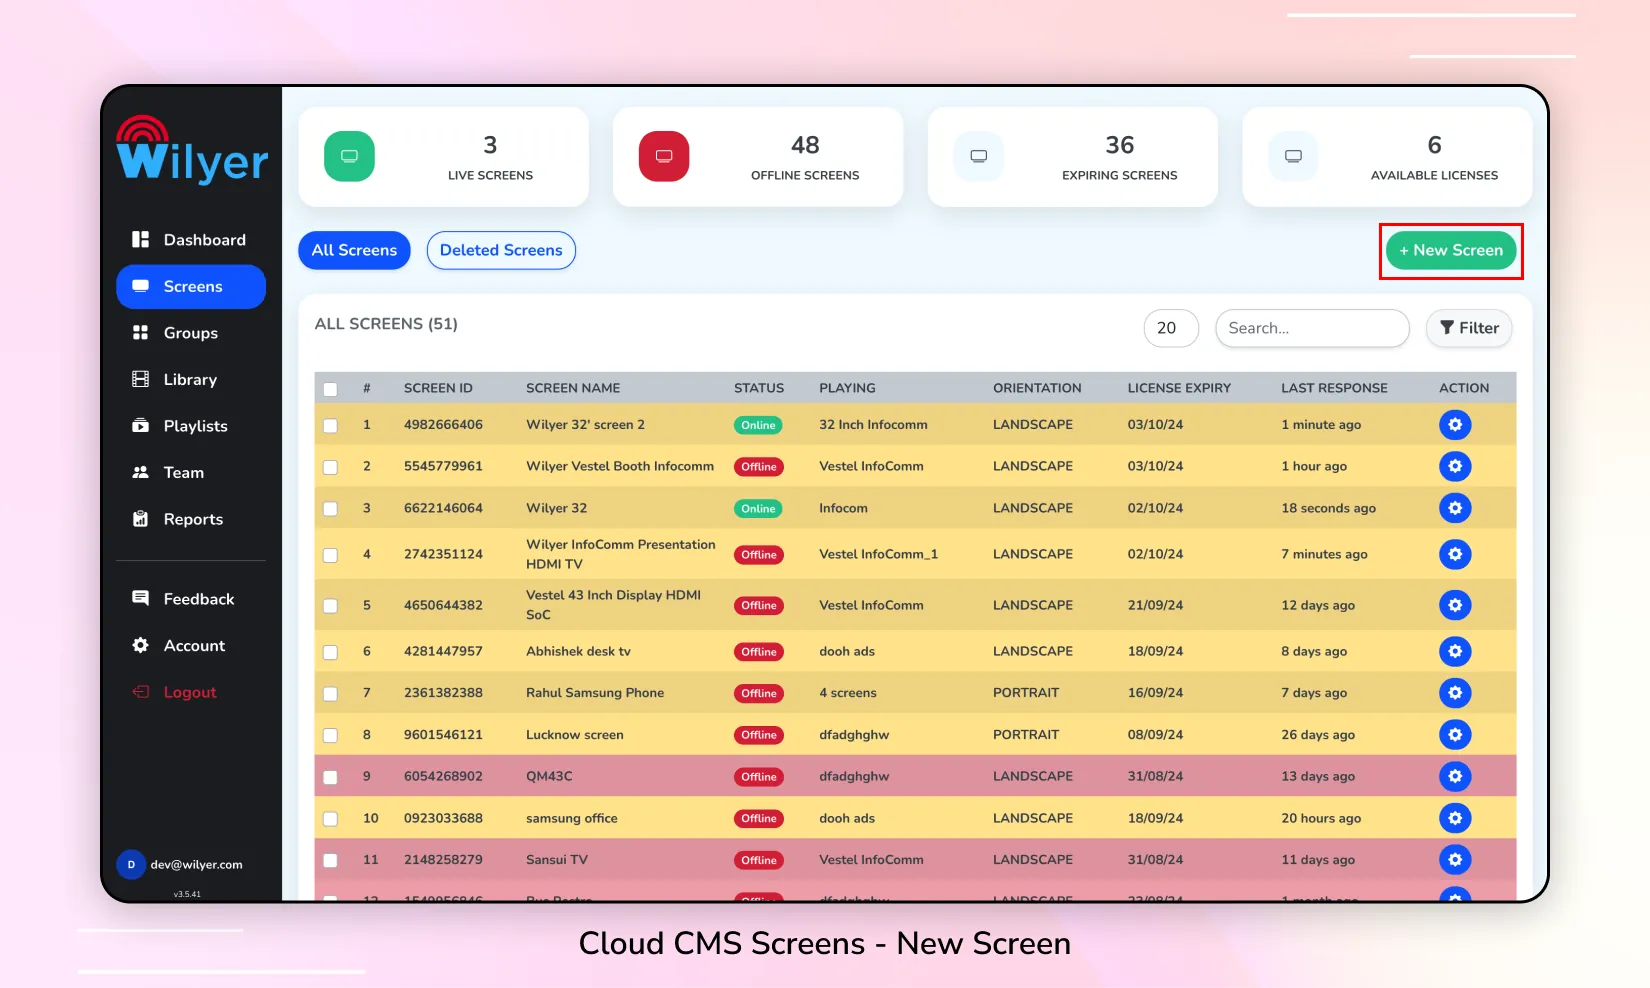
4. Pair a New Screen
Method 1: From the Dashboard :-
Step 1: Go to the Dashboard section of the CMS.
Step 2: Select the + New Screen button at the top.
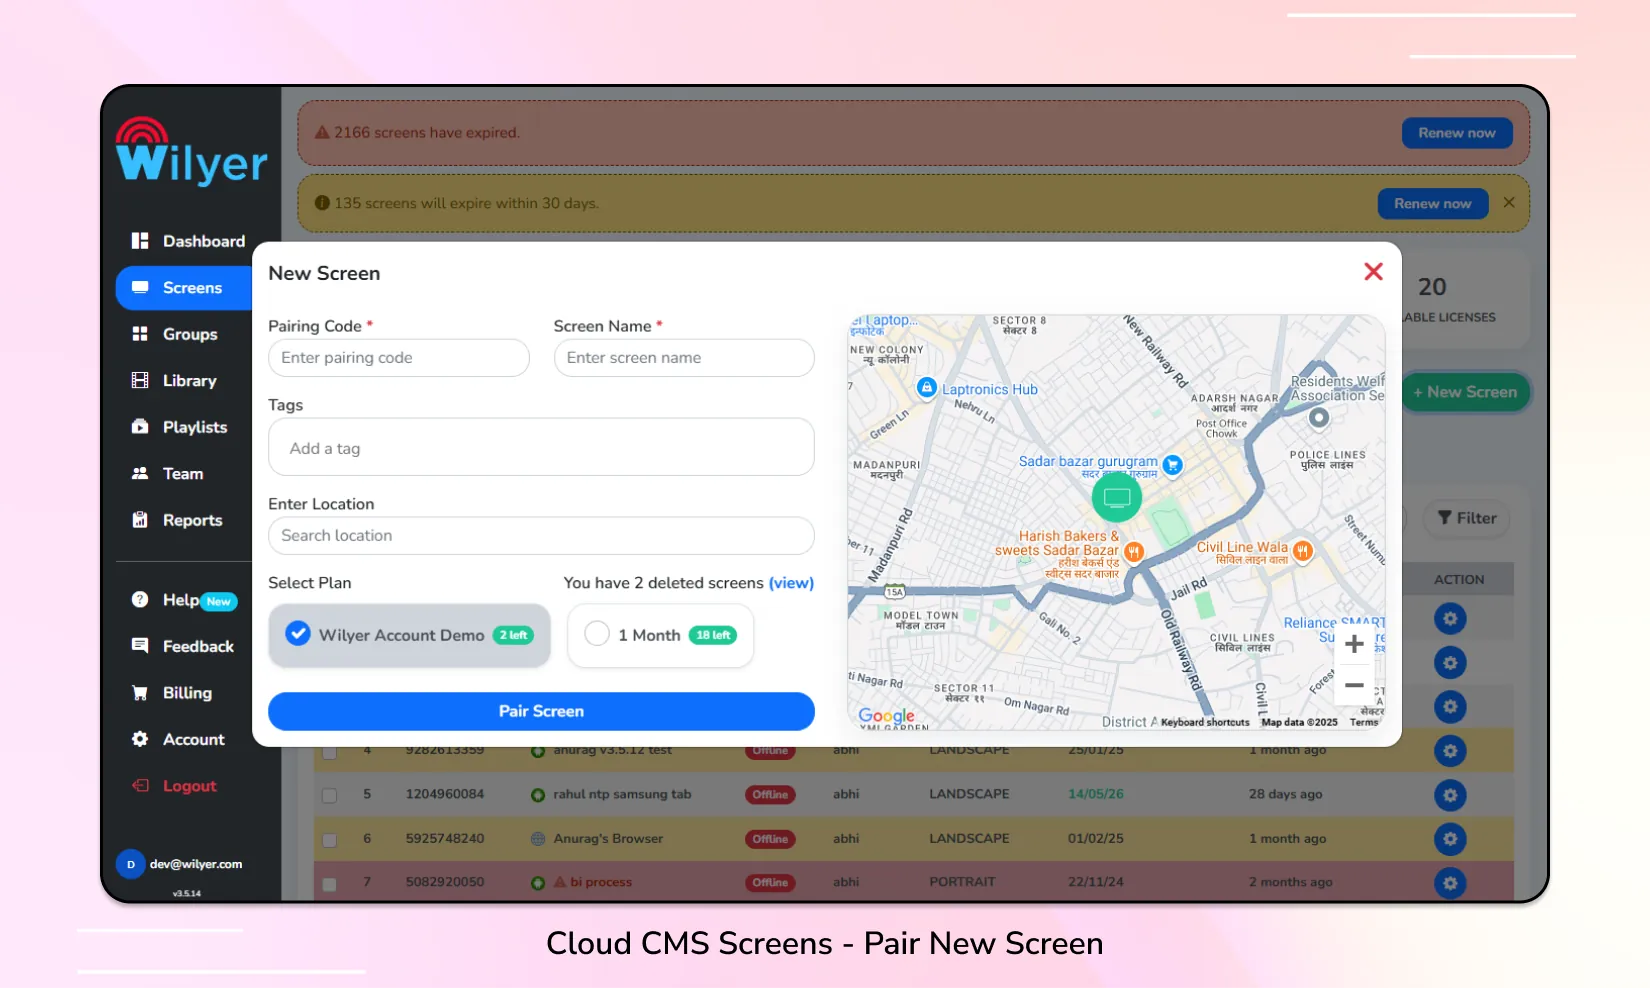
Step 3: Enter the 6-digit pairing code coming on the Display/Screen.
For example, 617890 is the code flashing on the display/screen. Enter the same code in the CMS “Pair New Screen” window.
Step 4: Enter the name of the screen/Display to distinguish between various screens. For example, Lobby Display, Display 1, or Sector 14 screen.
Step 5: Optionally, assign some Tags to the screen and enter the location to map it on the dashboard.
Step 6: Click on Pair Screen.
Method 2: From the Screens Section :-
Step 1: Go to the Screens section on the left side of the CMS.
Step 2: Select the + New Screen button.
Step 3: Enter the 6-digit pairing code coming on the Display/Screen.
For example, 617890 is the code flashing on the display/screen. Enter the same code in the CMS “Pair New Screen” window.
Step 4: Enter the name of the screen/Display to distinguish between various screens. For example, Lobby Display, Display 1, or Sector 14 screen.
Step 5: Optionally, assign some Tags to the screen and enter the location to map it on the dashboard.
Step 6: Click on Pair Screen.
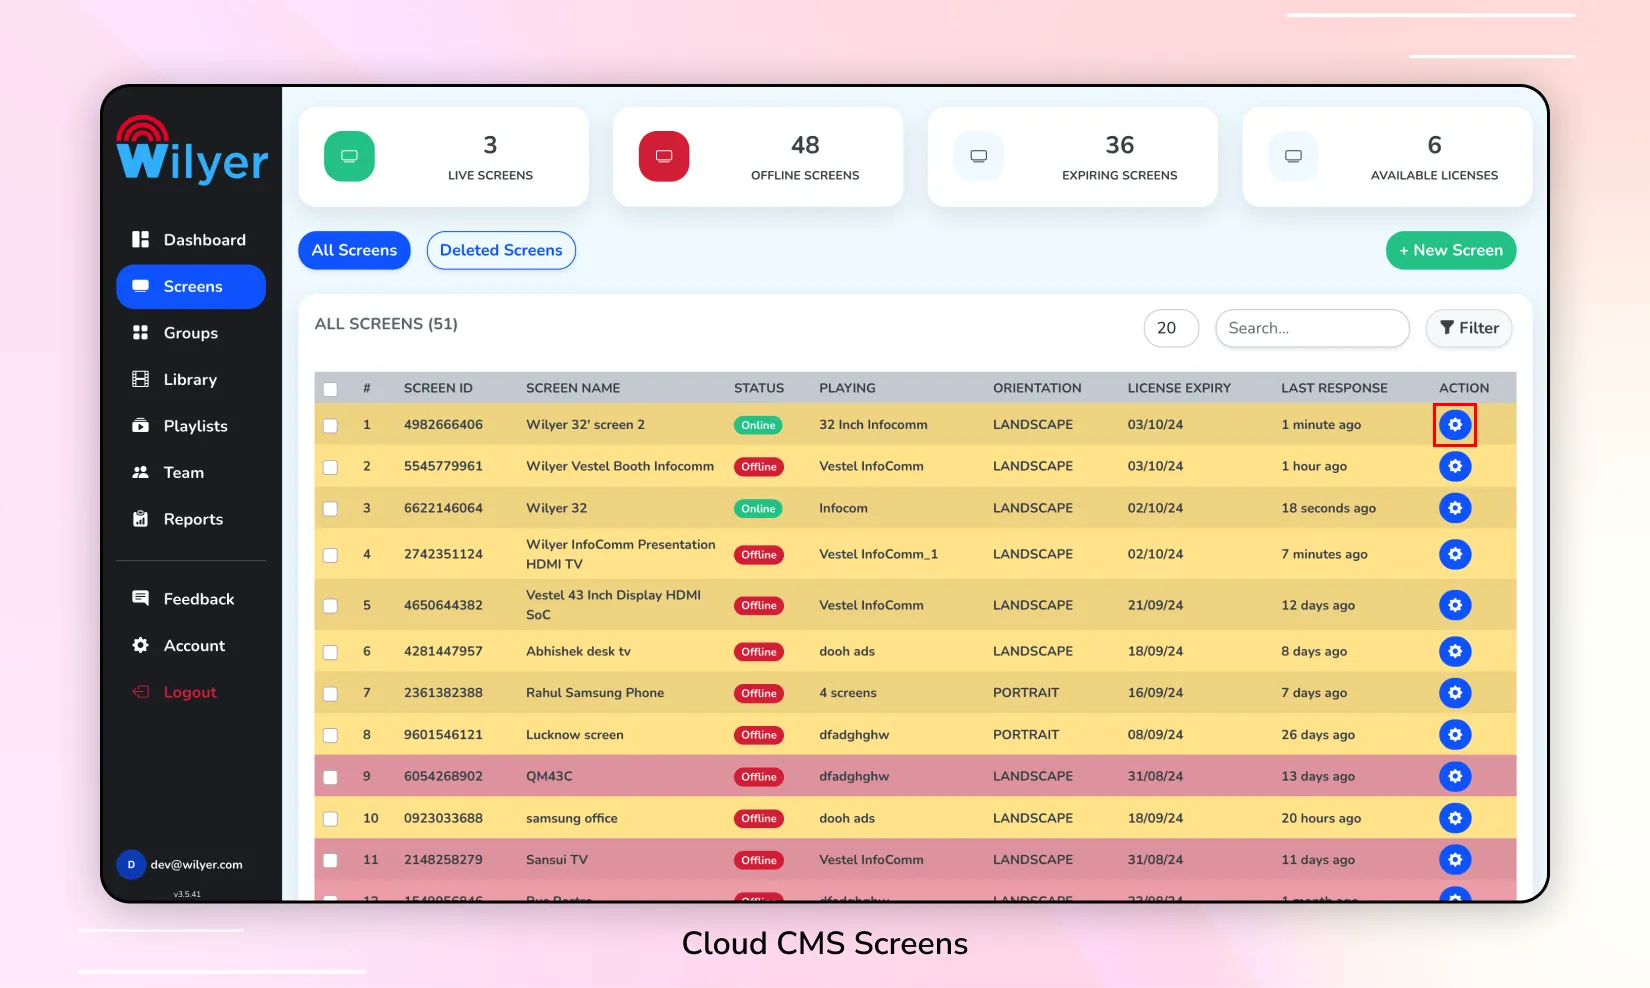
5. Check the Online/Offline Status of a Screen
Step 1: Go to the Screens section on the left side of the CMS.
In the All Screens component, you can view the status of each screen.
Step 2: In the Action column, click on the ⚙️ Settings button for the screen.
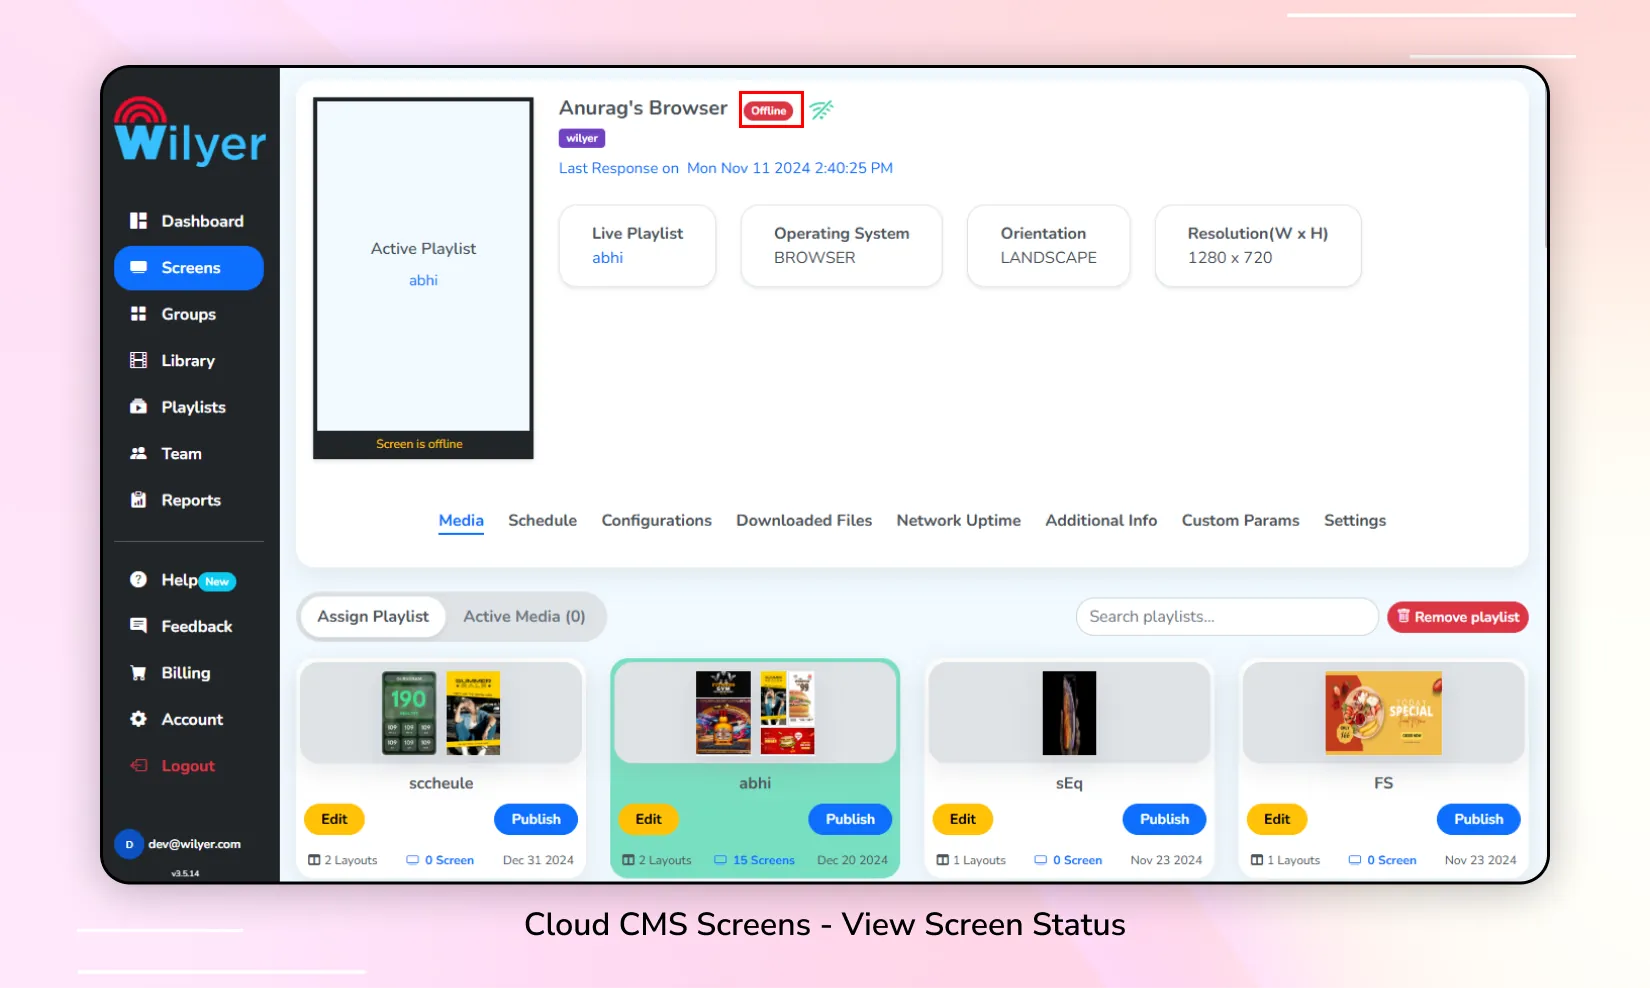
 Step 3: Check the status displayed at the top of the CMS, just to the right of the screen name, to see whether the screen is online or offline.
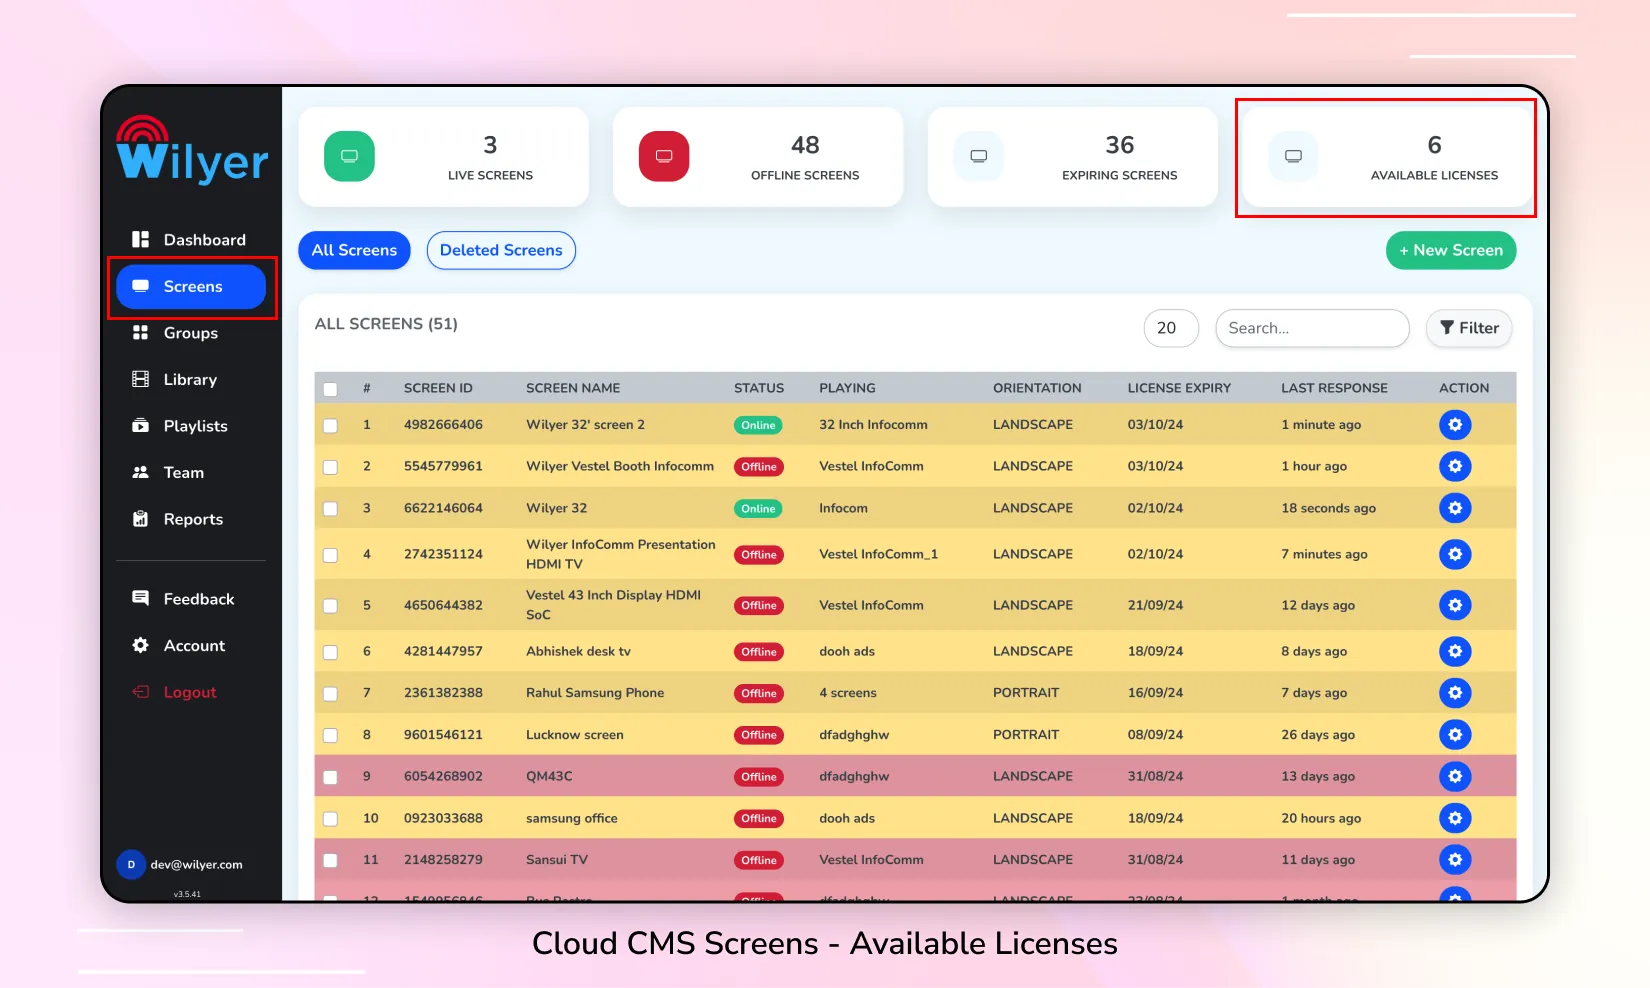
6. Check Available Licenses
Method 1: From the Dashboard :-
Step 1: Go to the Dashboard section of the CMS.
You can view the available licenses in the Available Licenses component.
Method 2: From the Screens Section :-
Step 1: Go to the Screens section on the left side of the CMS.
You can view the available licenses in the Available Licenses component.
7. Search & Apply Filters
Step 1: Click on the Screens tab in the left sidebar.
Step 2: Use the Search input to enter the keywords you want to search for.
Step 3: Click on the Filter button and apply filters based on the desired fields, such as Orientation, Sort By, and Screen Status.

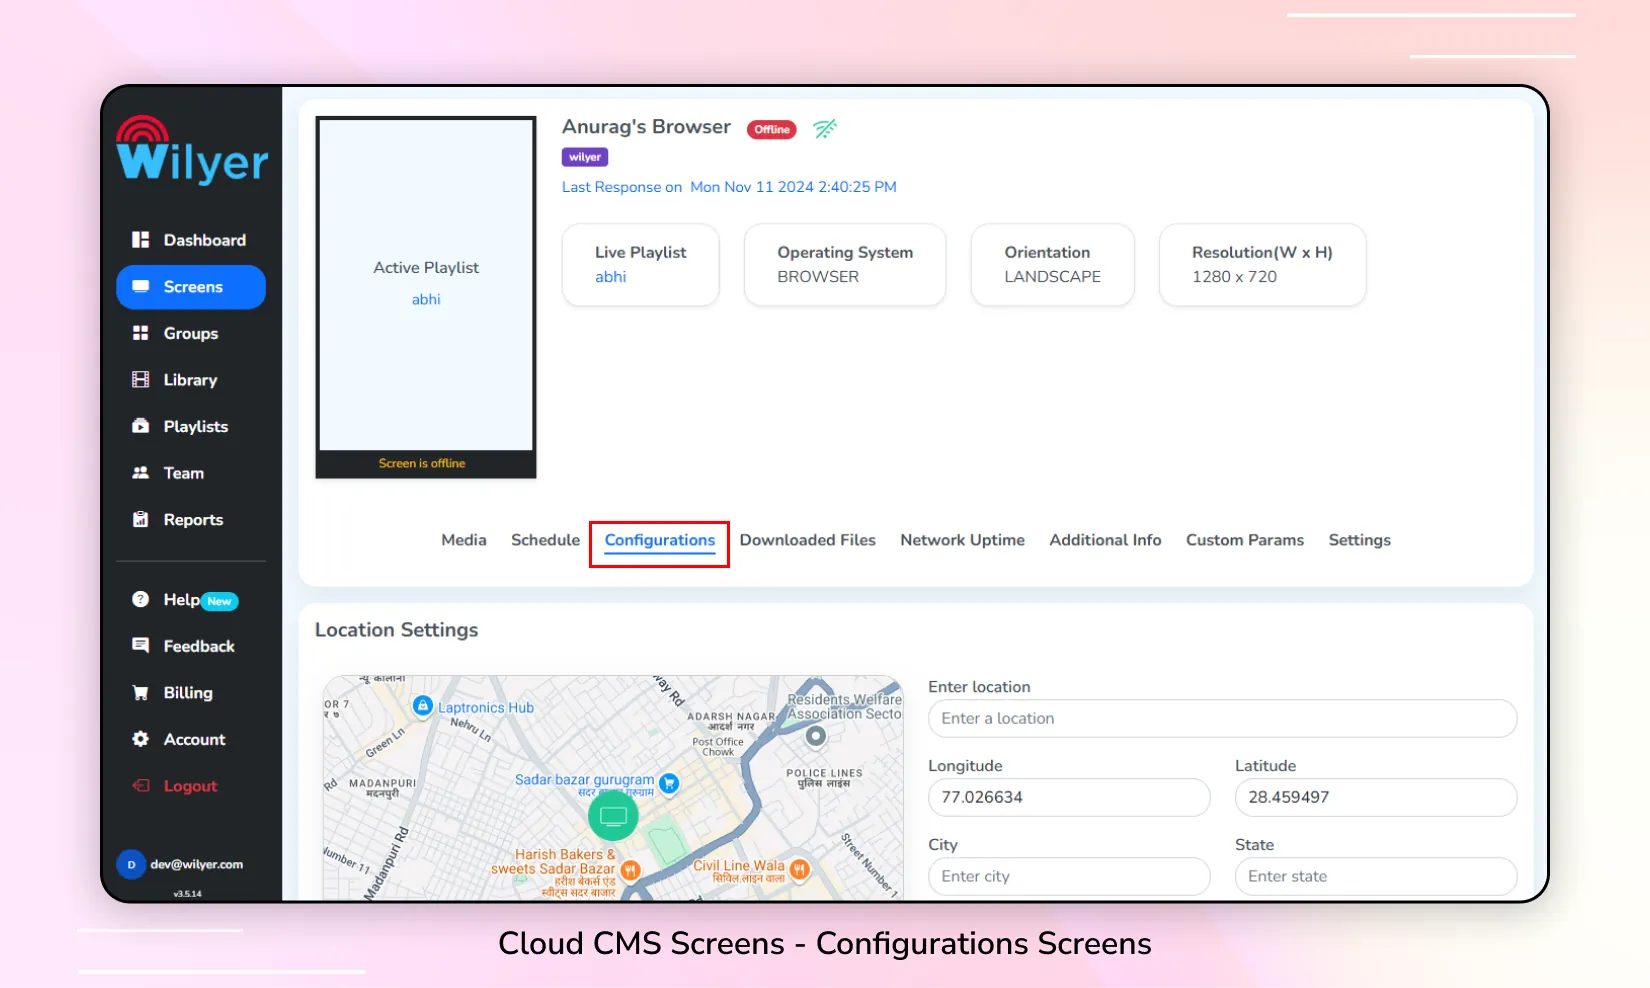
8. Edit Screen Details
Step 1: Go to the Screens section on the left side of the CMS.
Step 2: In the Action column, click on the ⚙️ Settings button for the screen.
Step 3: Select the Configurations option.
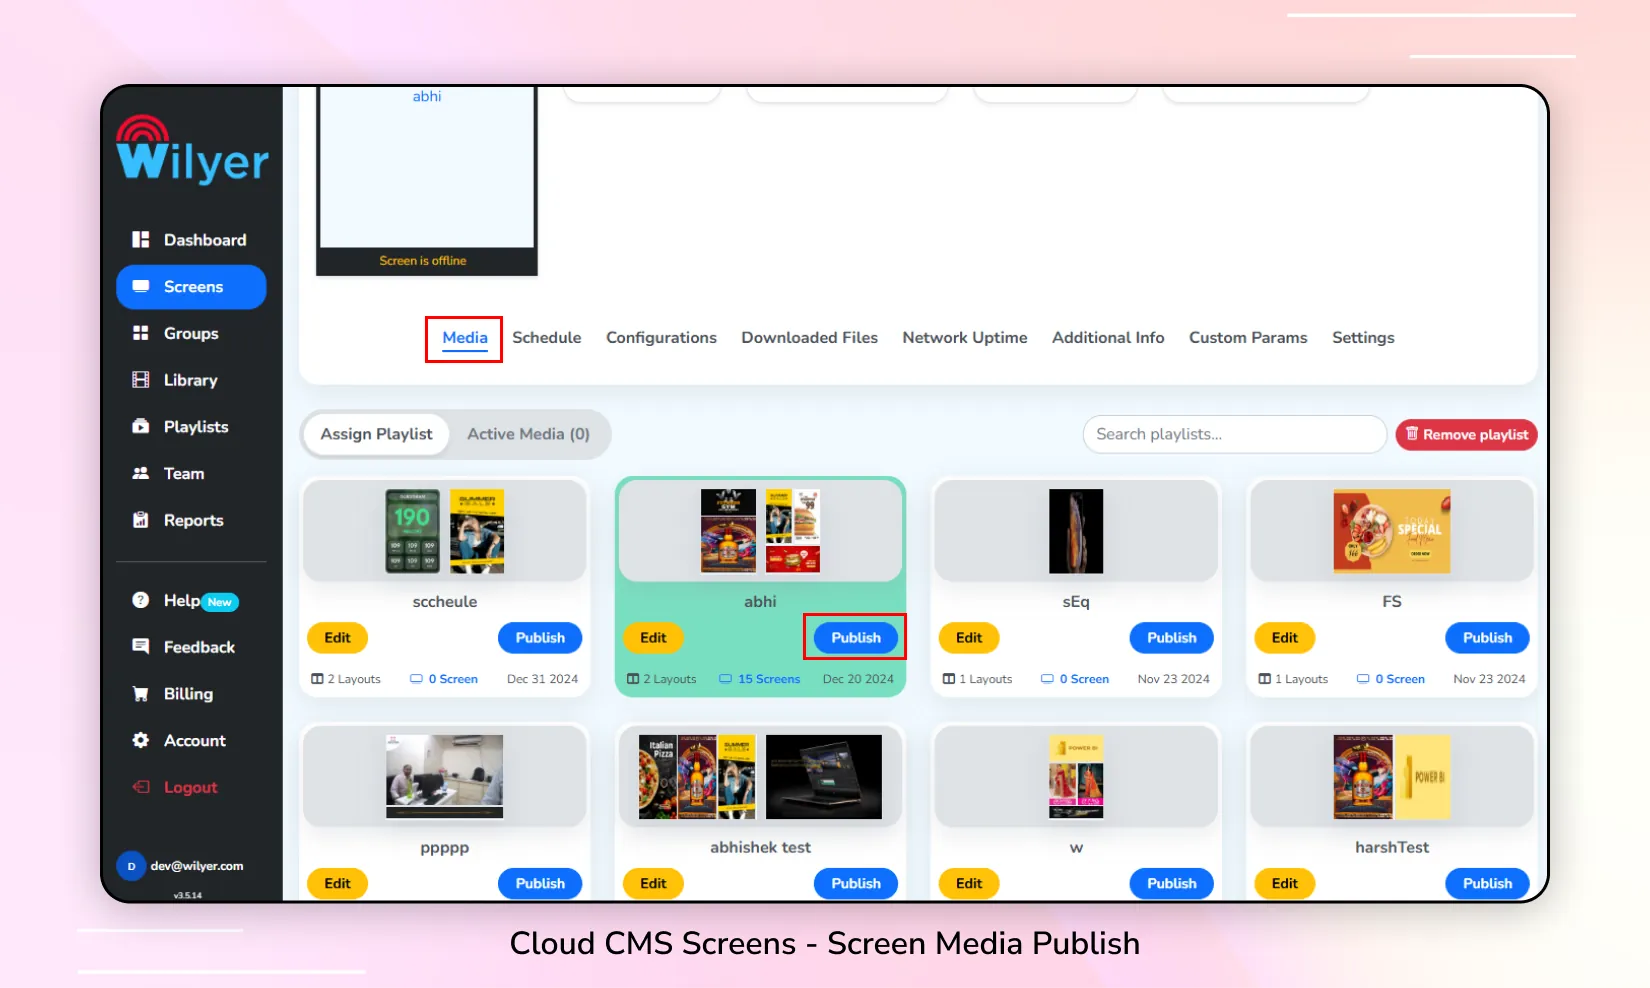
9. Assign Media to a Screen
Step 1: Go to the Screens section on the left side of the CMS.
Step 2: In the Action column, click on the ⚙️ Settings button for the screen.
Step 3: Select the Media option.
Step 4: Click on the Publish button next to any file you want to assign to the screen.
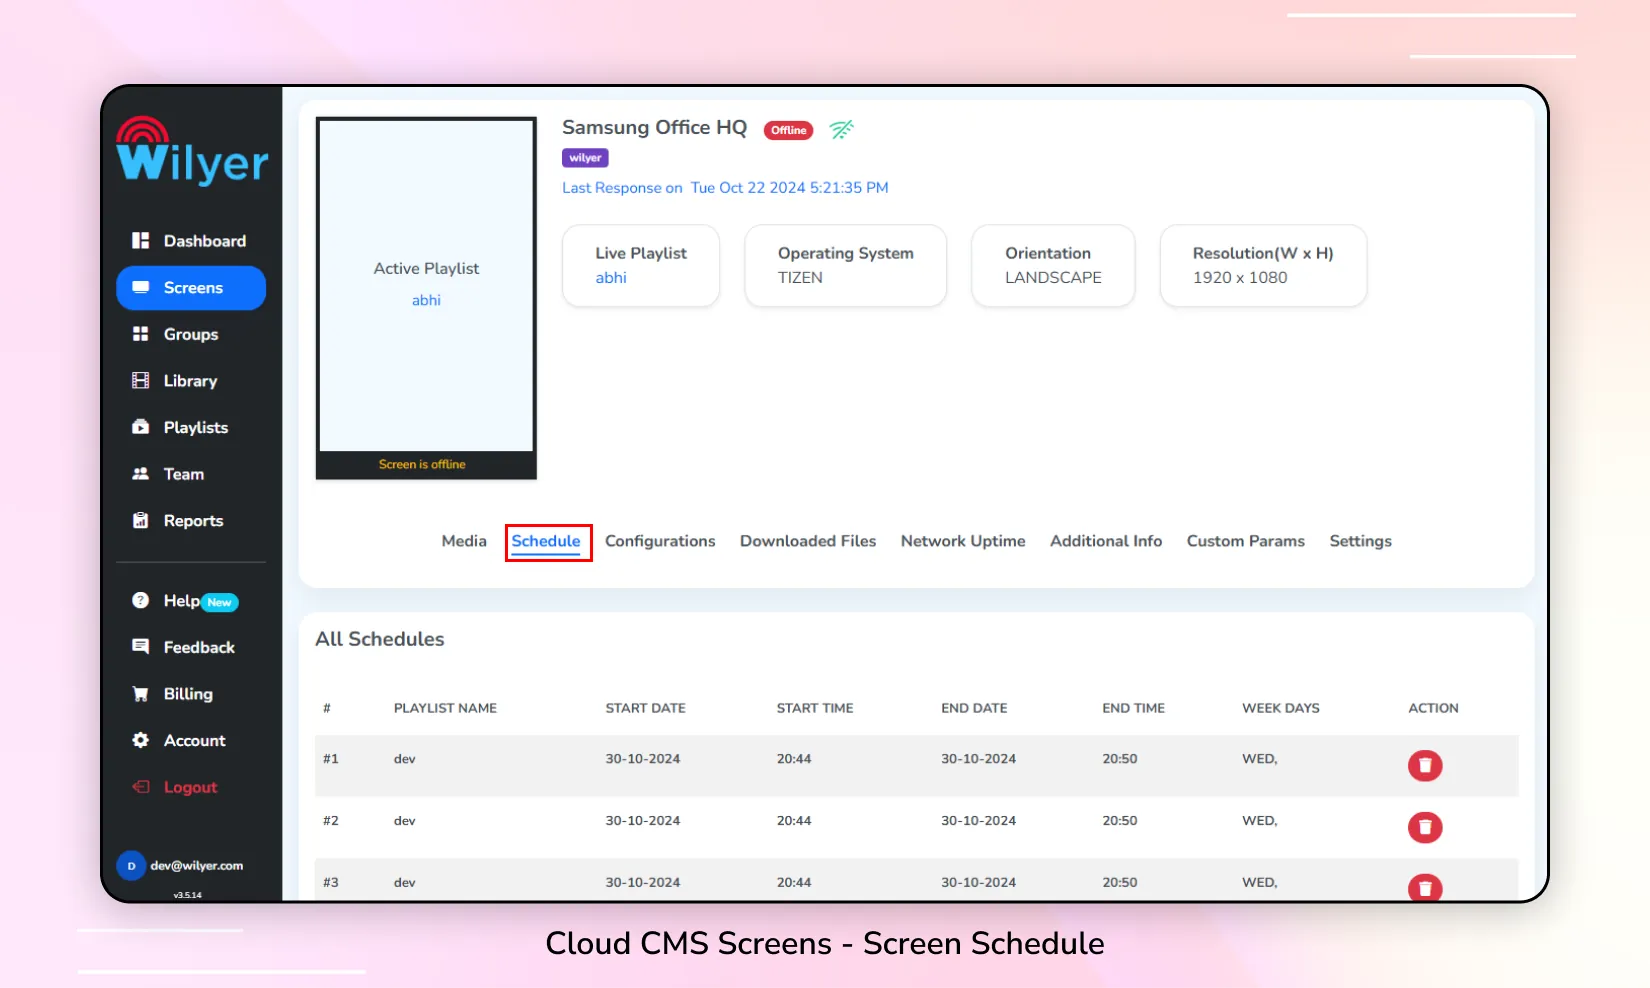
10. View Available Schedules
Step 1: Go to the Screens section on the left side of the CMS.
Step 2: In the Action column, click on the ⚙️ Settings button for the screen.
Step 3: Select the Schedules option to view the details.
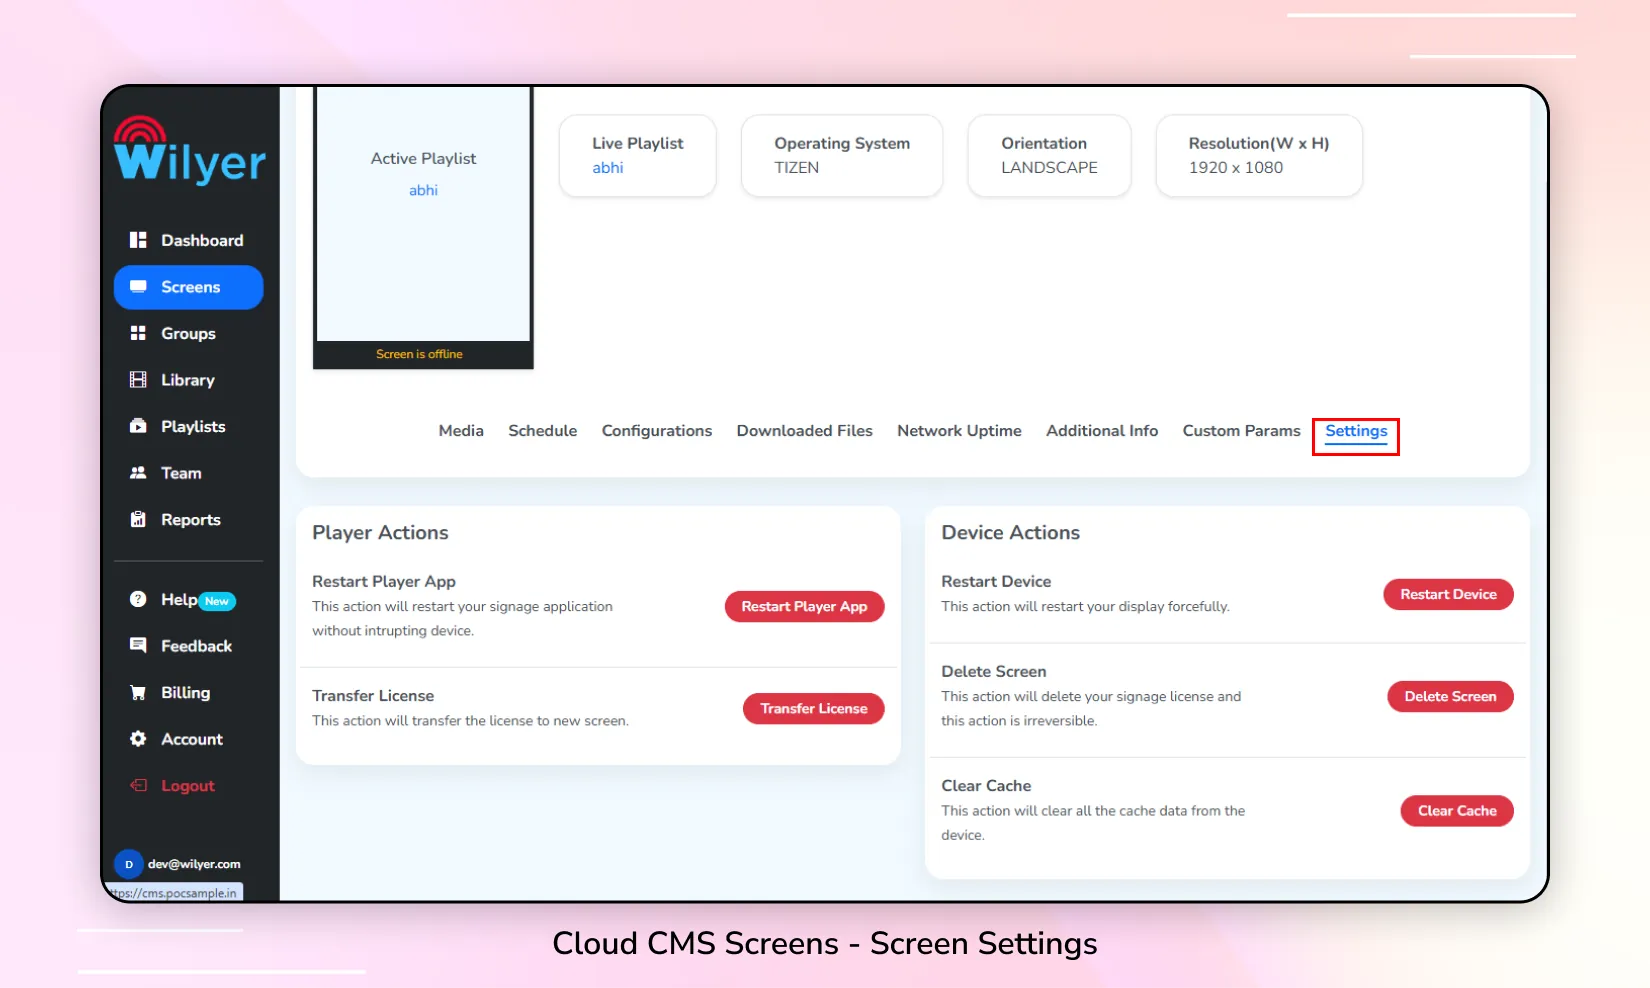
11. Update Screen Settings
Step 1: Go to the Screens section on the left side of the CMS.
Step 2: In the Action column, click on the ⚙️ Settings button for the screen.
Step 3: Select the Settings option.
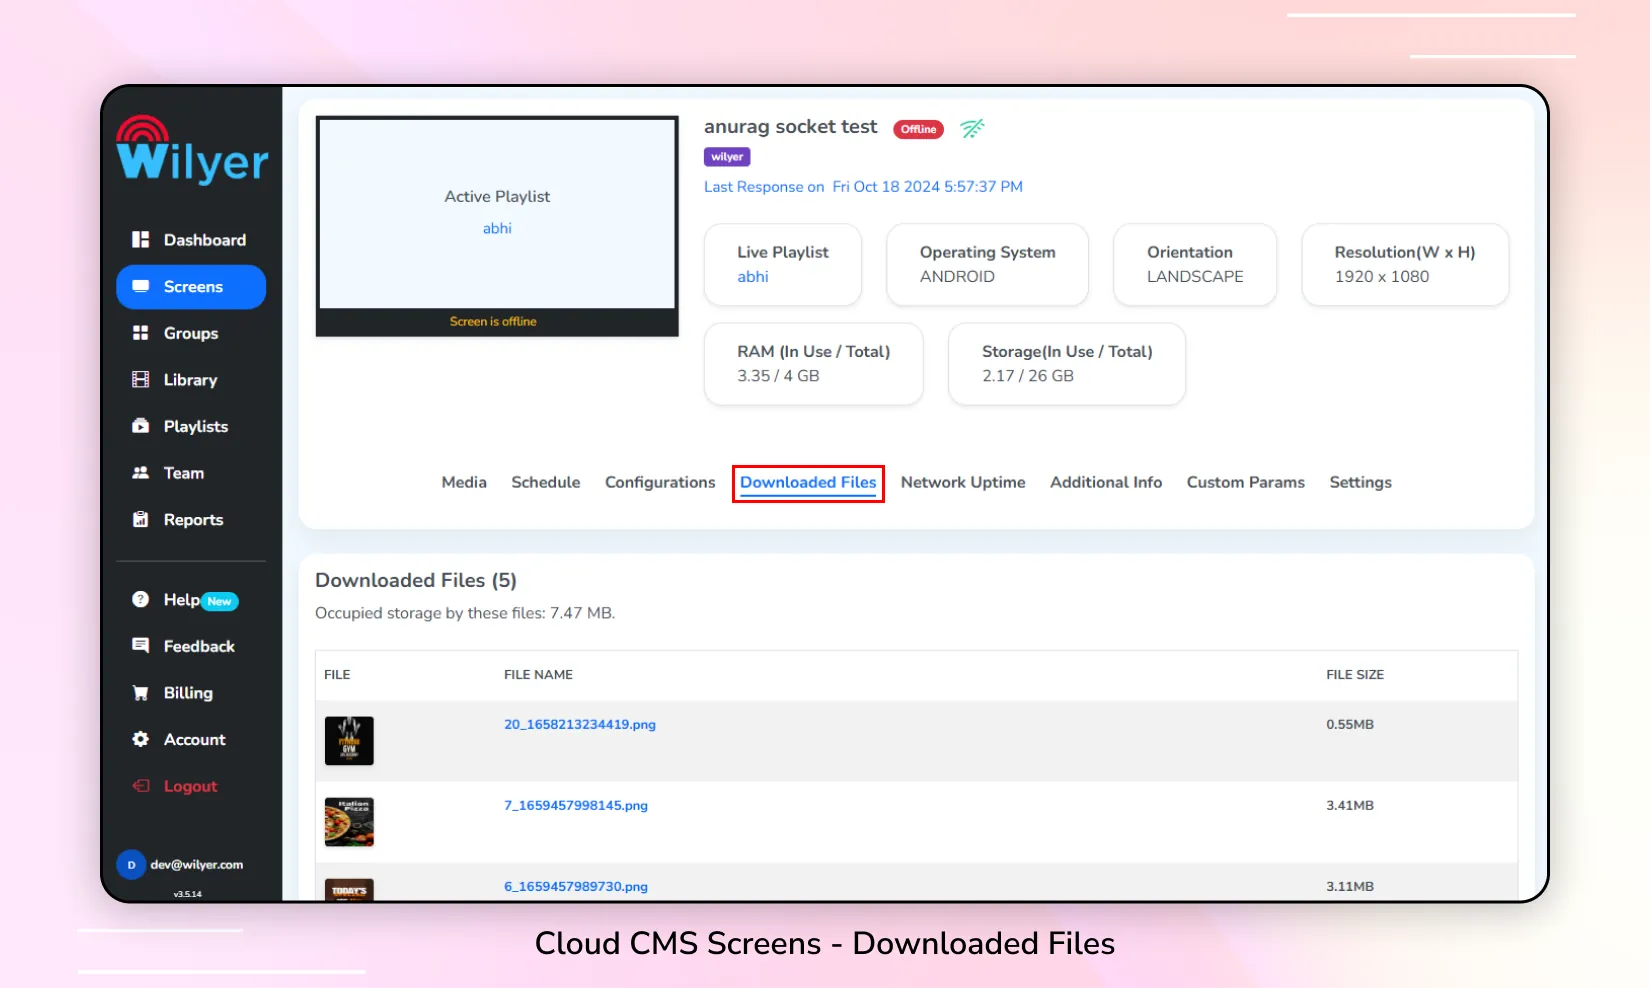
13. Check Downloaded Files on a Screen
Step 1: Go to the Screens section on the left side of the CMS.
Step 2: In the Action column, click on the ⚙️ Settings button of the screen.
Step 3: Select the Files option to view the desired information.
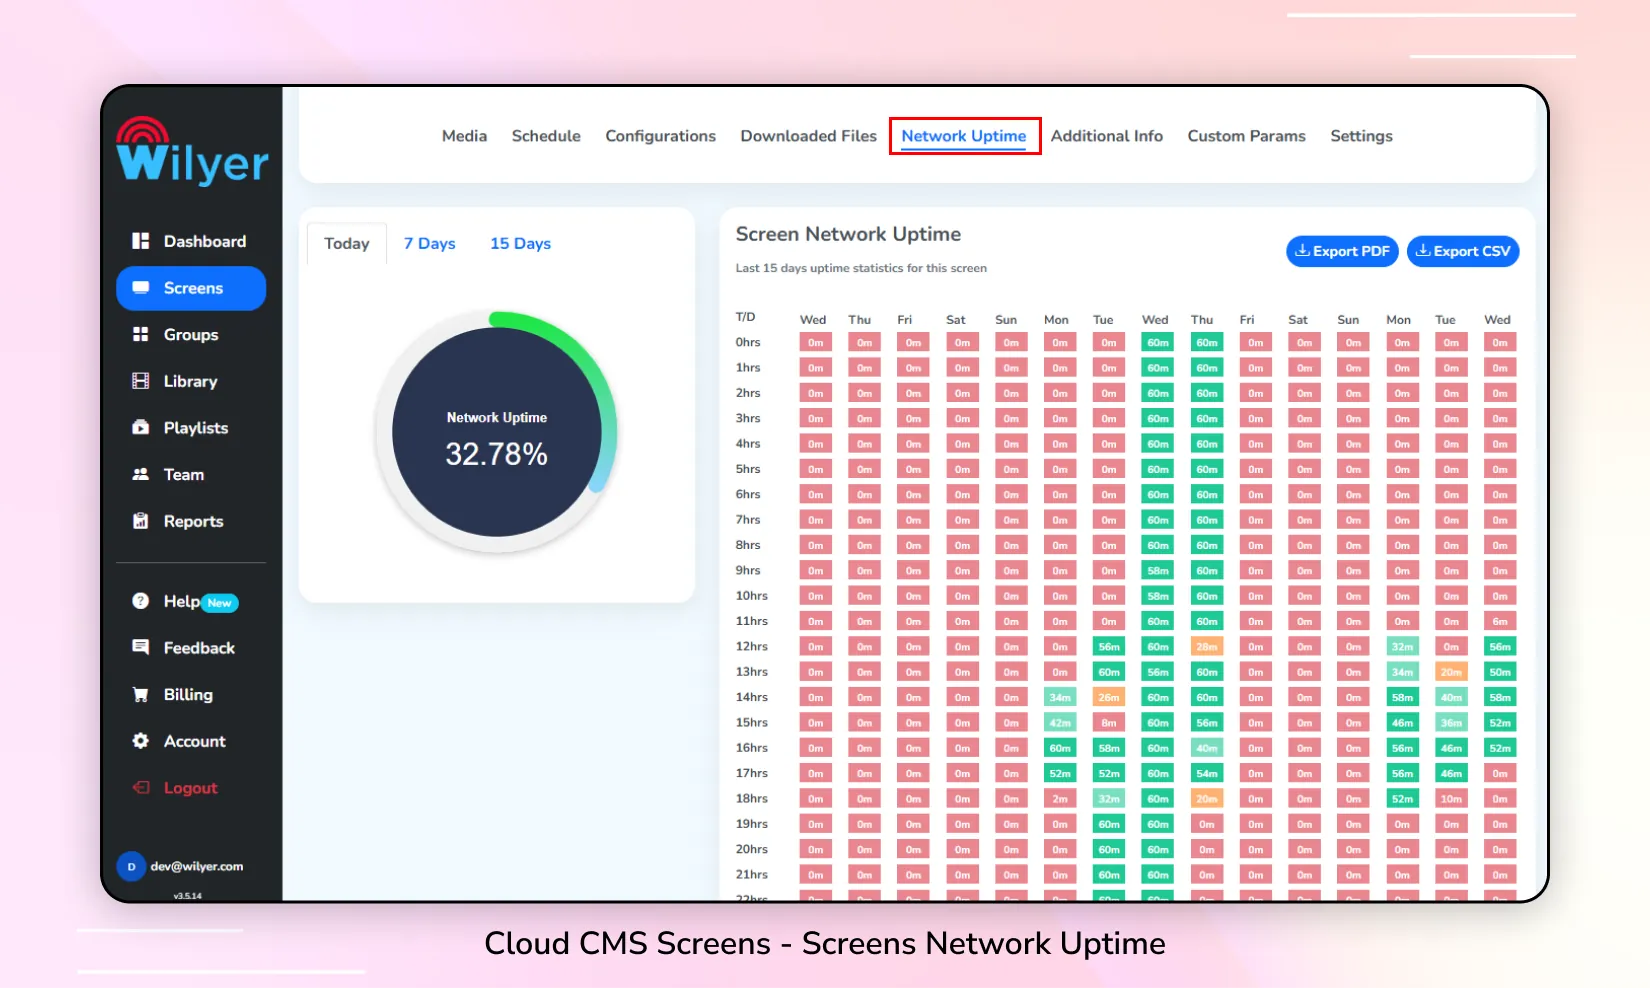
14. Check Screen Uptime Reports
Step 1: Go to the Screens section on the left side of the CMS.
Step 2: In the Action column, click on the ⚙️ Settings button for the screen.
Step 3: Select the Network Uptime option to view the desired information.
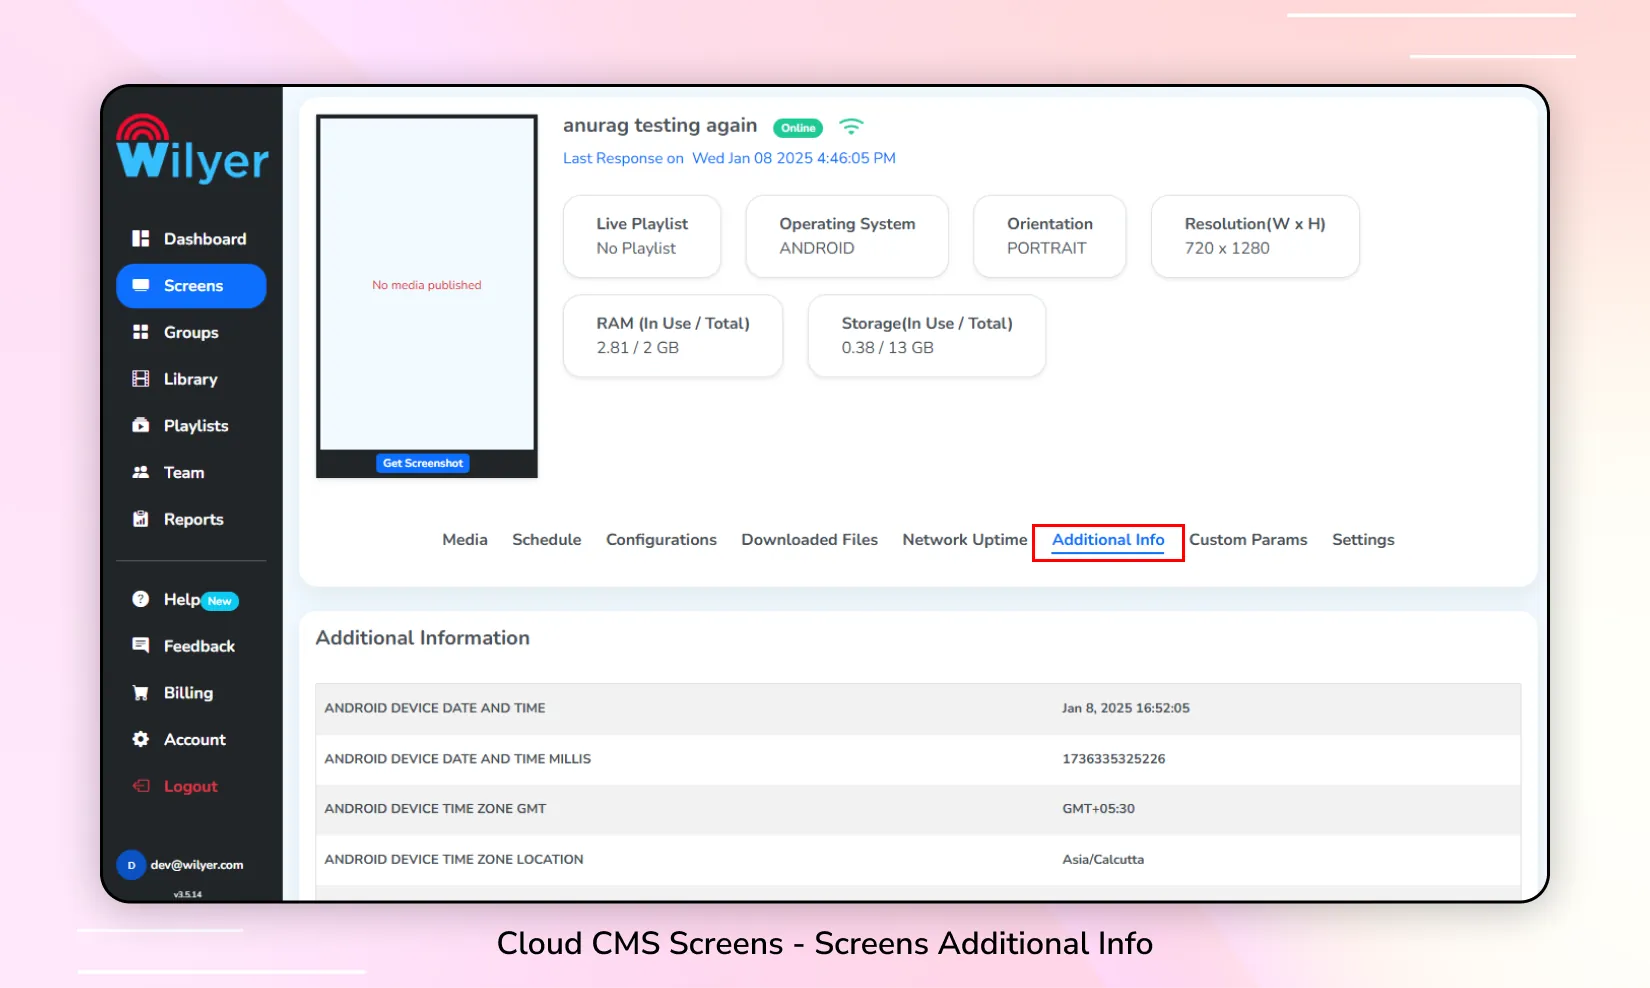
15. Check Player Information
Step 1: Go to the Screens section on the left side of the CMS.
Step 2: In the Action column, click on the ⚙️ Settings button for the screen.
Step 3: Select the Additional Info option to view the player information.
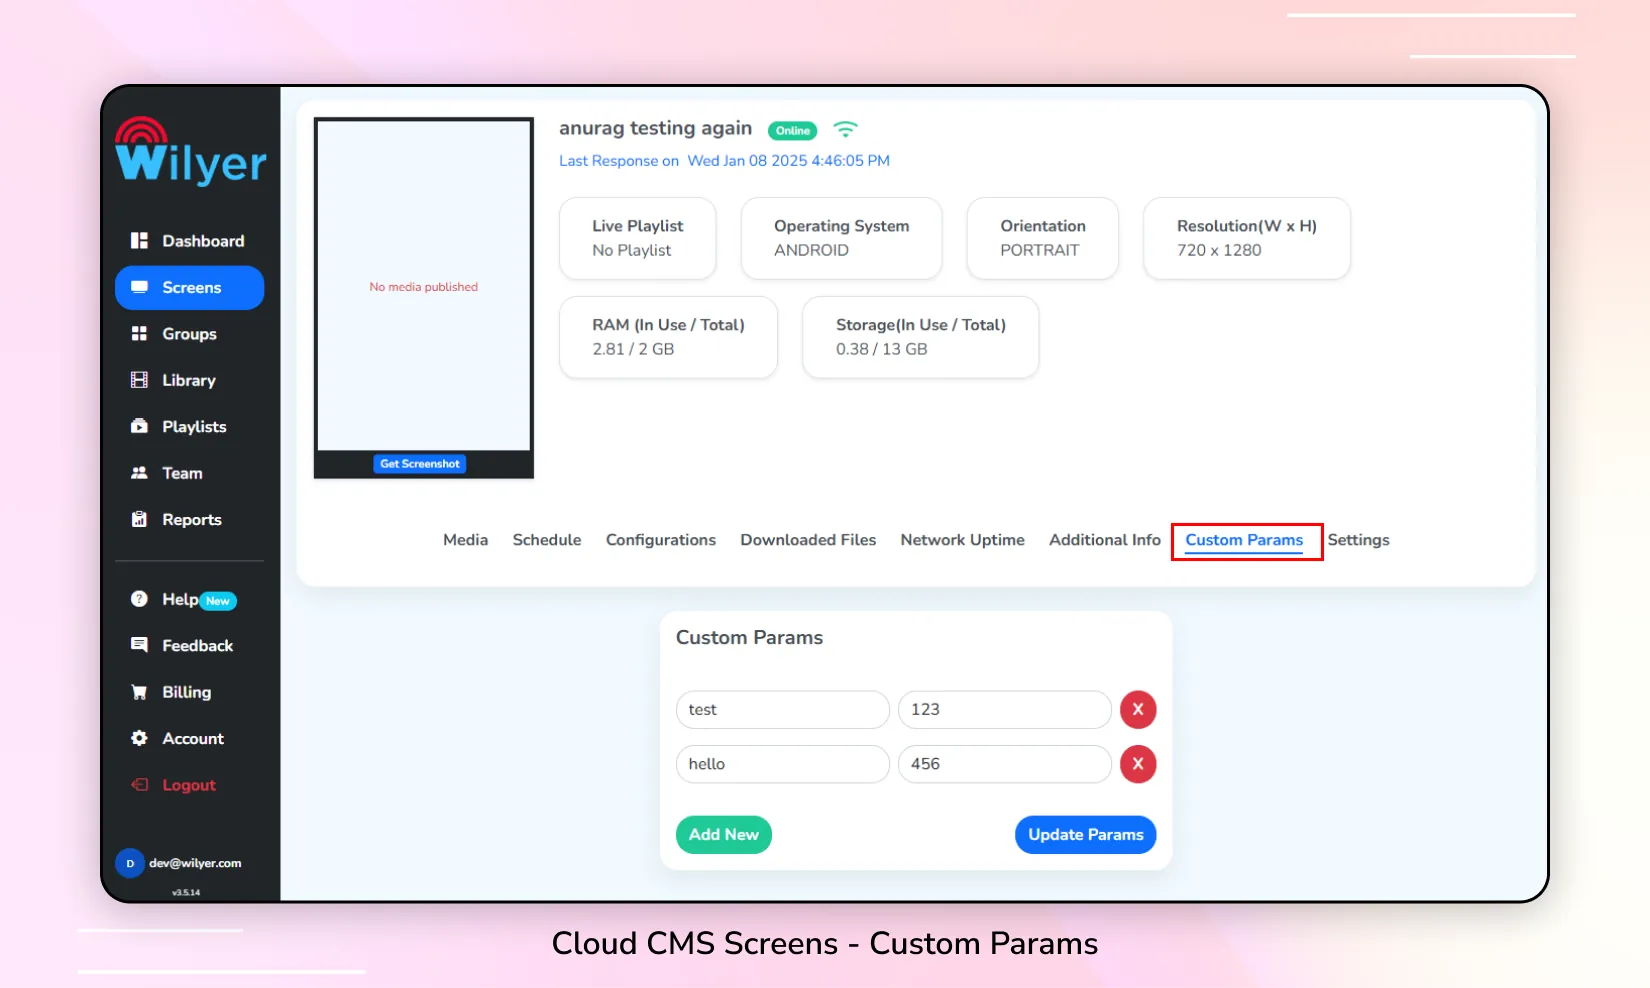
16. Add Custom Fields to a Screen
Step 1: Go to the Screens section on the left side of the CMS.
Step 2: In the Action column, click on the ⚙️ Settings button for the screen.
Step 3: Select the Custom Params option.
Step 4: Click on Add New to add a custom field.
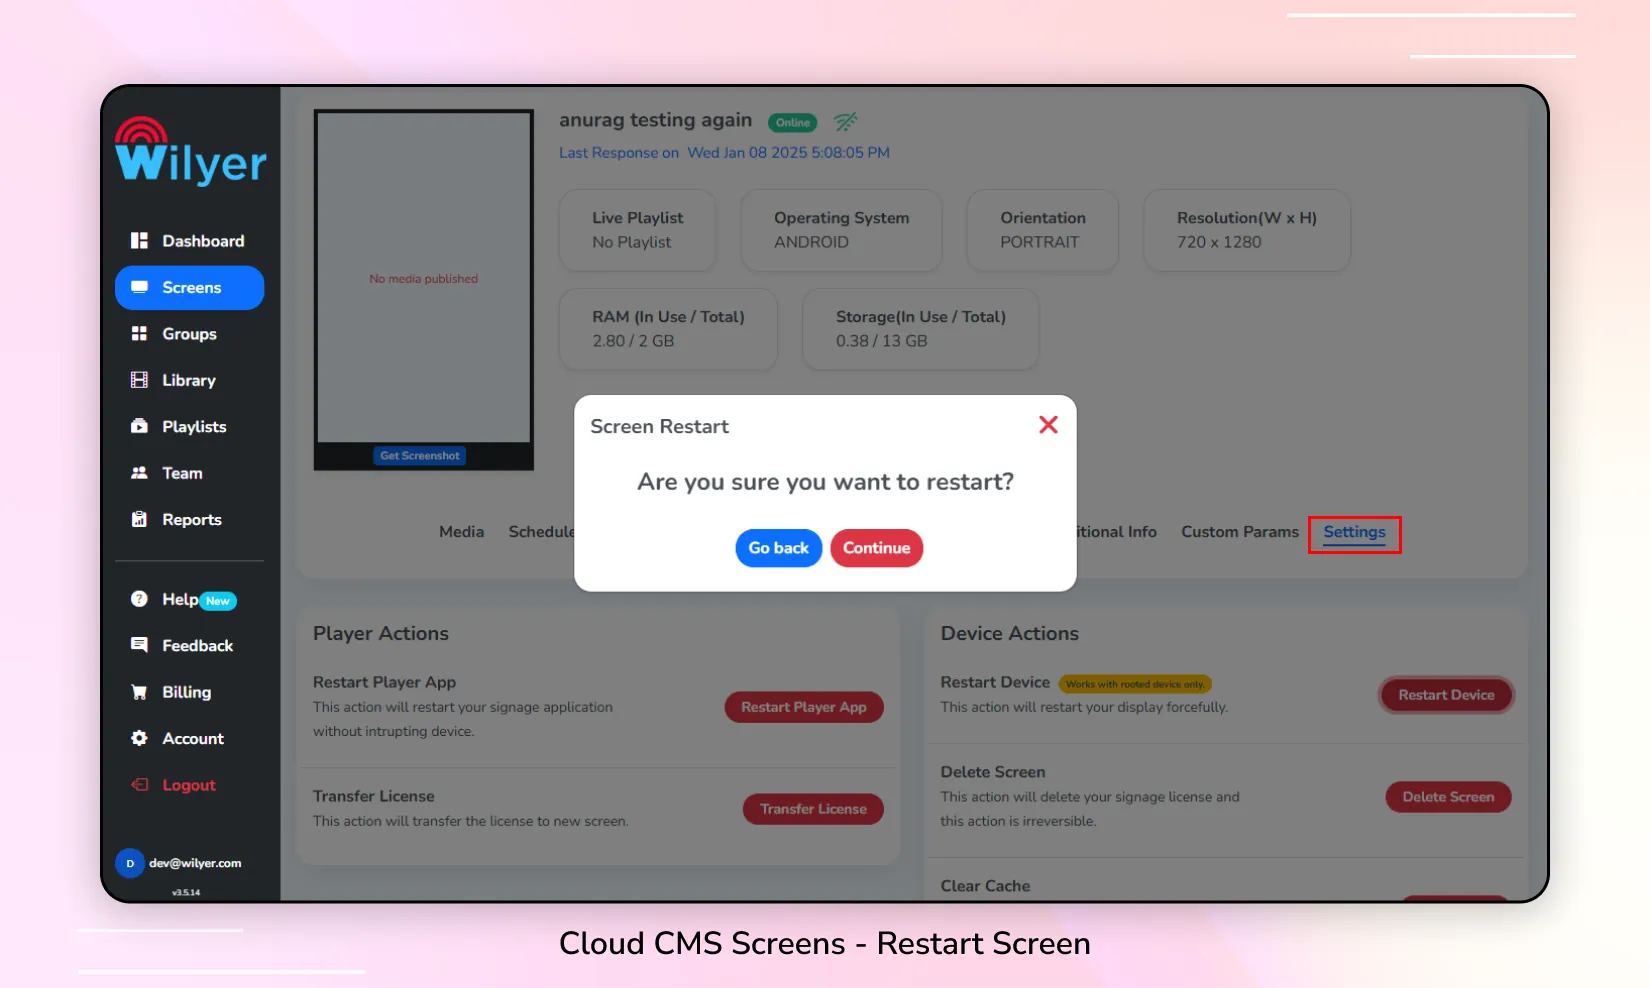
17. Restart a Screen
Step 1: Go to the Screens section on the left side of the CMS.
Step 2: In the Action column, click on the ⚙️ Settings button of the screen.
Step 3: Select the Settings option.
Step 4: Click on the Restart Device button and then click Continue.
18. Restart the Player App
Step 1: Go to the Screens section on the left side of the CMS.
Step 2: In the Action column, click on the ⚙️ Settings button of the screen.
Step 3: Select the Settings option.
Step 4: Click on the Restart Player App button and then click Continue.

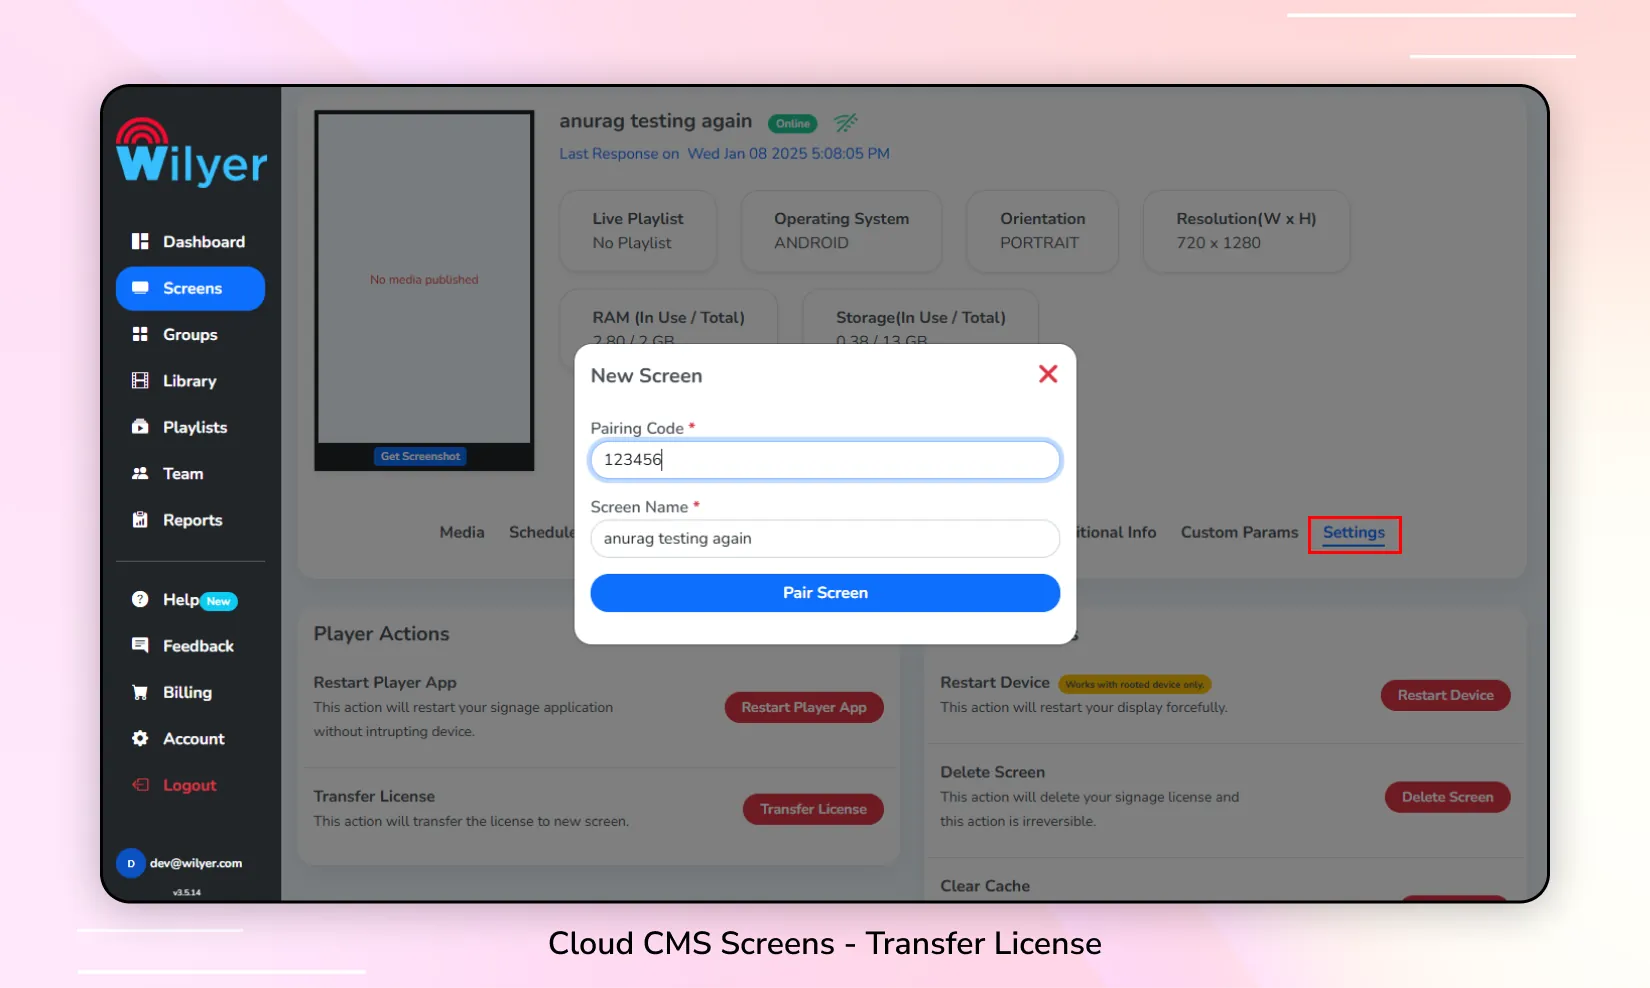
19. Transfer Screen License
Step 1: Go to the Screens section on the left side of the CMS.
Step 2: In the Action column, click on the ⚙️ Settings button for the screen.
Step 3: Select the Settings option.
Step 4: Click on the Transfer License button.
Step 5: Enter the 6-digit pairing code displayed on the screen. For example, 617890 is the code flashing on the display. Enter this code in the CMS “Pair New Screen” window.
Step 6: Enter the name of the screen/display to distinguish it from other screens. For example, Lobby Display, Display 1, or Sector 14 screen.
Step 7: Click on Pair Screen. The license will be transferred to the newly paired screen.
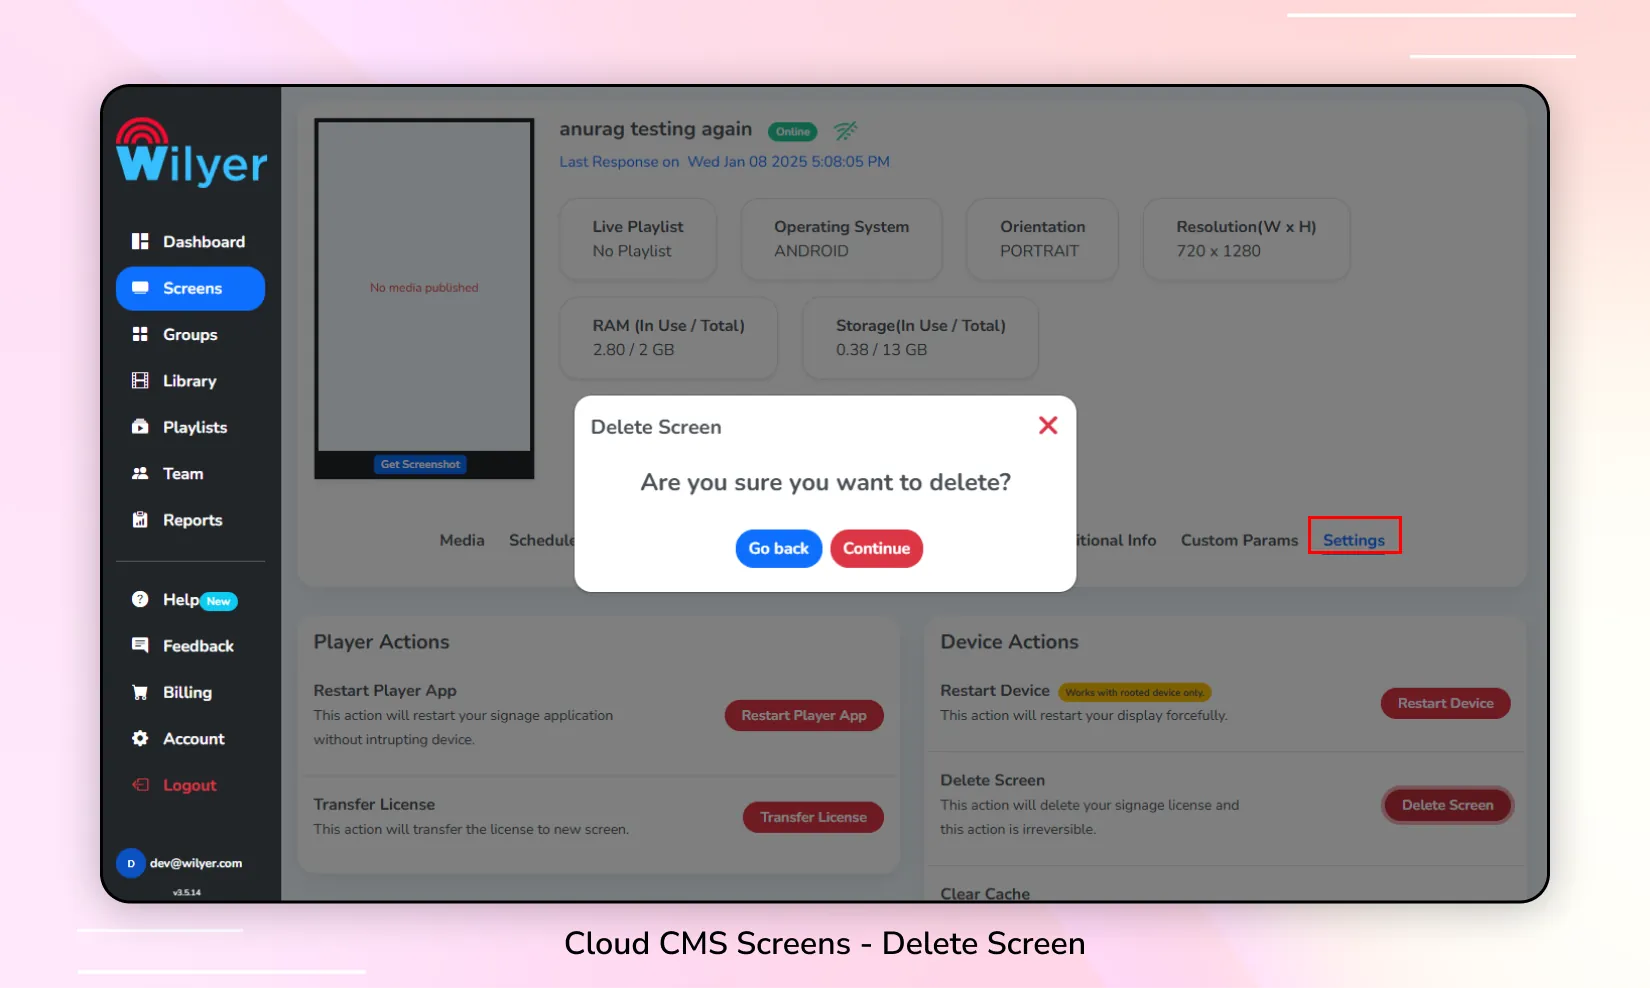
20. Delete a Screen
Step 1: Go to the Screens section on the left side of the CMS.
Step 2: In the Action column, click on the ⚙️ Settings button for the screen you want to delete.
Step 3: Select the Settings option.
Step 4: Click on the Delete Screen button and confirm the action.
Step 5: The screen will be successfully deleted and can be restored later from the Deleted Screens section.
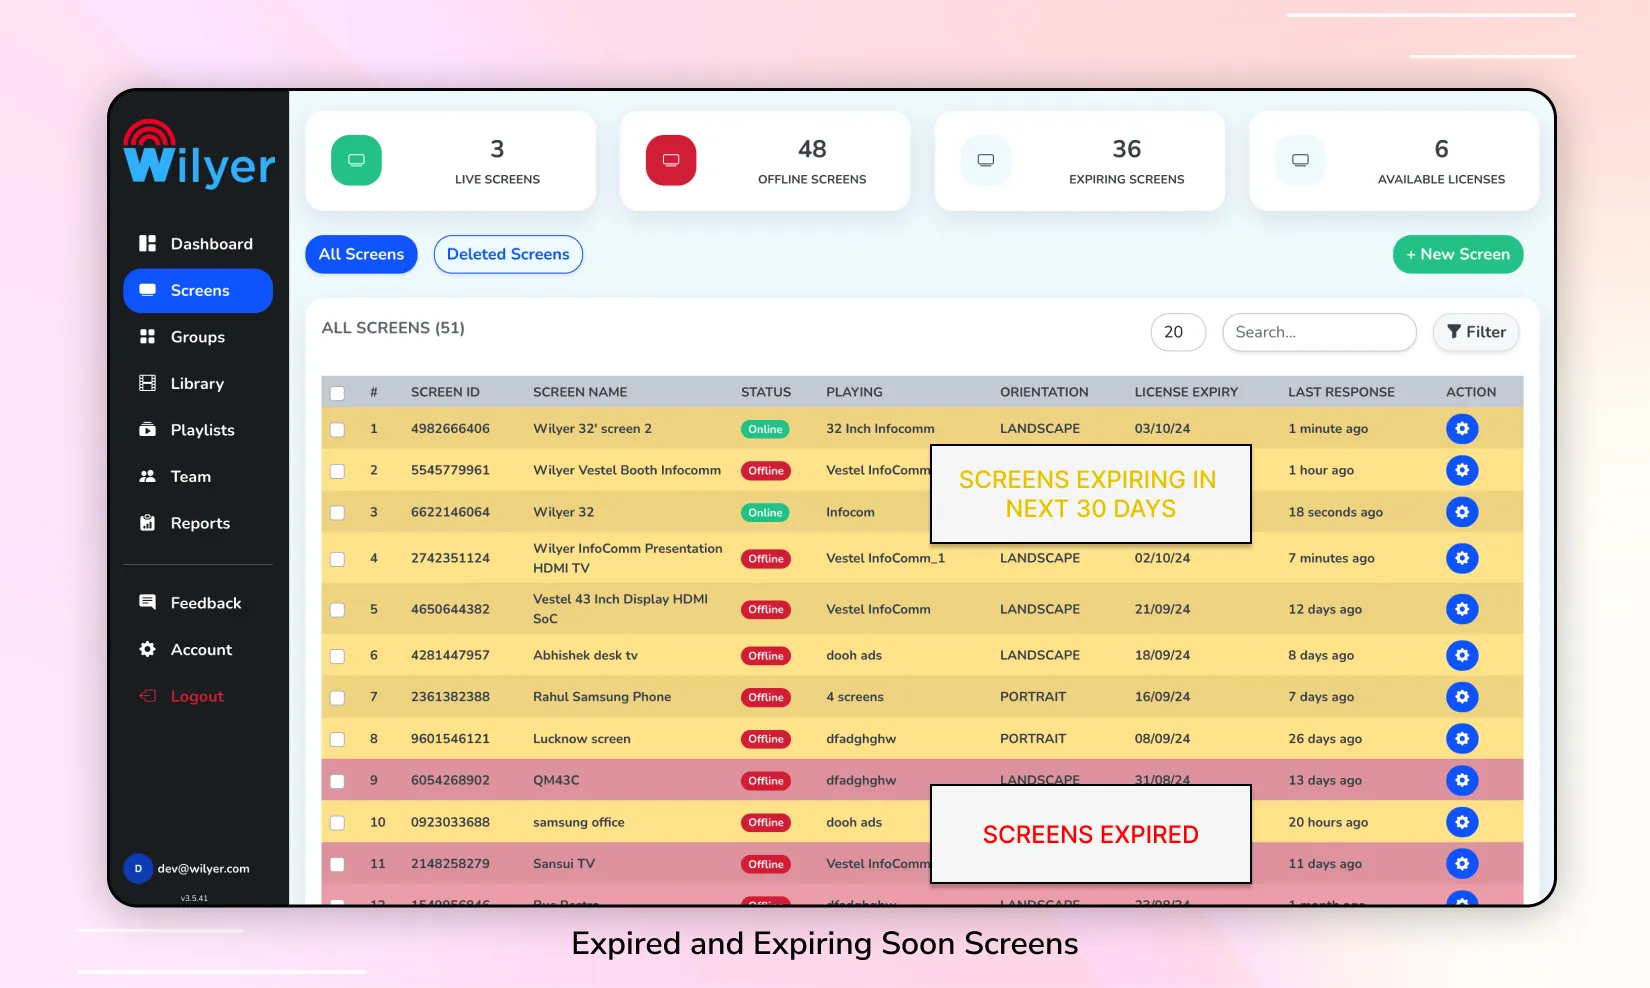
Screens - Frequently Asked Questions
Why are some of my screens with yellow and red background?
The screens are displayed in different colors based on their status:
- Yellow background: The screen’s license is expiring within the next 30 days.
- Red background: The screen’s license has expired.