Account
In the cloud, you can manage Account Settings in the following ways:

- View All Profile info
- Change Profile Name
- Change Email
- Change Password
- Change Organization Name
- Change Phone Number
- Enable/Disable 2FA (Two Factor Authentication)
- Edit Notification Settings
- View All Logs
- Search Logs
- Filter Logs
- Export Logs
Documentation
1. View All Profile info
Step 1: Click on the Account Settings tab in the left sidebar.
Step 2: Click on the Profile option.
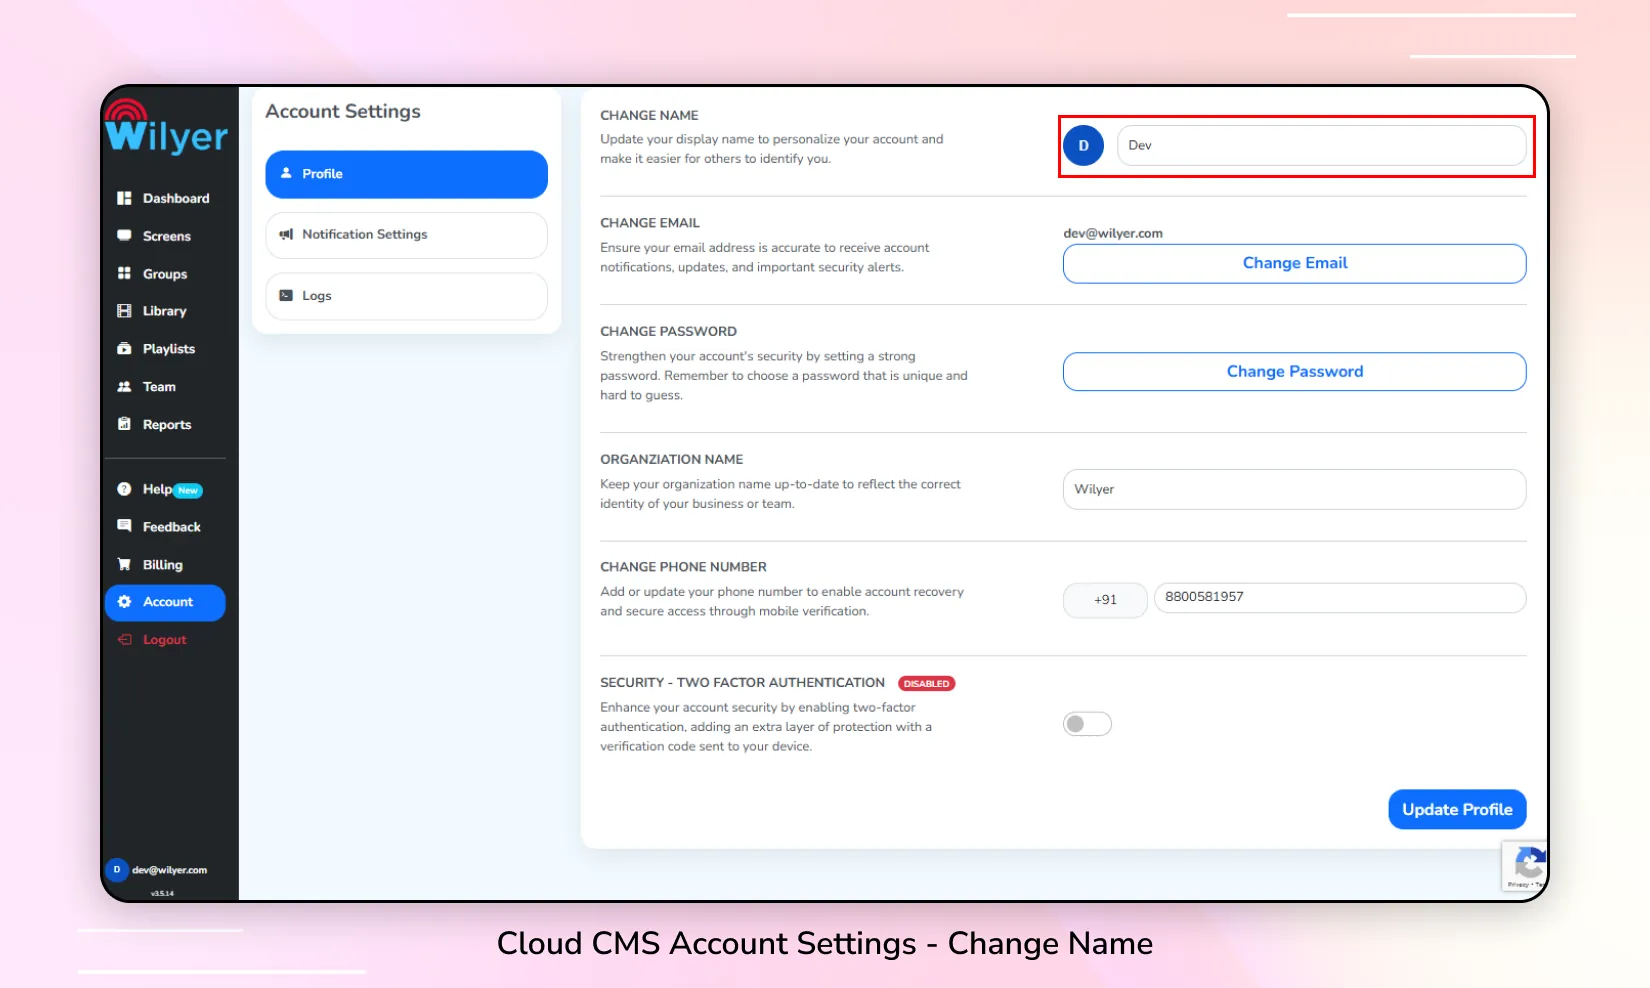
2. Change Profile Name
Step 1: Click on the Account Settings tab in the left sidebar.
Step 2: Click on the Profile option.
Step 3: Modify the name in the Change Name input.
Step 4: Click on the Update Profile button.
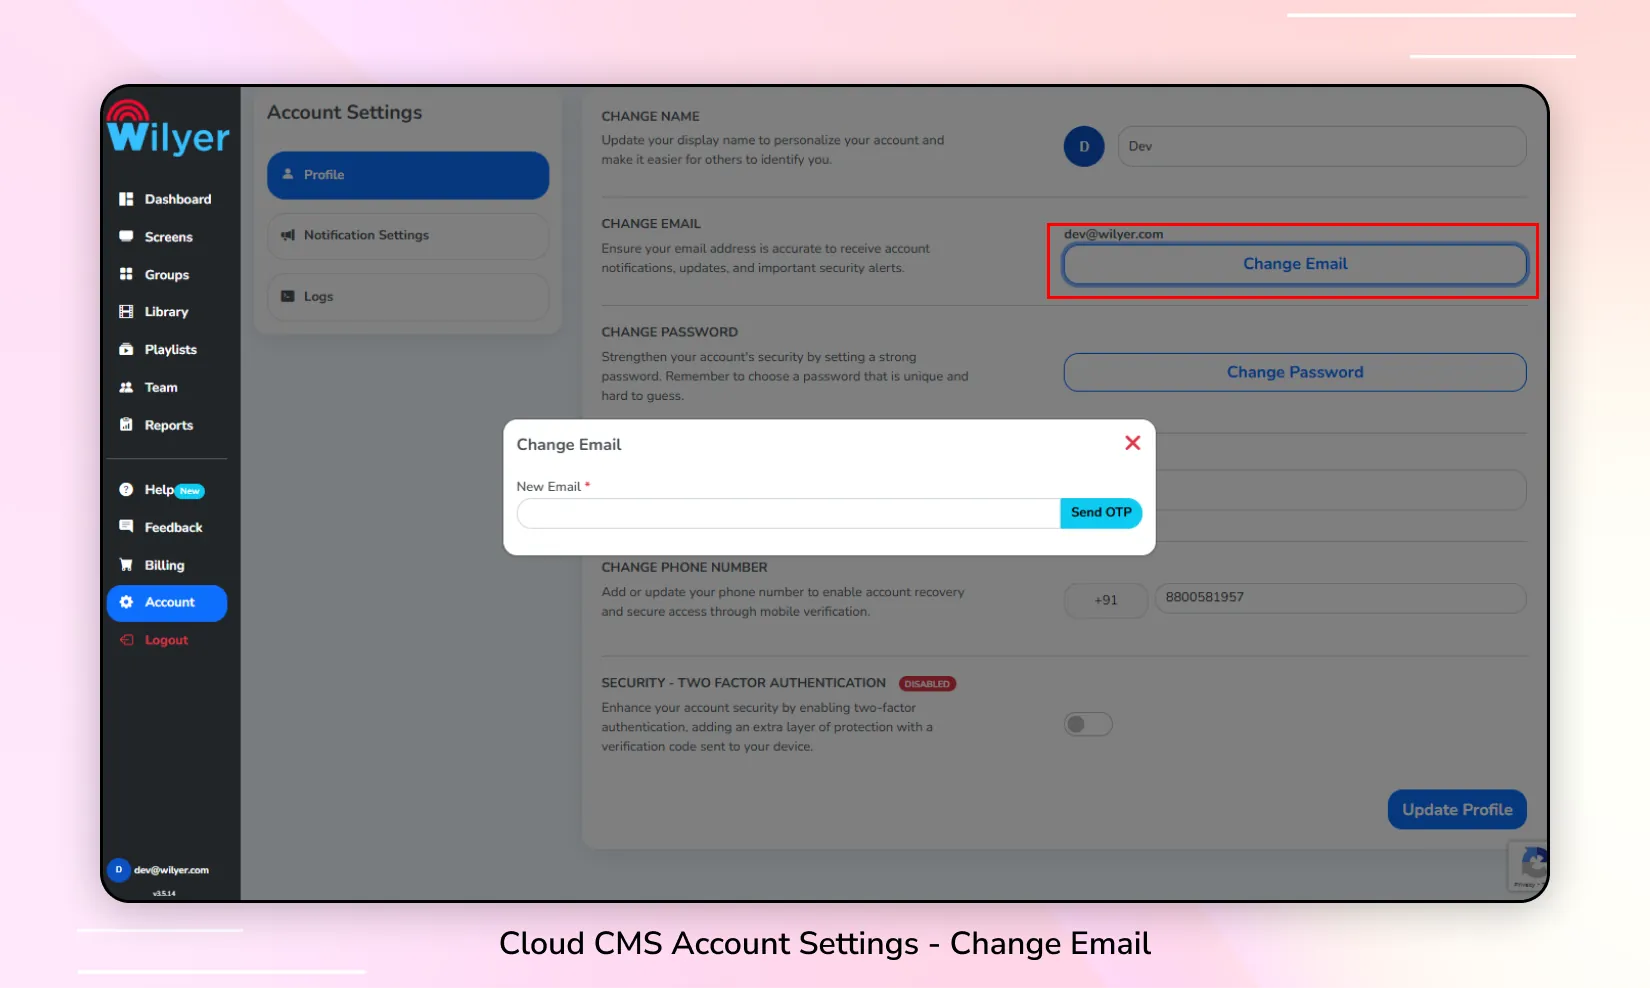
3. Change Email
Step 1: Click on the Account Settings tab in the left sidebar.
Step 2: Click on the Profile option.
Step 3: Click on the Change Email button.
Step 4: Enter the new email address in the input field and click on the Get OTP button.
Step 5: Verify the OTP.
Step 6: Click on the Update Profile button.
4. Change Password
Step 1: Click on the Account Settings tab in the left sidebar.
Step 2: Click on the Profile option.
Step 3: Click on the Change Password button.
Step 4: Enter your Current Password, New Password, and Confirm New Password in the respective input fields, then click on the Change Password button.
Step 5: Click on the Update Profile button to save your changes.

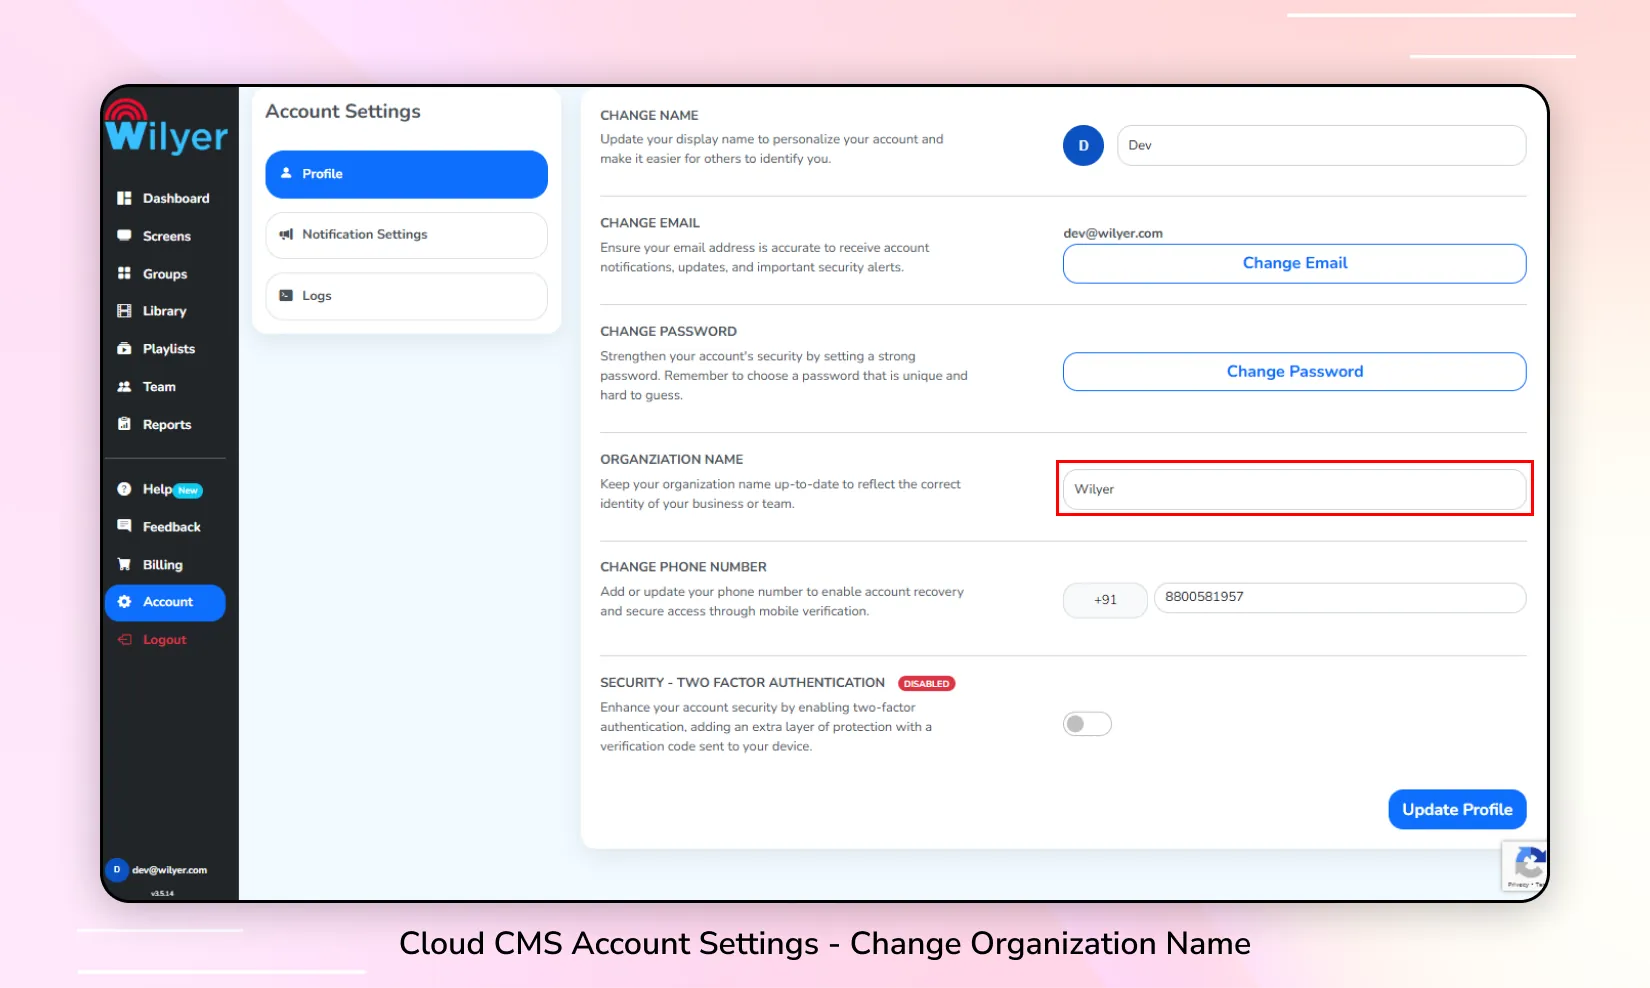
5. Change Organization Name
Step 1: Click on the Account Settings tab in the left sidebar.
Step 2: Click on the Profile option.
Step 3: Modify the Organization Name in the input field.
Step 4: Click on the Update Profile button to save the changes.
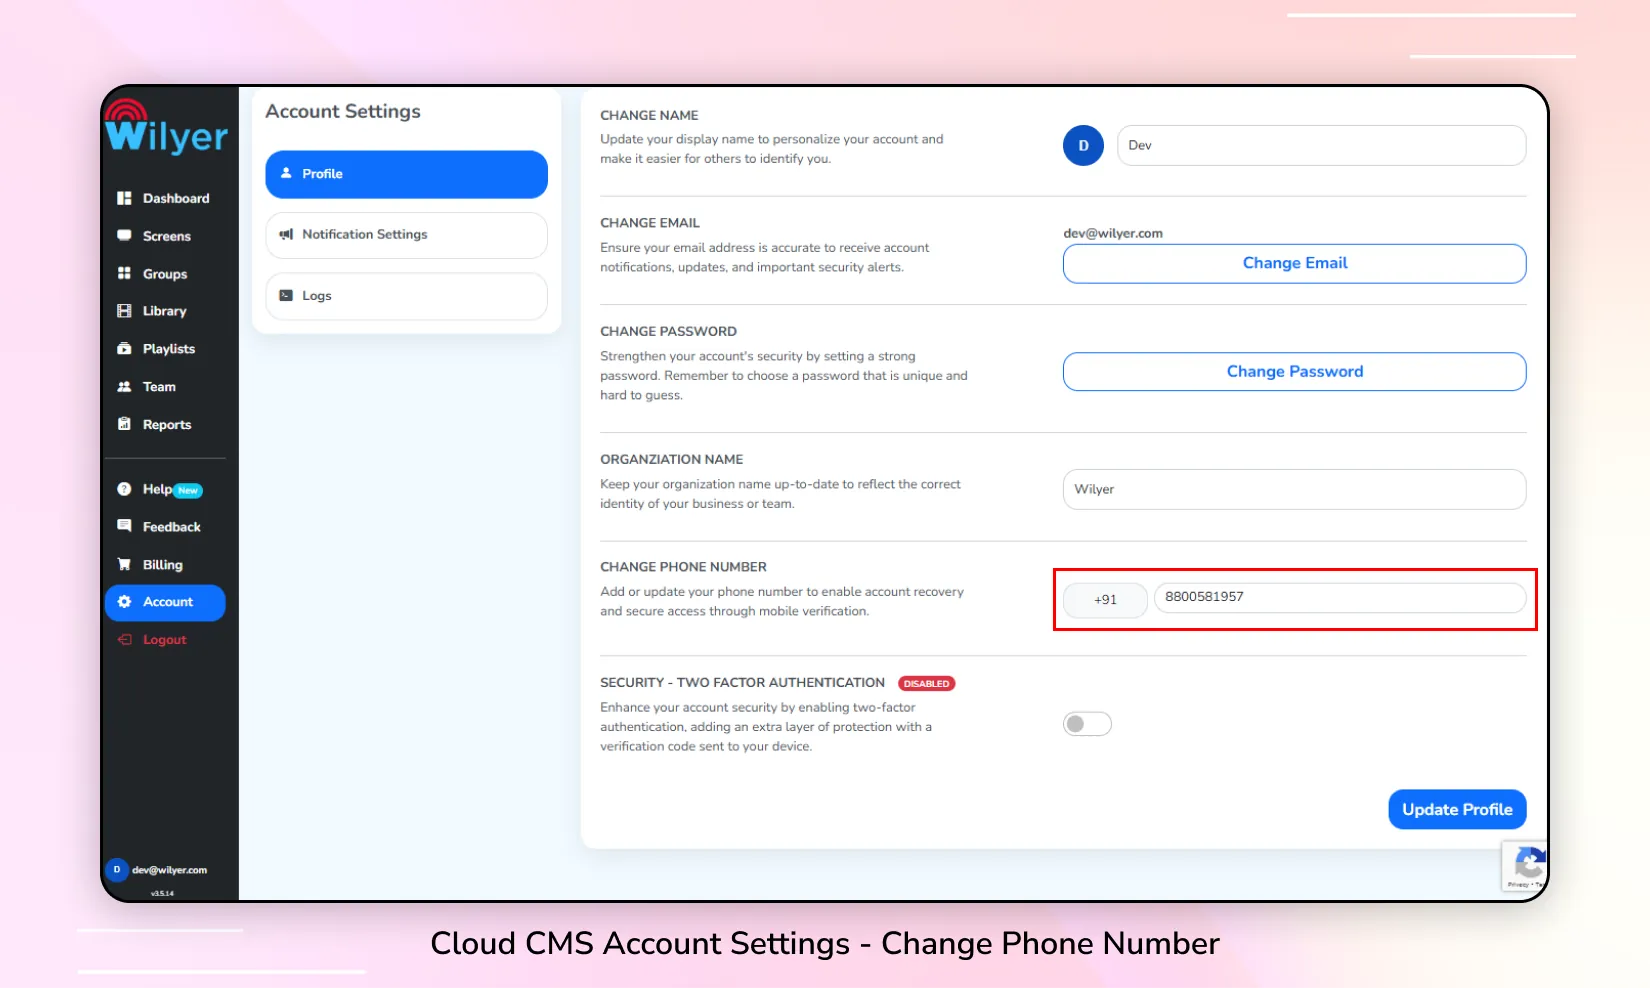
6. Change Phone Number
Step 1: Click on the Account Settings tab in the left sidebar.
Step 2: Click on the Profile option.
Step 3: Modify the Country Code and Phone Number in the input fields as needed.
Step 4: Click on the Update Profile button to save the changes.
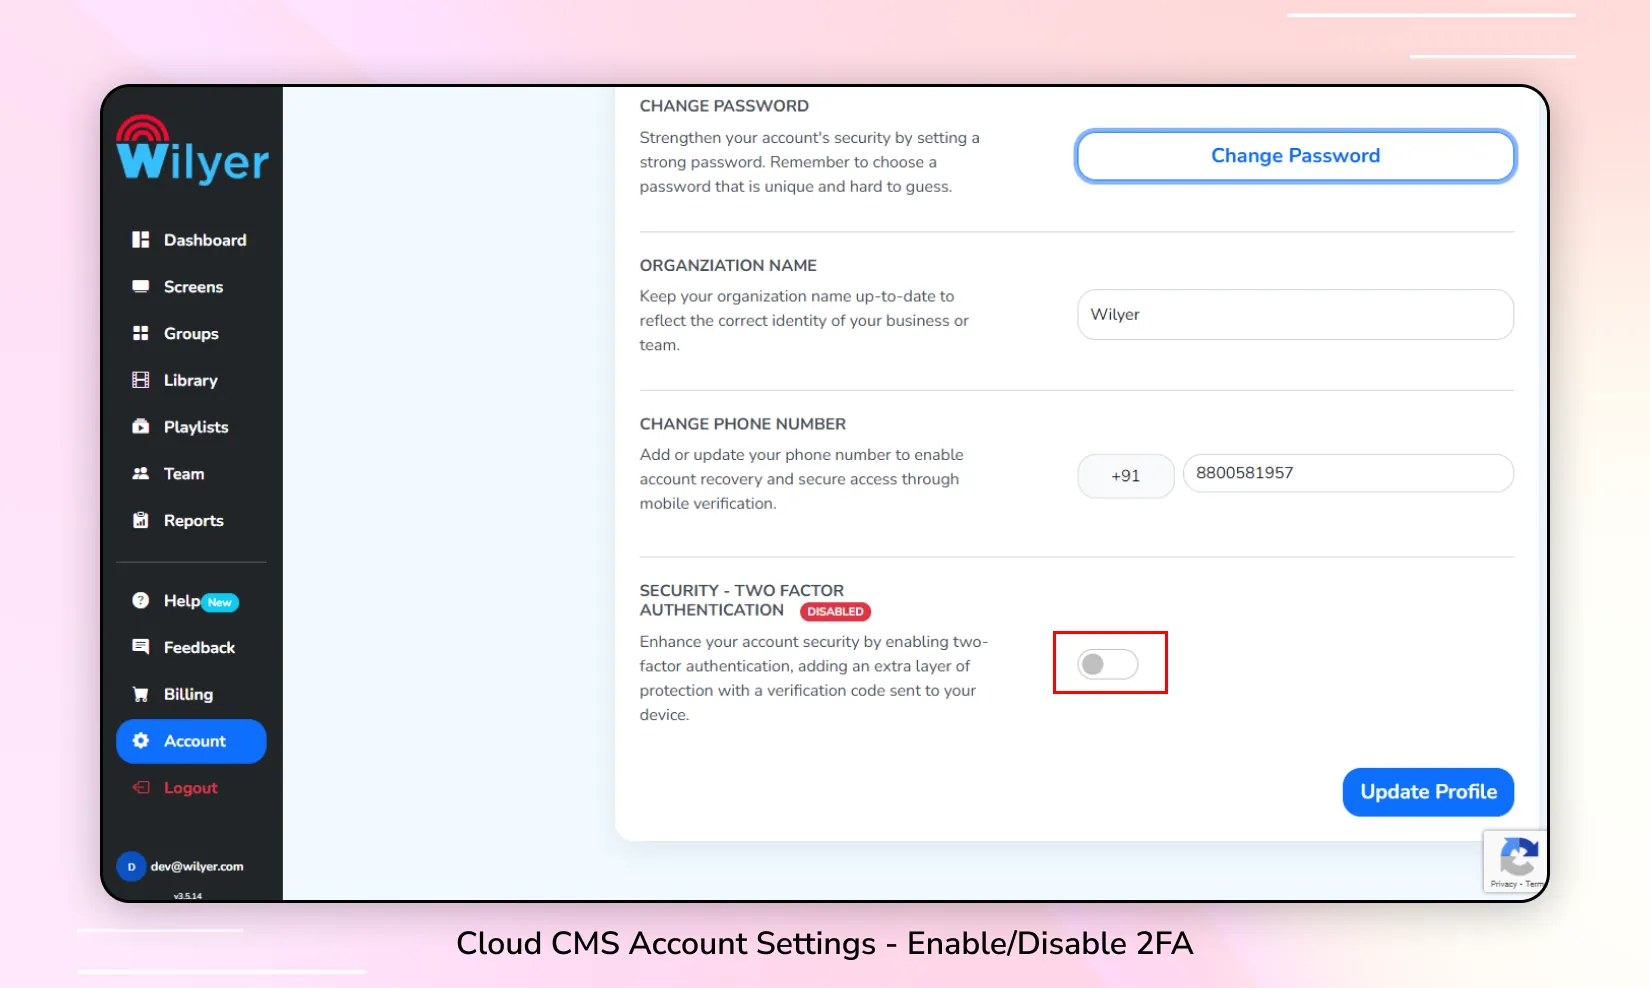
7. Enable/Disable 2FA (Two Factor Authentication)
Step 1: Click on the Account Settings tab in the left sidebar.
Step 2: Click on the Profile option.
Step 3: Toggle the 2FA switch to either enable or disable Two-Factor Authentication.
Step 4: Click on the Update Profile button to save your changes.
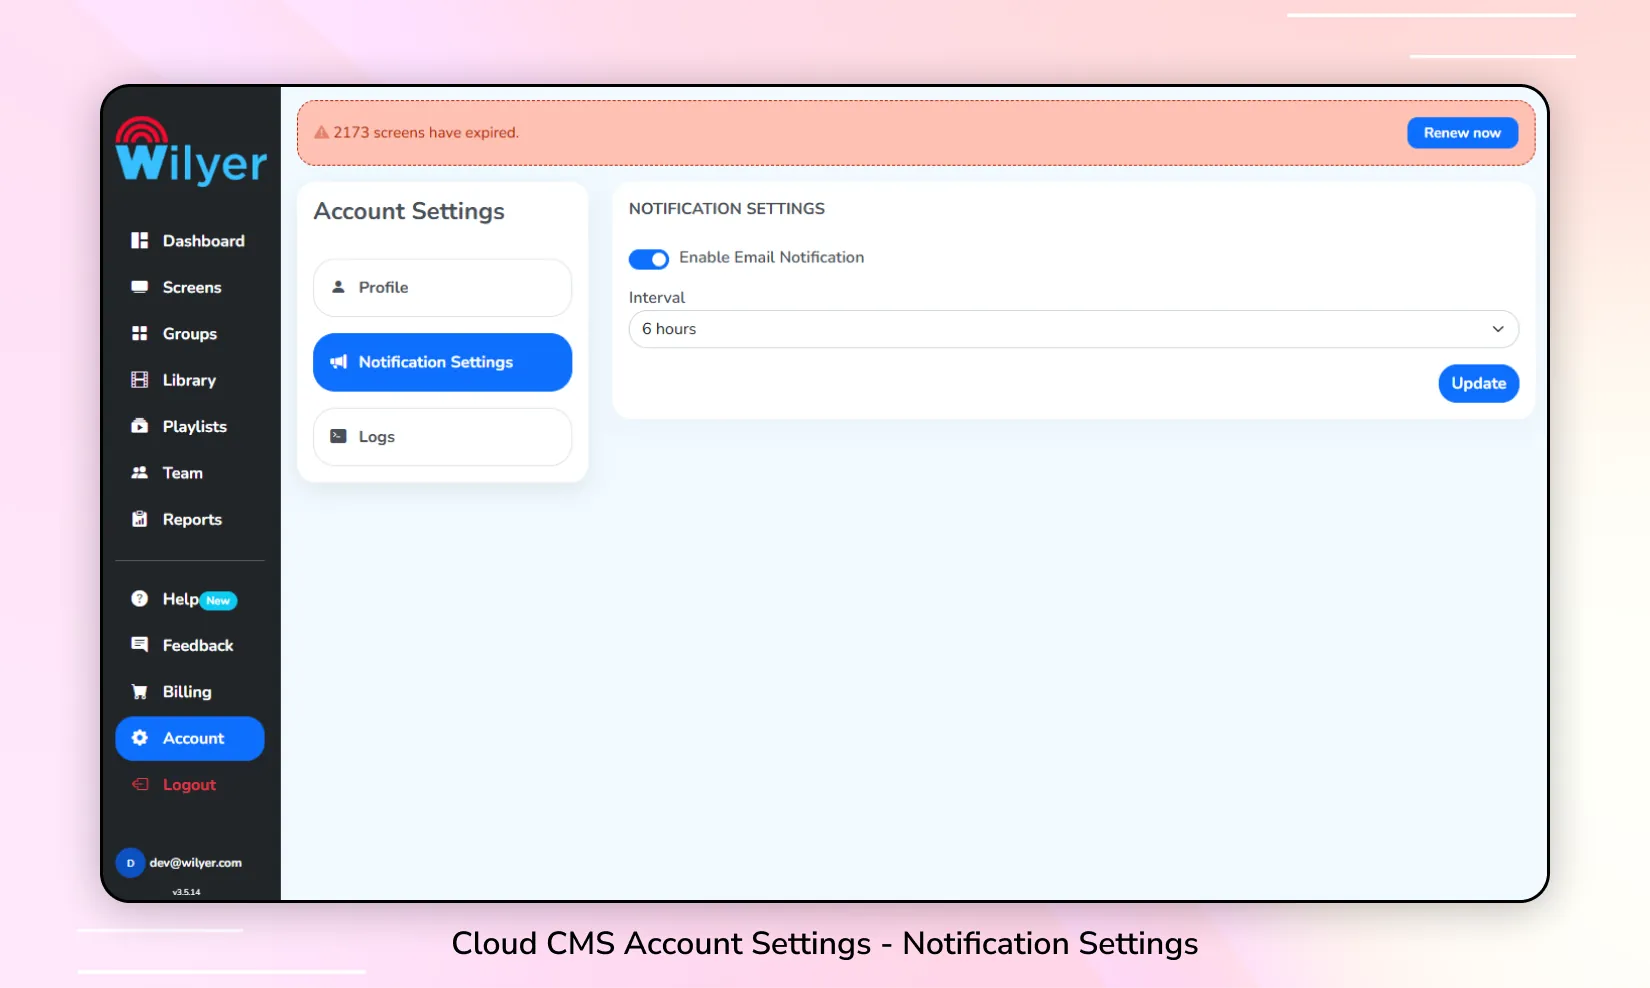
8. Edit Notification Settings
Step 1: Click on the Account Settings tab in the left sidebar.
Step 2: Click on the Notification Settings option.
Step 3: Adjust the Enable Notifications Toggle and configure the Interval as needed.
Step 4: Click on the Update button to save your changes.
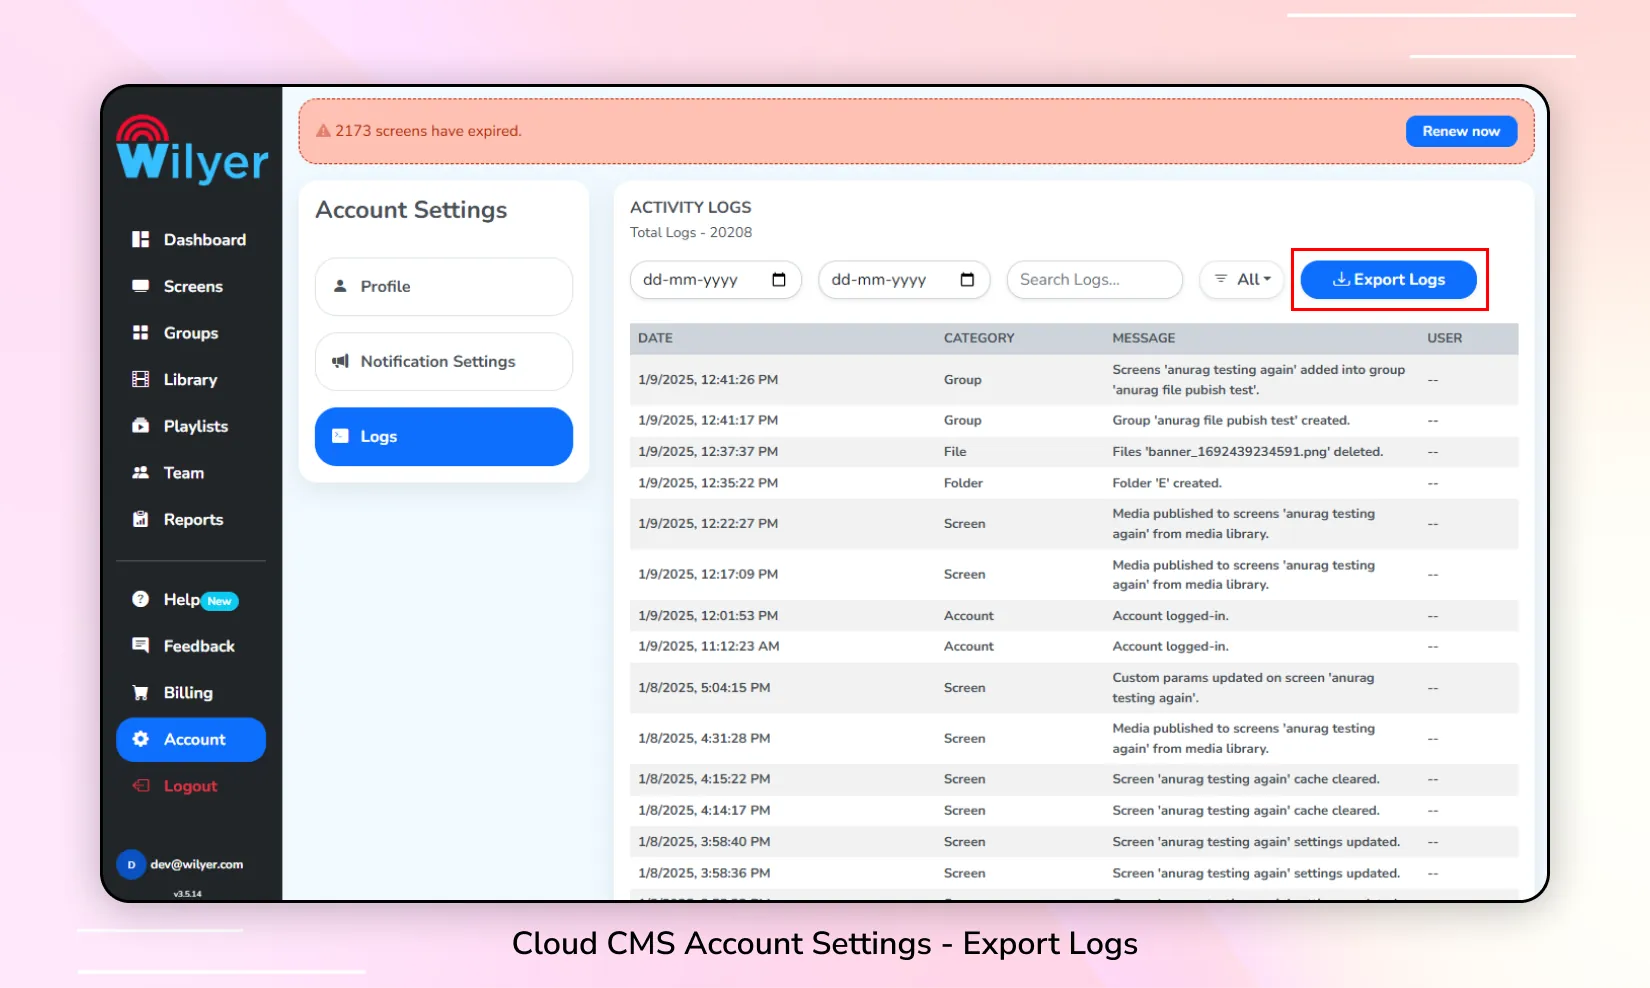
9. View All Logs
Step 1: Click on the Account Settings tab in the left sidebar.
Step 2: Click on the Logs option.
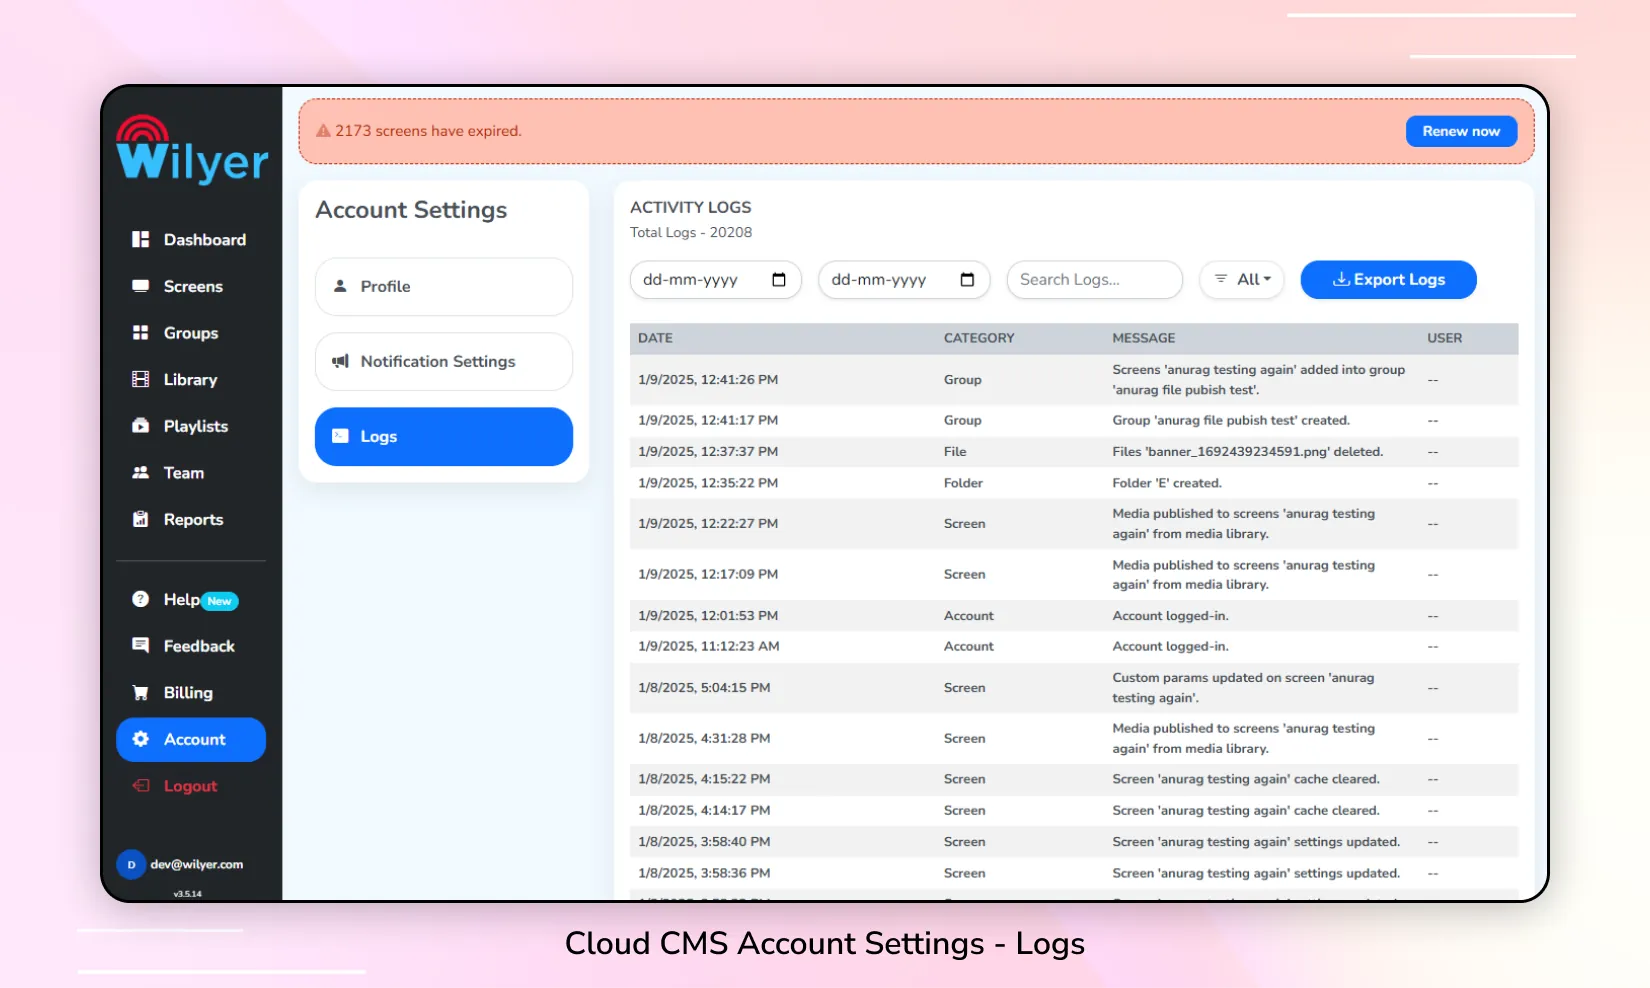
10. Search Logs
Step 1: Click on the Account Settings tab in the left sidebar.
Step 2: Click on the Logs option.
Step 3: Enter your search query in the Search Logs input field to filter the logs.

11. Filter Logs
Step 1: Click on the Account Settings tab in the left sidebar.
Step 2: Click on the Logs option.
Step 3: Use the Filter options to sort the logs based on category and other criteria.

12. Export Logs
Step 1: Click on the Account Settings tab in the left sidebar.
Step 2: Click on the Logs option.
Step 3: Click on the Export Logs button.