Team
In the cloud, you can manage Teams in the following ways:
- View All Members
- Edit Member Details
- Delete Member Details
- Add a New Member
- Check Logs
- Update Login Password
- Check Role of Members
- Change Status of a Member
- Change Role & Permissions of Members
Documentation
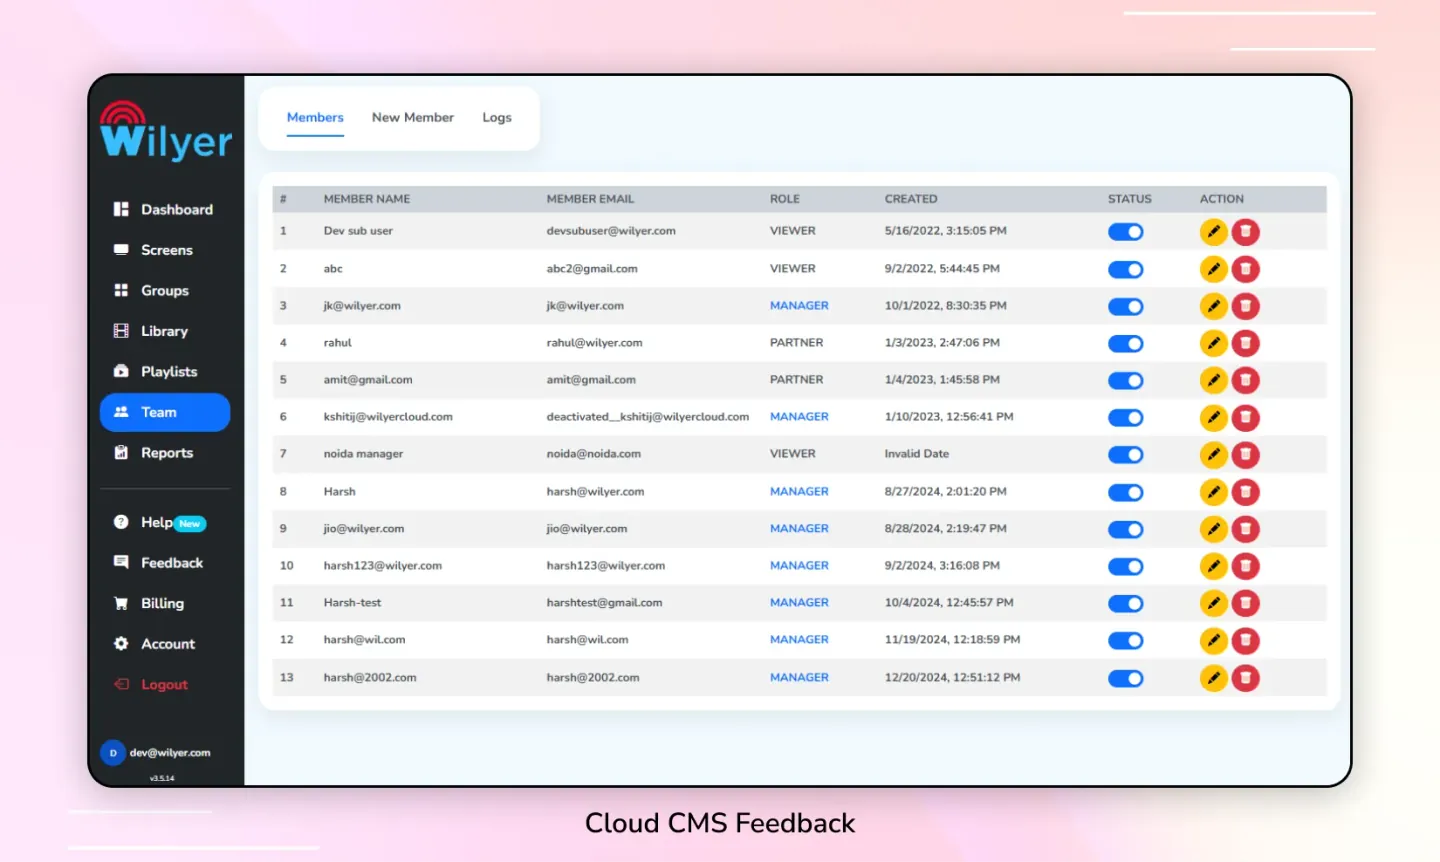
1. View All Members
Step 1: Click on the Team tab in the left sidebar.
Step 2: Click on the Members option to view the list of all team members.
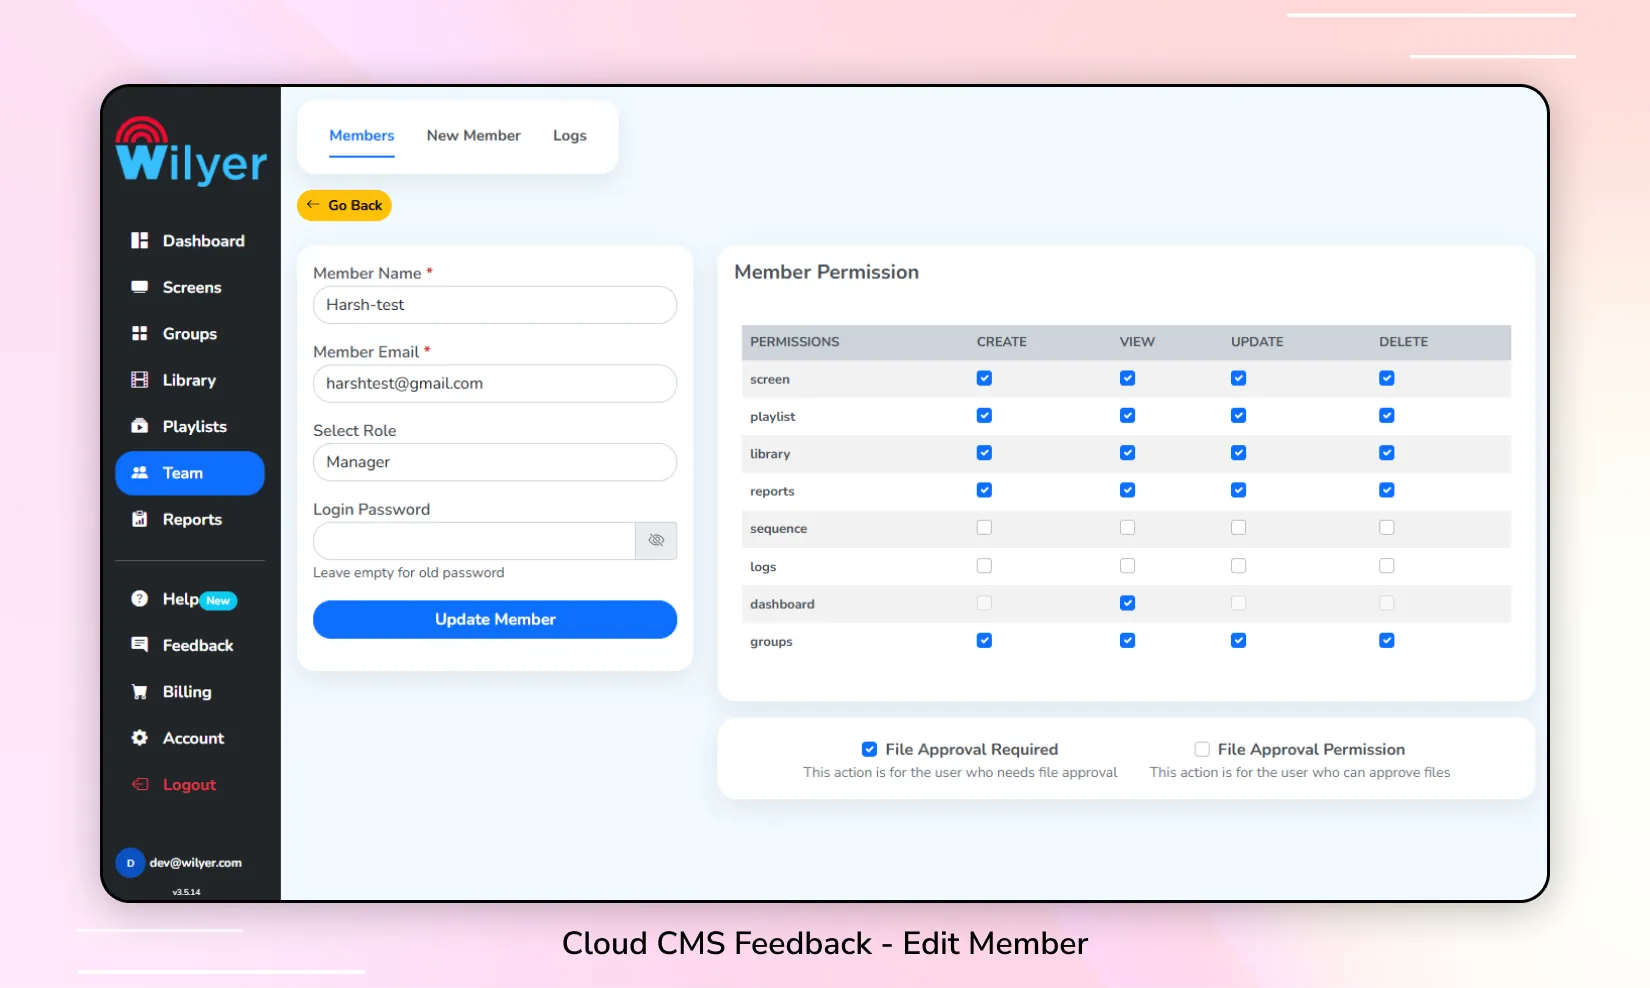
2. Edit Member Details
Step 1: Click on the Team tab in the left sidebar.
Step 2: Click on the Members option.
Step 2: Locate the member whose details you want to edit.
Step 3: Click on the ✏️ Edit button in the Action column.
Step 4: Modify the member’s details and permissions as needed.
Step 5: Click on the Update Member button to save your changes.
3. Delete Member Details
Step 1: Click on the Team tab in the left sidebar.
Step 2: Click on the Members option.
Step 3: Locate the member whose details you want to delete.
Step 4: Click on the 🗑️ Delete button in the Action column.
Step 5: Confirm the deletion by clicking the Continue button in the confirmation dialog.

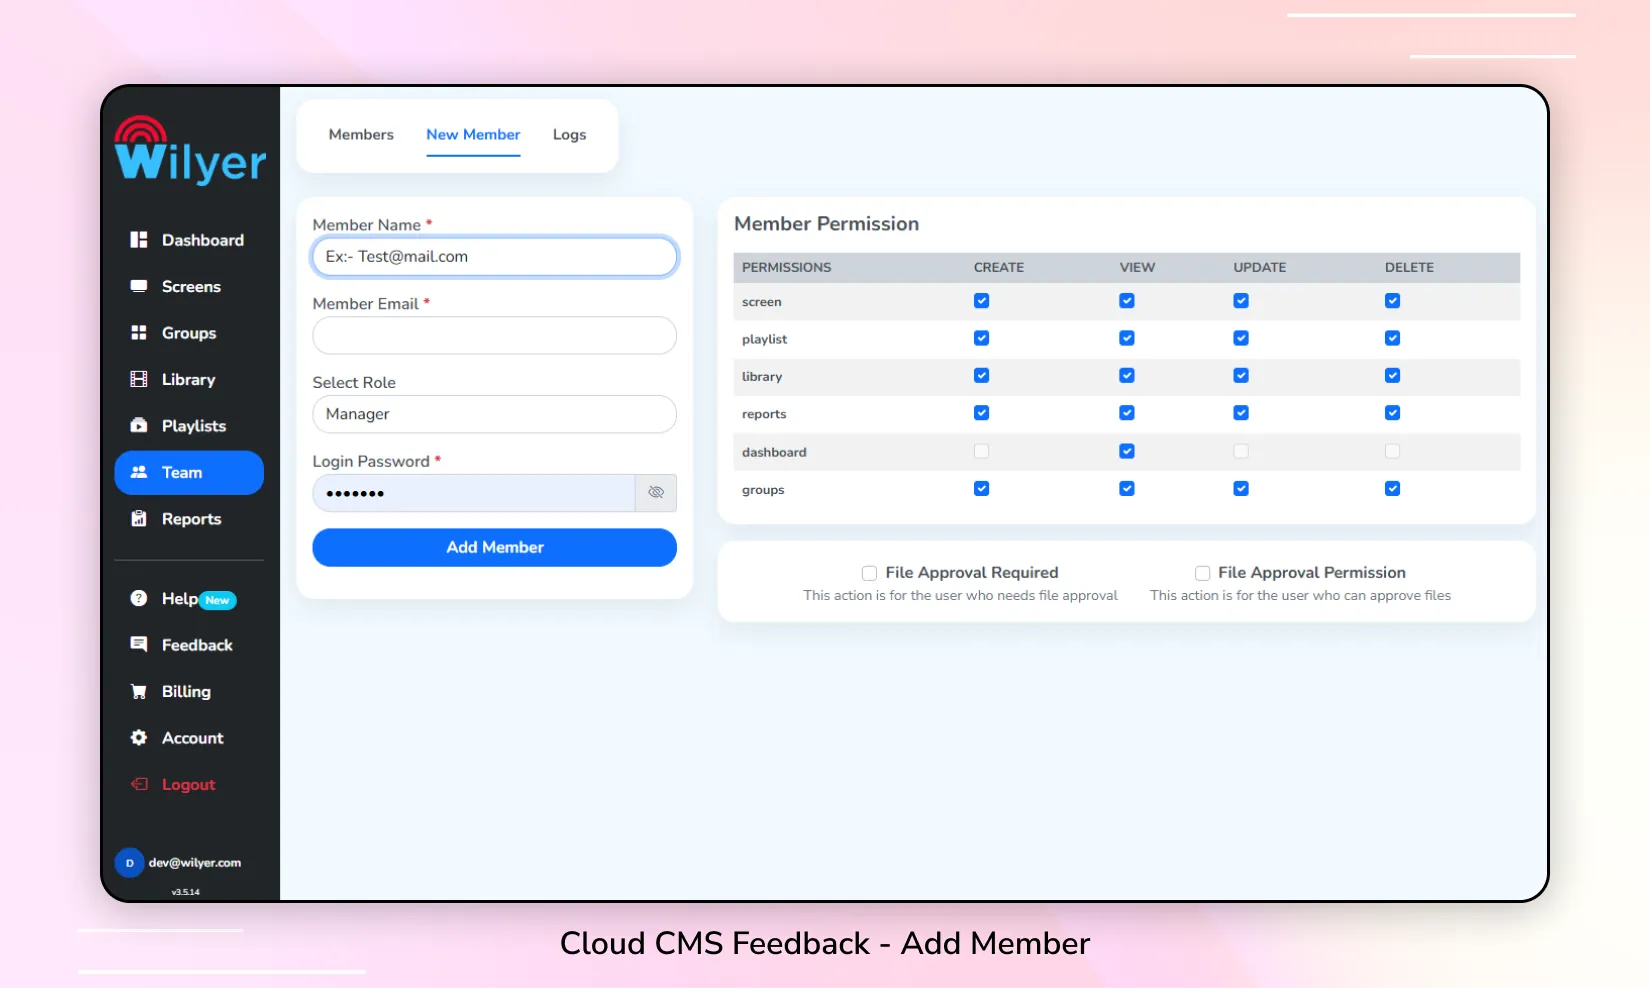
4. Add a New Member
Step 1: Click on the Team tab in the left sidebar.
Step 2: Click on the New Member option.
Step 3: Enter the member’s details and configure their permissions as needed.
Step 4: Click on the Add Member button to save your changes.
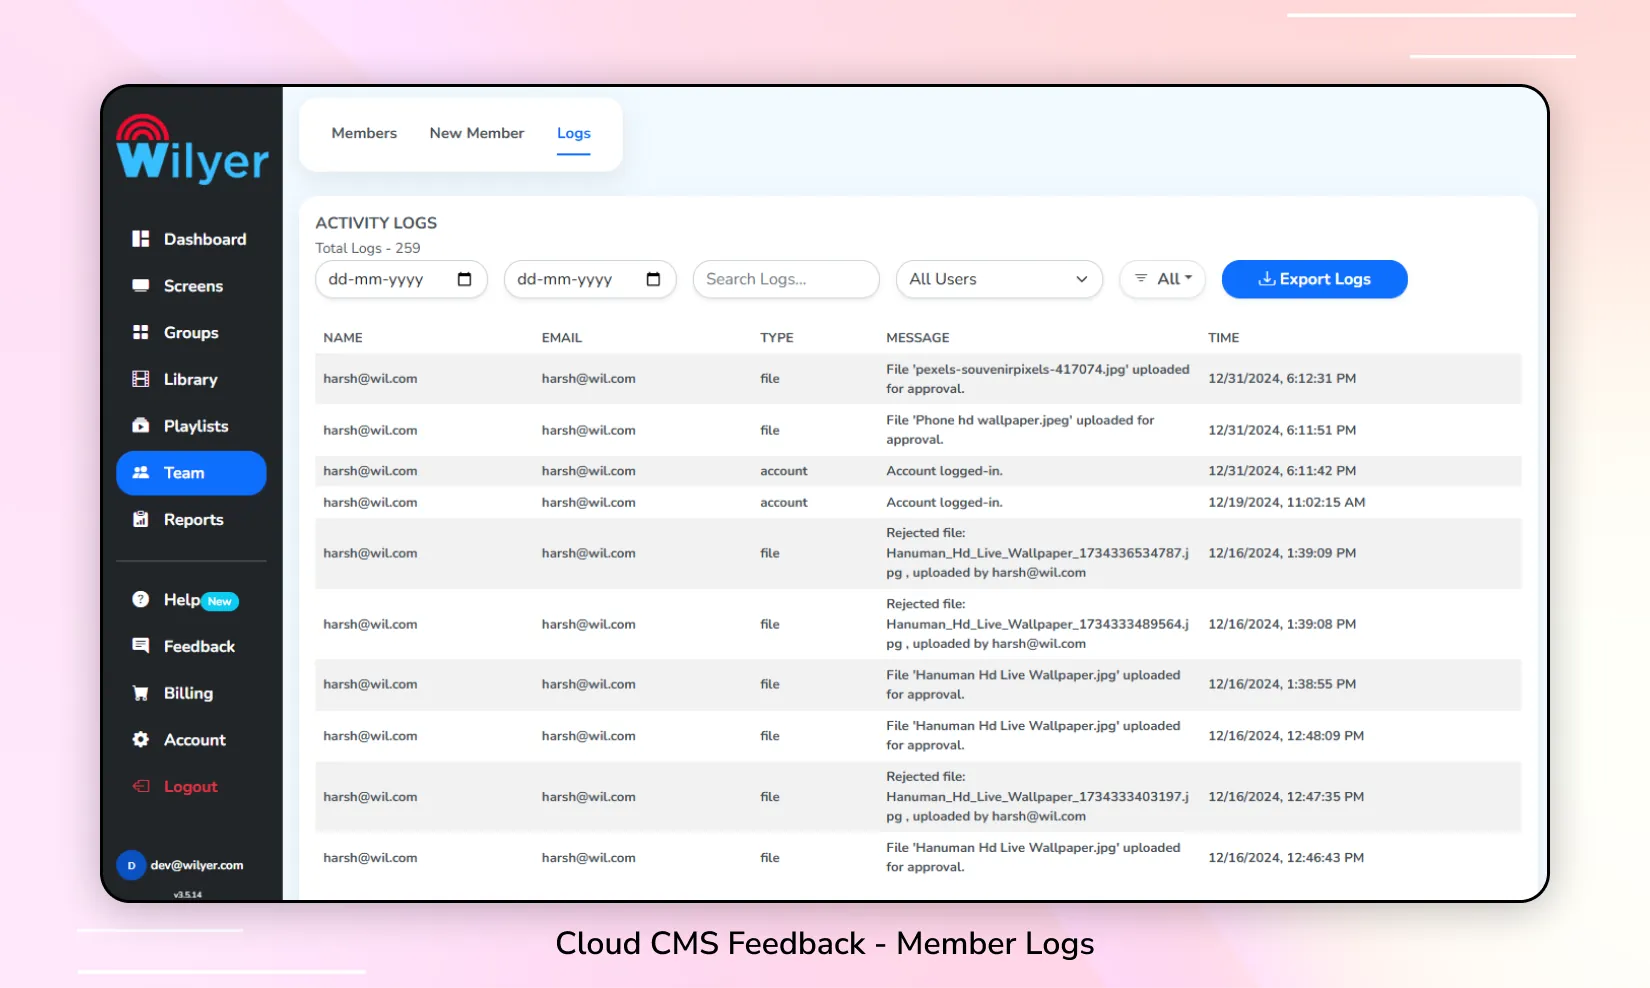
5. Check Logs
Step 1: Click on the Logs tab in the left sidebar.
Step 2: Click on the Logs option to view the available log entries.
Step 3: Filter the log entries based on Partner, Screen, or Admin. Alternatively, you can search for logs by name.
Step 4: Review the log entries displayed to check for any relevant information or issues.
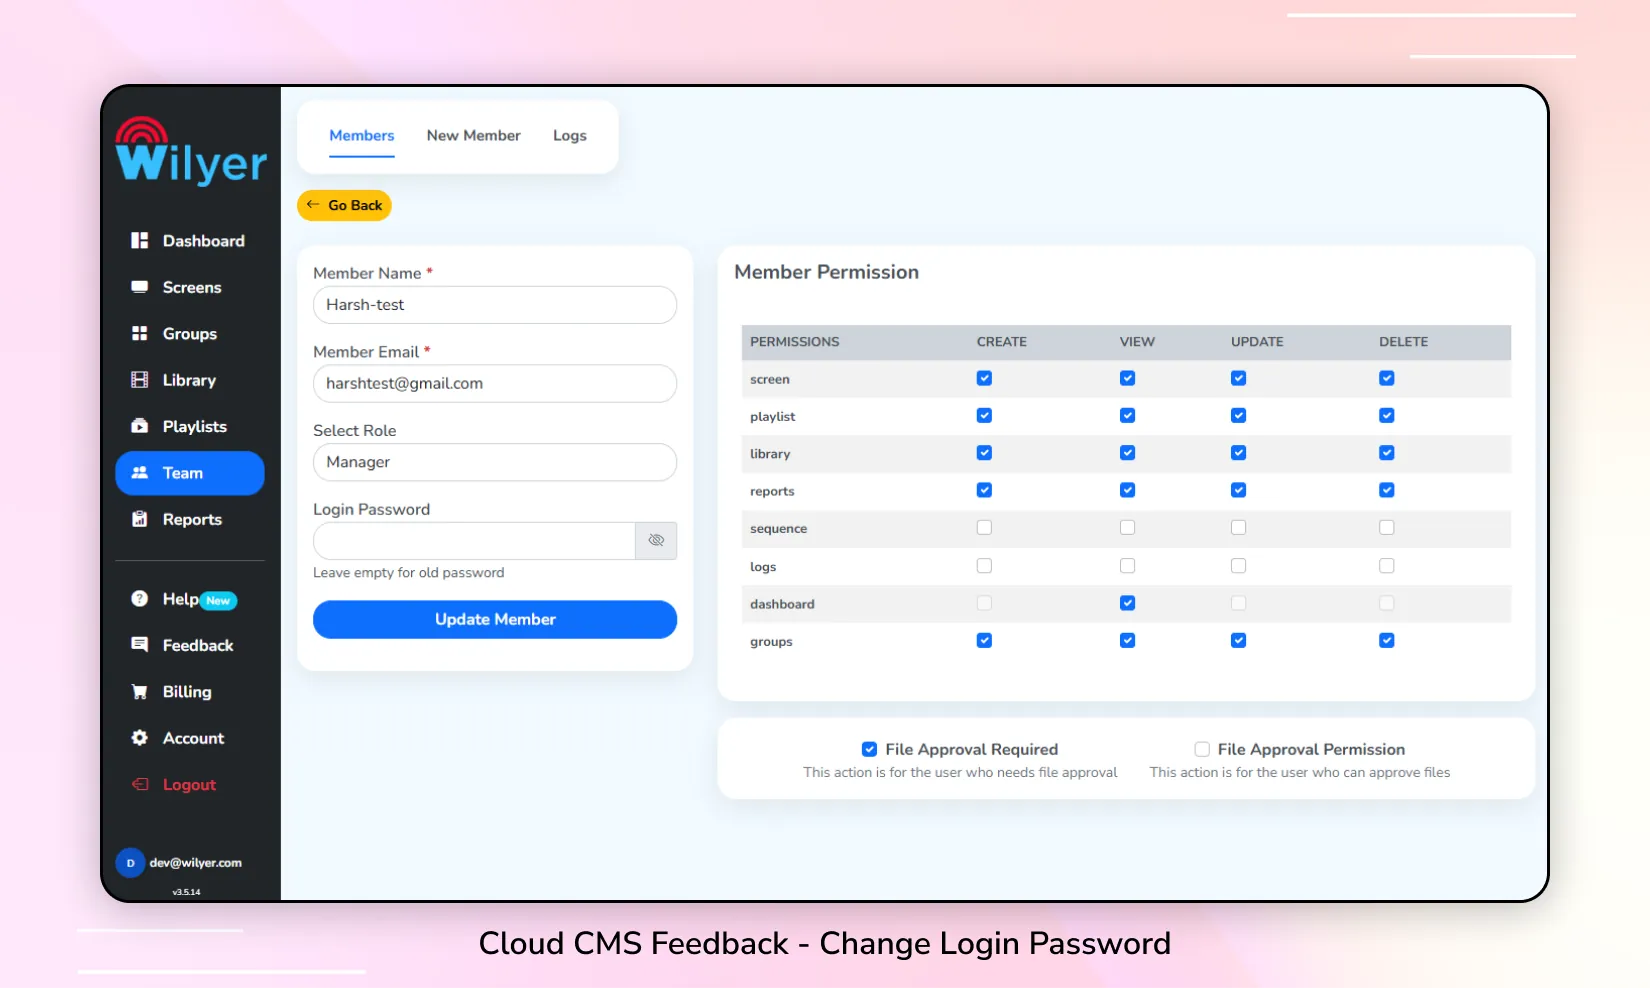
6. Update Login Password
Step 1: Click on the Team tab in the left sidebar.
Step 2: Click on the Members option.
Step 3: In the Action column, click on the ✏️ Edit button for the member whose password you want to update.
Step 4: Enter the new password in the Login Password input field.
Step 5: Click on the Update Member button to save the new password.
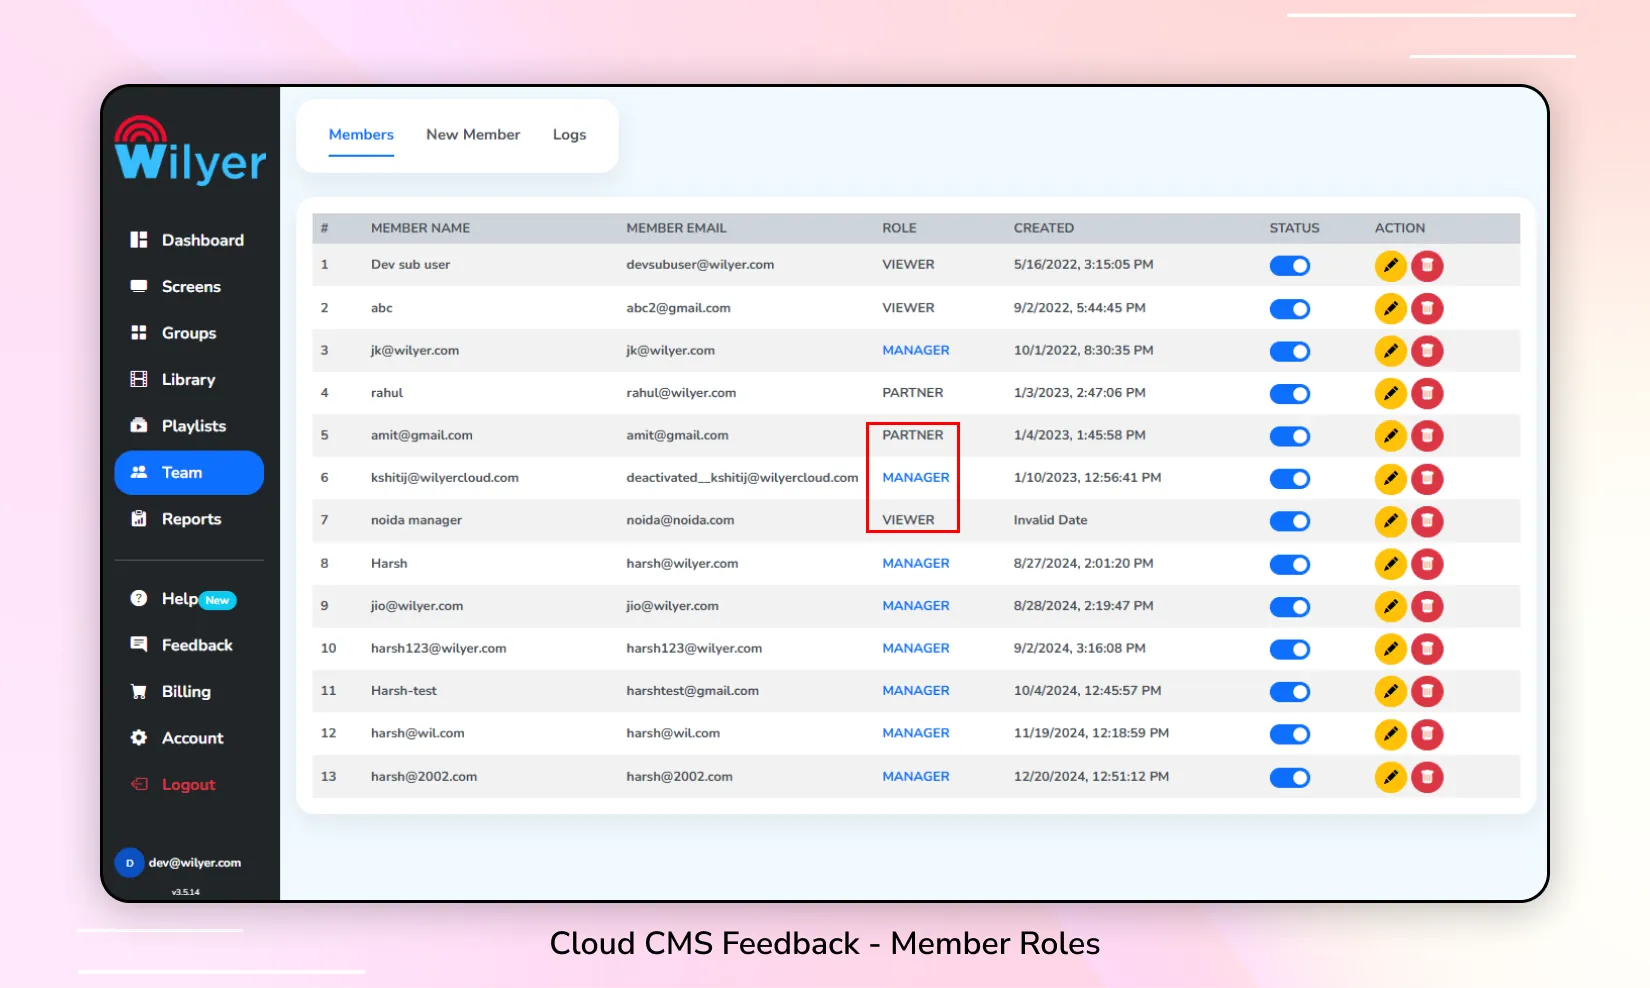
7. Check Role of Members
Step 1: Click on the Team tab in the left sidebar.
Step 2: Click on the Members option.
Step 3: In the Role column, you can view the assigned roles for each member.
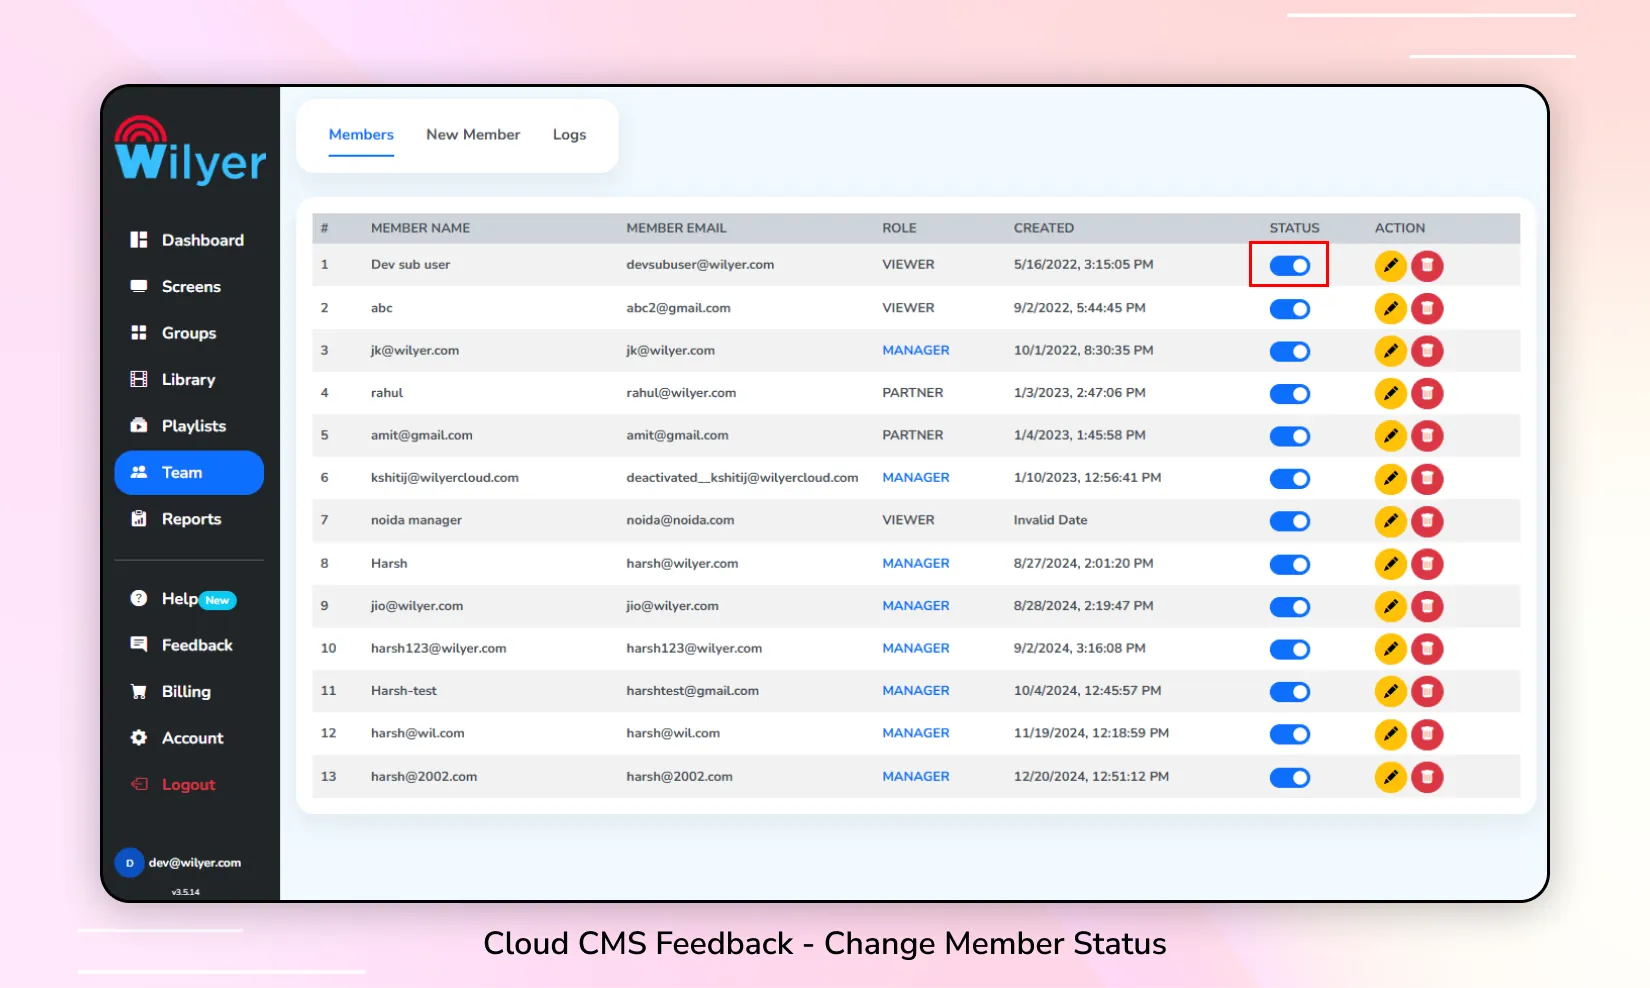
8. Change Status of a Member
Step 1: Click on the Team tab in the left sidebar.
Step 2: Click on the Members option.
Step 3: In the Status column, toggle the status to enable or disable the member as needed.
9. Change Role & Permissions of Members
Step 1: Click on the Team tab in the left sidebar.
Step 2: Select the Members option.
Step 3: Update the role of a member according to your requirements.
Step 4: Configure the member’s permissions by enabling or disabling options such as Create, View, Update, and Delete based on their responsibilities.
Step 5: For file approval settings:
- File Approval Required: Enable this for users who need their files to be approved.
- File Approval Permission: Enable this for users who are authorized to approve files.
Step 6: Save the changes to apply the updated roles and permissions.
