Clusters
The Clusters section is for screens that stand together as one display, such as a video wall in a lobby or a row of menu boards above a counter.
Overview
A cluster holds batches, and a batch holds screens along with the content they play. Each batch carries one playlist or one set of files, so every screen in that batch shows the same thing. Sync, on the cluster, is what keeps them playing it together.
Group vs Cluster
Use a group to give team members access to screens, find them easily and run operations on all of them at once. Use a cluster when screens have to play the same content.
In the cloud, you can manage clusters in the following ways:
What opens in the Clusters section
Click the Clusters tab in the left sidebar. Screen Clusters lists every cluster on the account, with the total number of clusters under the heading.
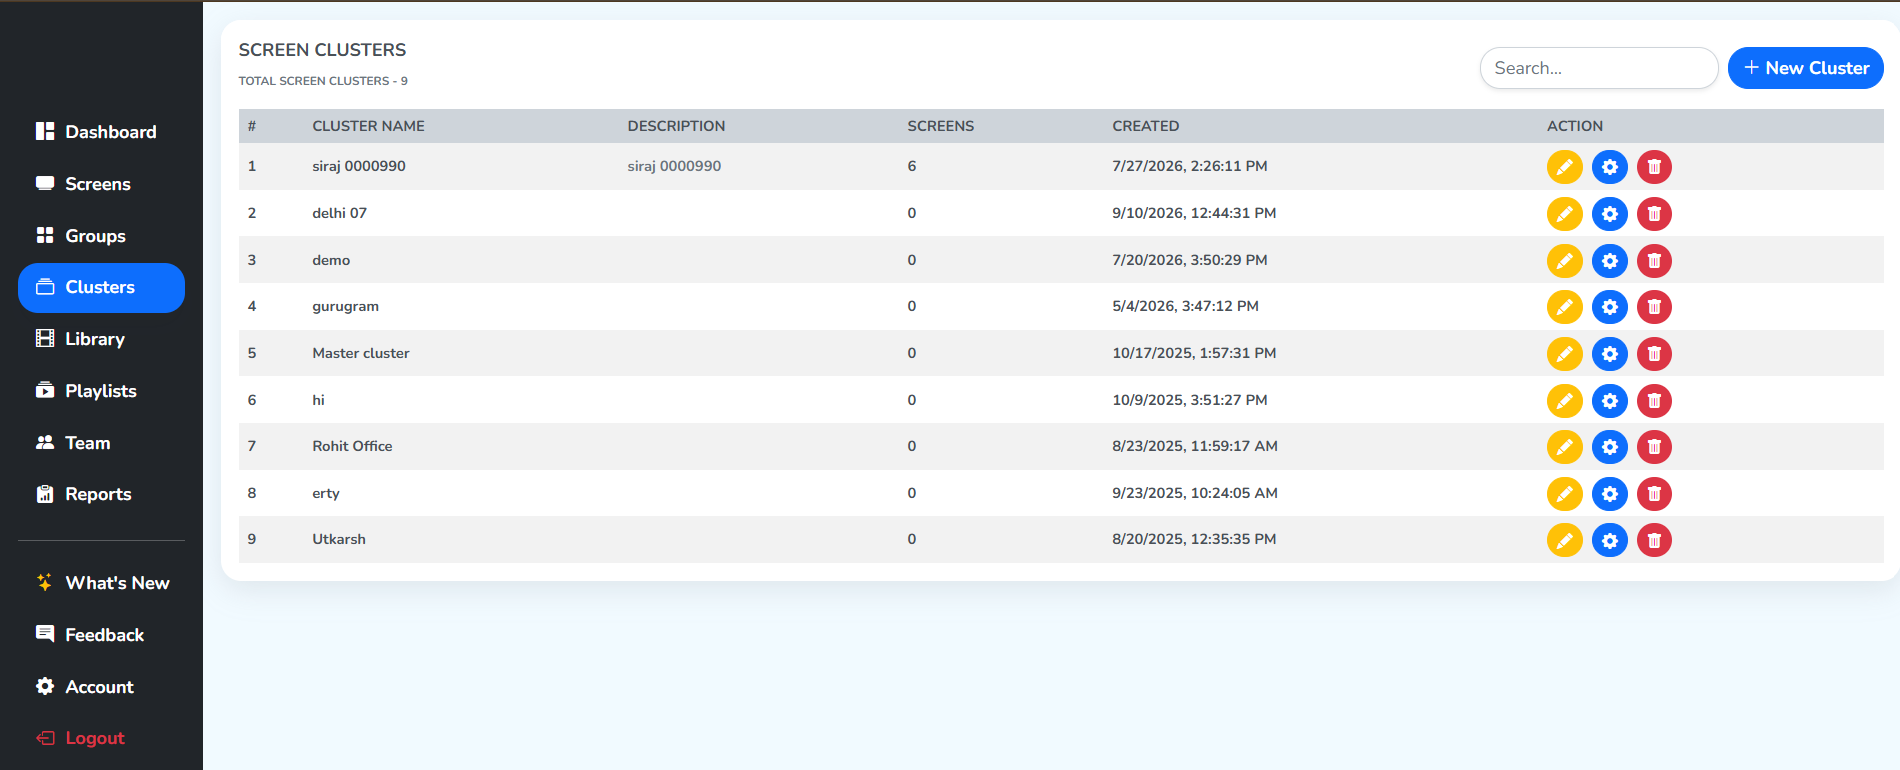 Every cluster on the account
SCREENScarries how many screens the cluster holds across its batches.CREATEDcarries the date and time the cluster was made.
Alongside them are the cluster’s number, name and description, with three icons in ACTION at the end of the row: the yellow pencil edits the name and description, the blue gear opens the cluster’s own page, and the red bin deletes it.
Find a cluster
Type in the Search box near + New Cluster in top right. The list narrows to the clusters whose name matches, as you type.
Create a cluster
Step 1: Select the + New Cluster button at the top right.
Step 2: Enter the Cluster Name, and a Description of up to 50 characters if you want one.
Step 3: Click Create Cluster.
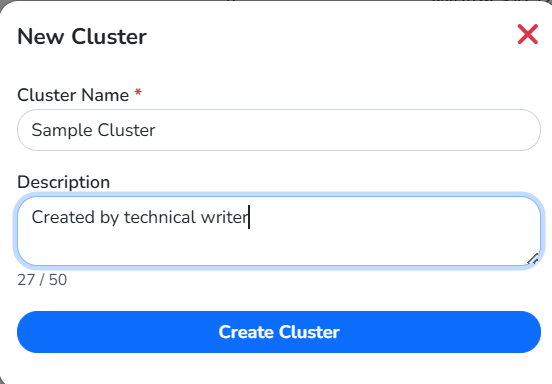 What the cluster is calledWhat it is forCounts as you typeCreates it
The cluster joins the list straight away, with no screens yet. Its batches are added from its own page.
Edit a cluster
Step 1: Click the yellow ✏️ Edit button next to the cluster you want to modify.
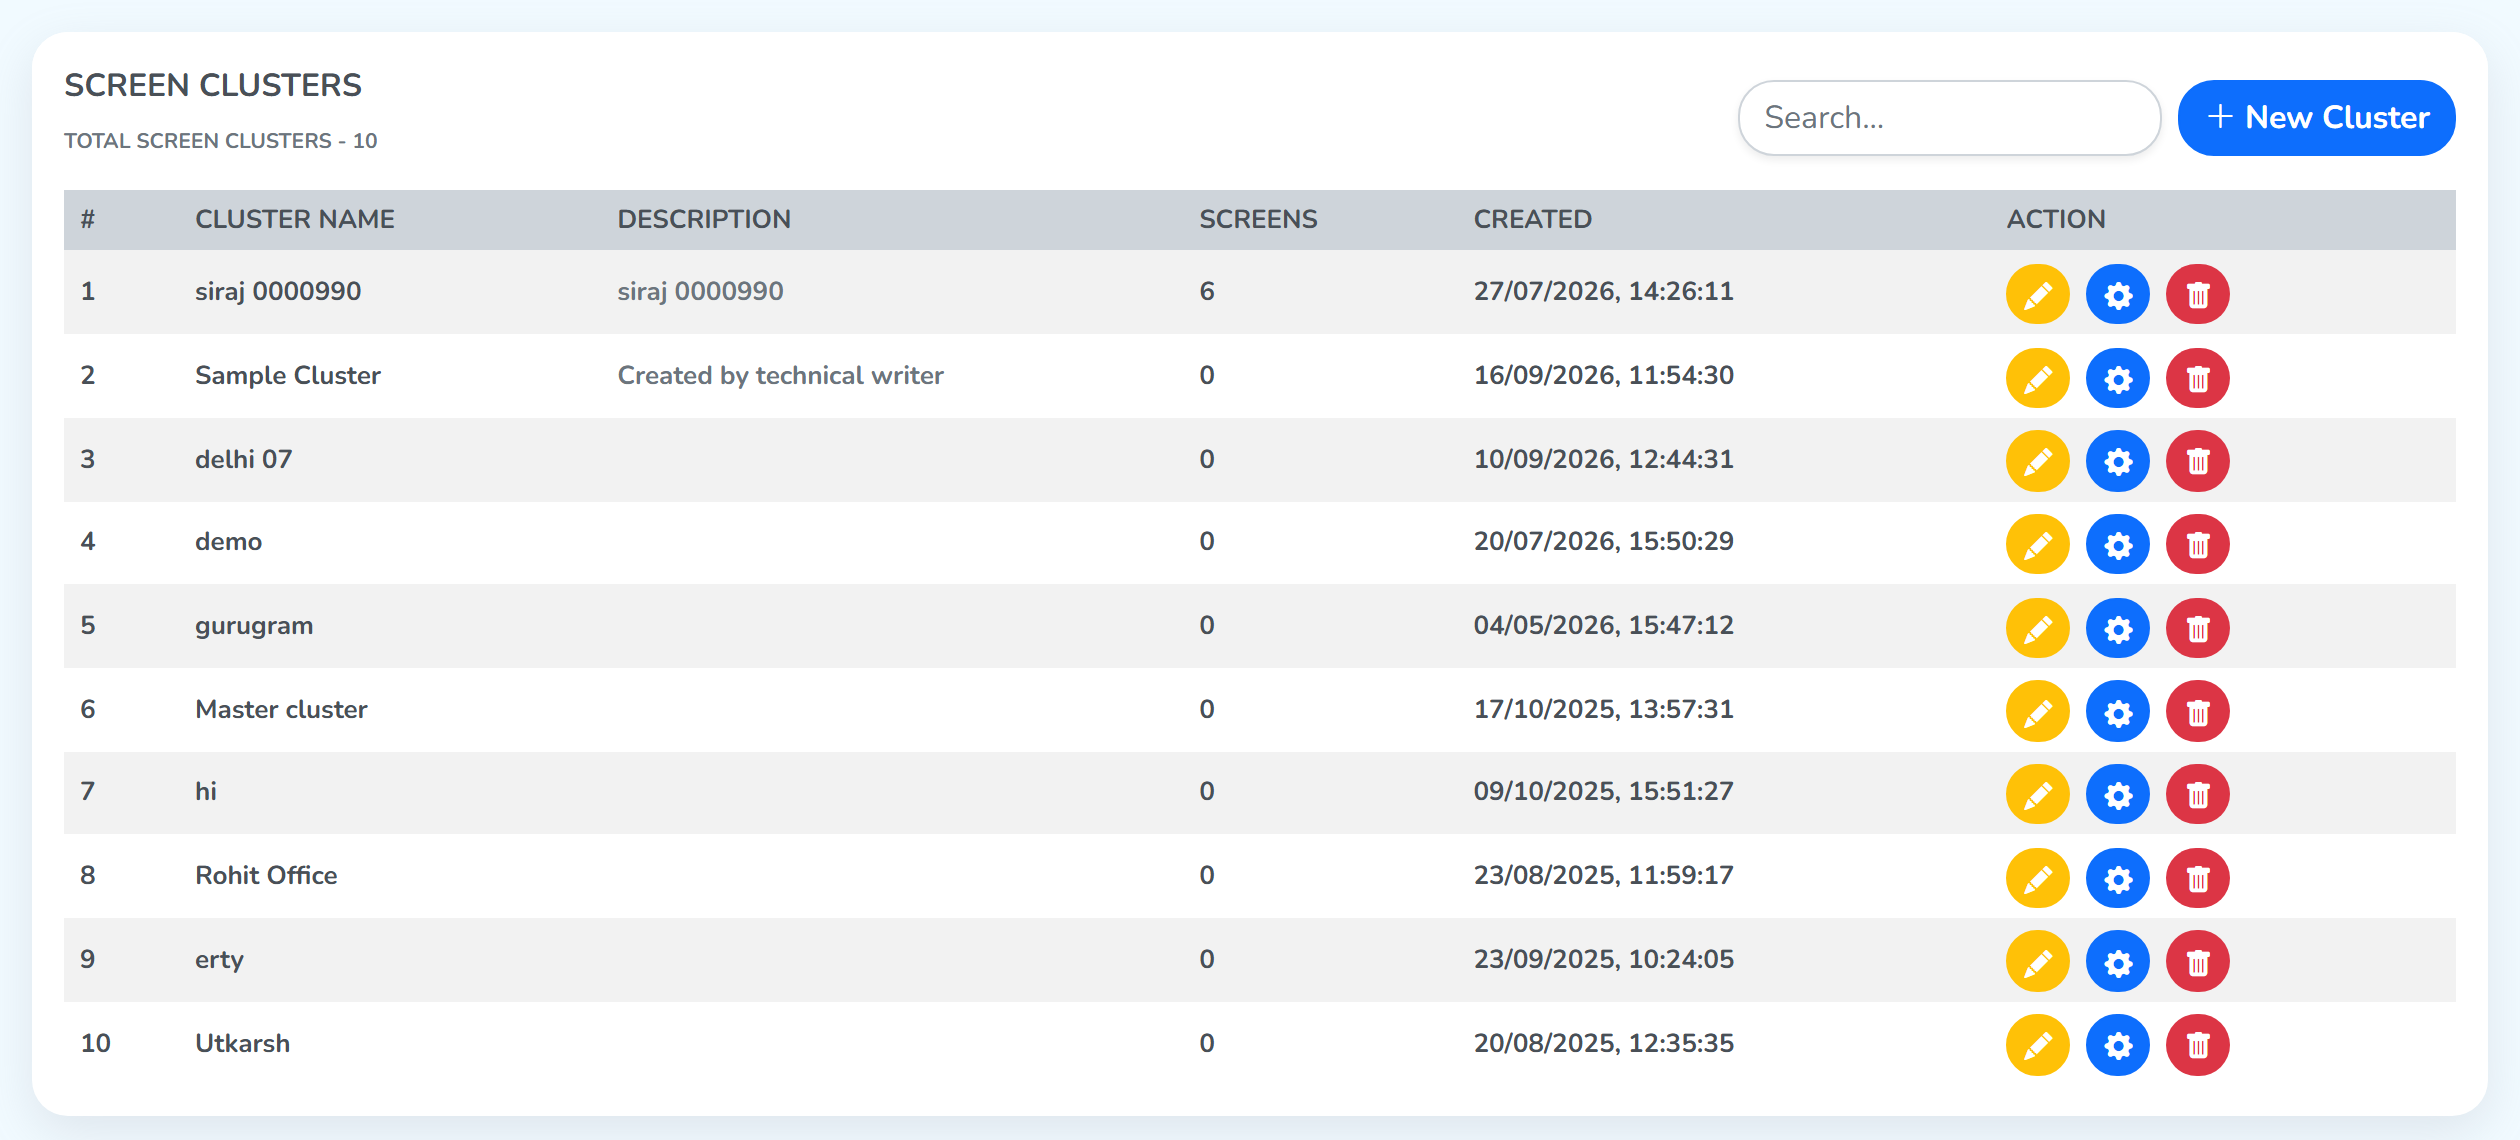
Step 2: Update the Cluster Name or Description as needed.
Step 3: Click the Update Cluster button to save your changes.
The list shows the updated name and description straight away.
Cluster Settings
The blue gear opens the cluster’s own page, with the cluster’s name at the top and its batches below. The controls across the top belong to the whole cluster:
Restart Screensrestarts every screen in the cluster.Live Datashows what each screen is playing right now, so you can see the whole wall at a glance.Synckeeps the screens playing together. Turned off, each screen plays the same content at its own pace.FilesandPlaylistset where a batch’s content comes from: media files you pick yourself, or a saved playlist.Savesends the setup to every screen at once.Add Batchcreates a batch inside the cluster.
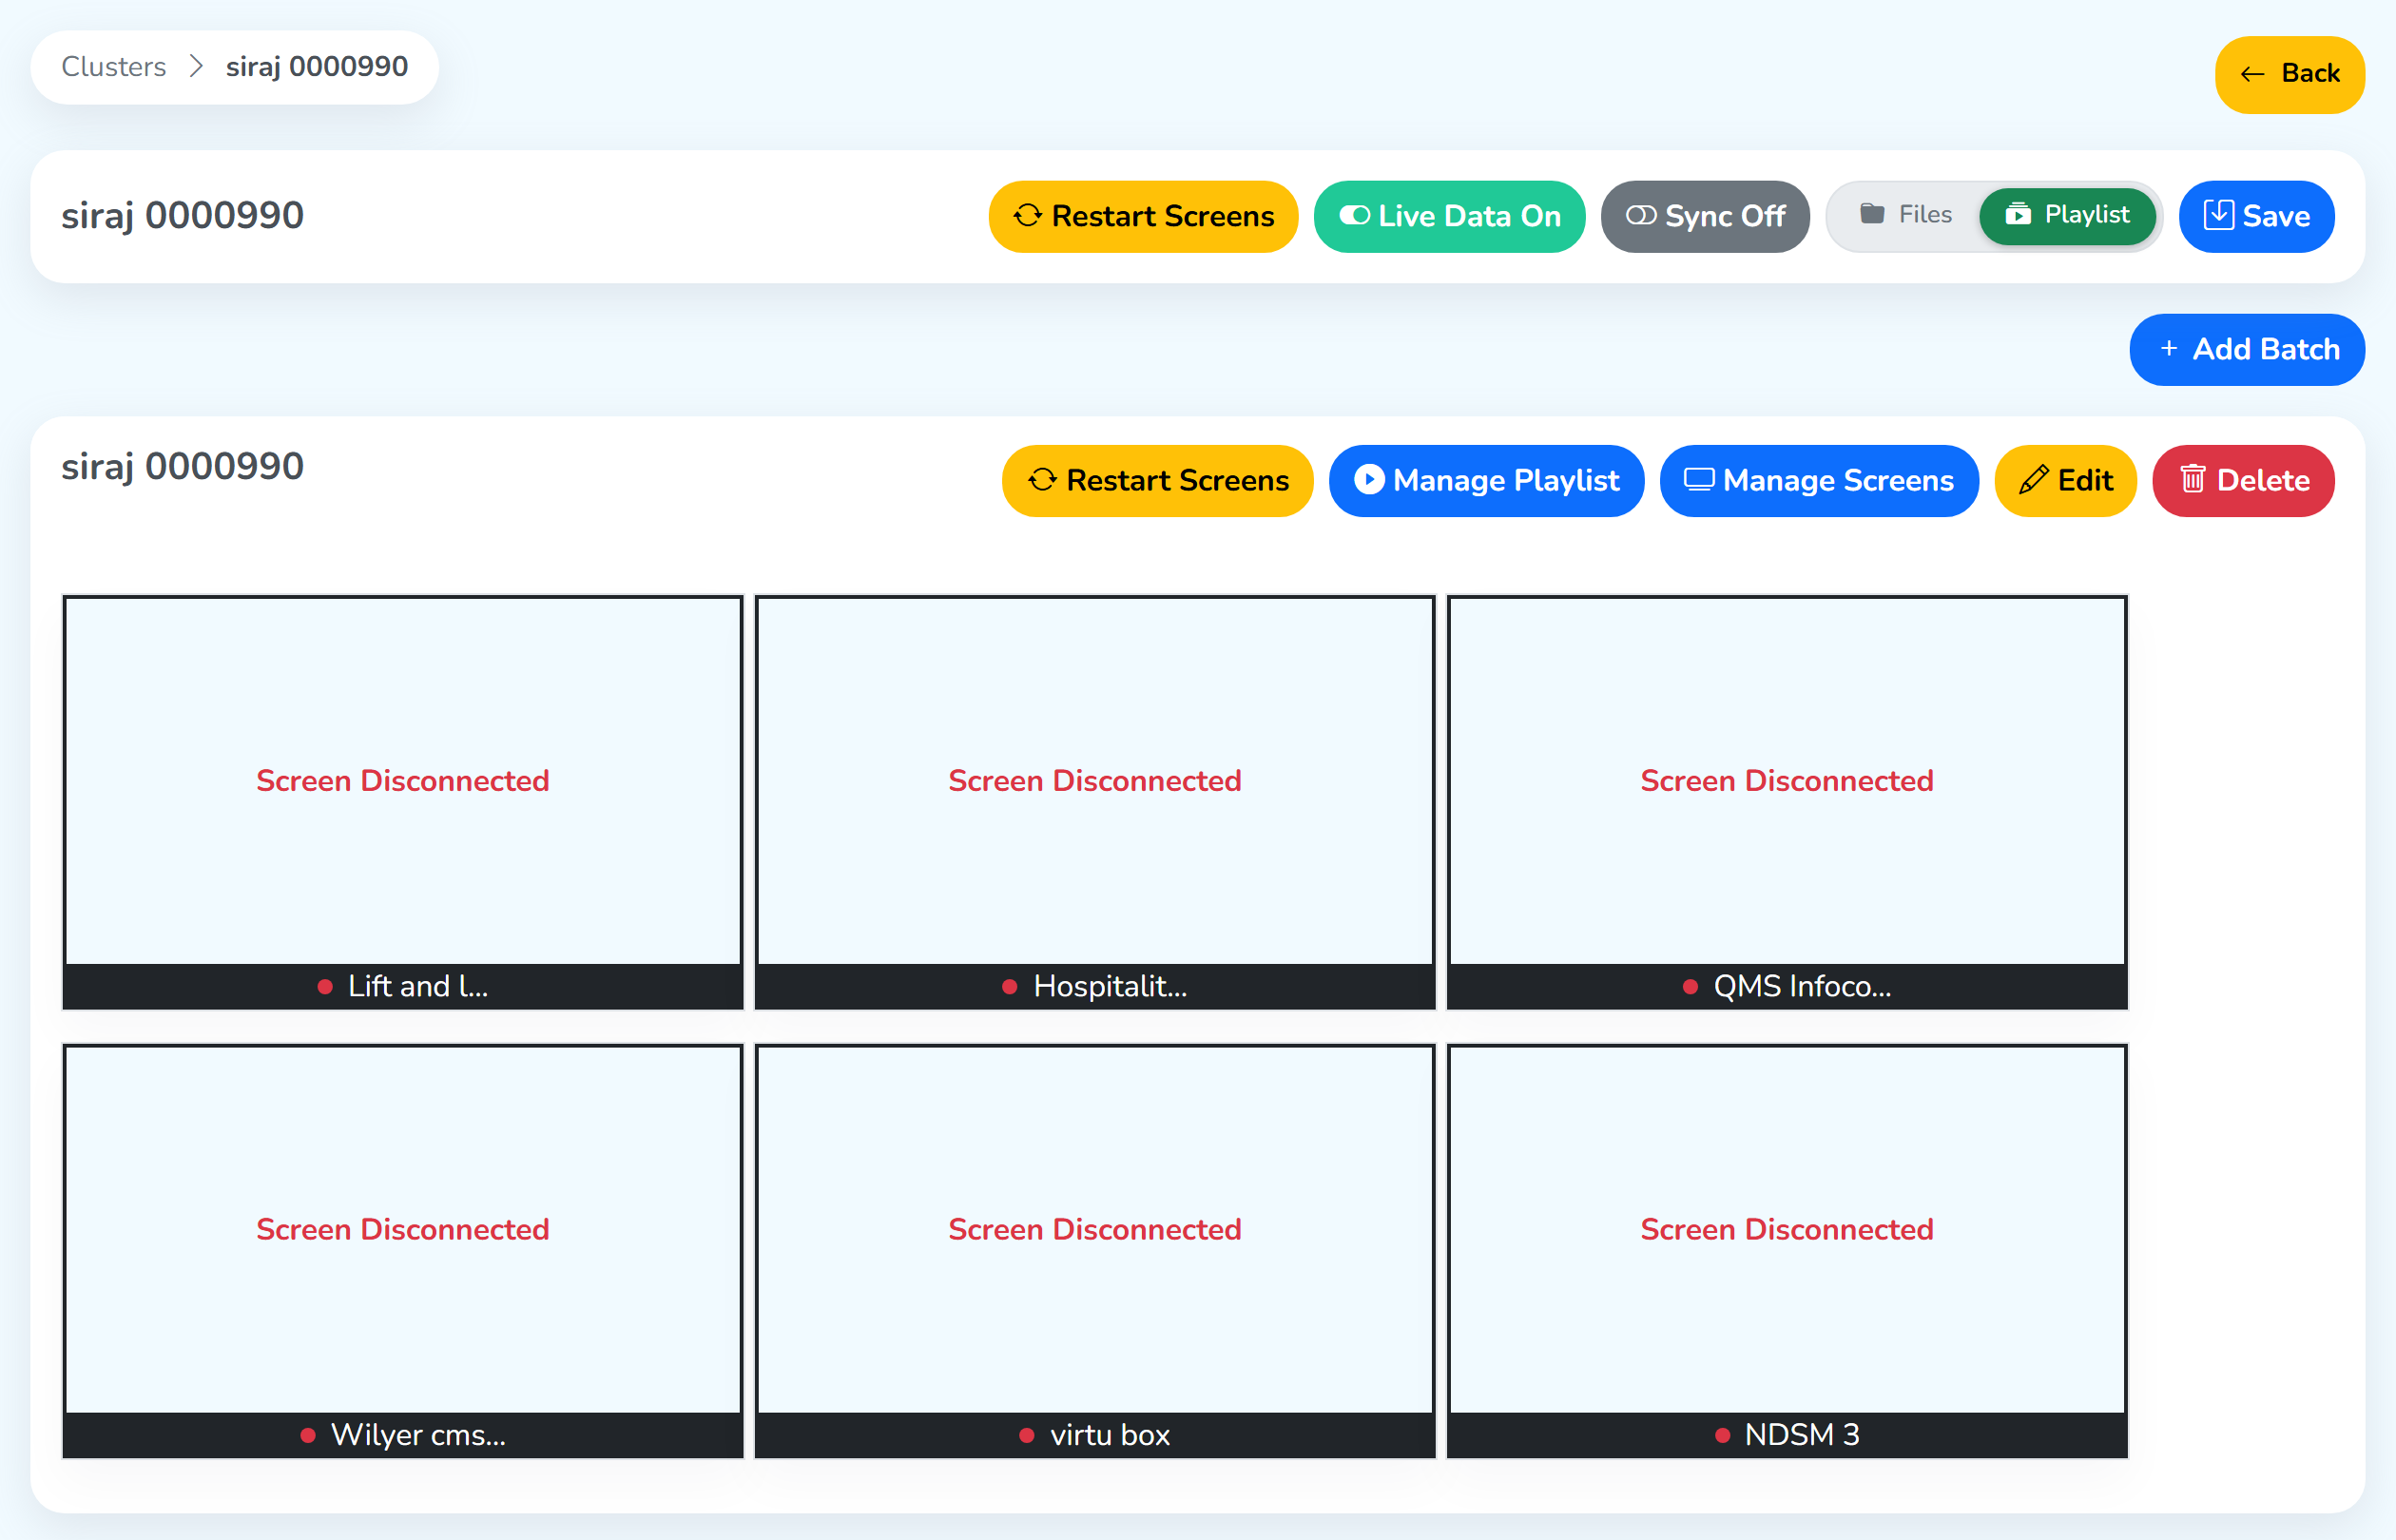 Controls for the whole clusterOne batch, with its screens
The page, its batches and the sync behind them are covered in the Batch Settings document.
Delete a cluster
Step 1: Click the red 🗑️ Delete button next to the cluster you want to remove.
Step 2: The window asks you to confirm. Click Delete.
The cluster leaves the list. Its screens stay on the account, and the batches they were in go with the cluster.
Clusters in a group
A cluster can belong to a group or to any of its subgroups. The linked cluster shows at that level of the group settings page, in the tree and as a card with its number of batches and screens. Its screens count toward that level and every level above it. This keeps every screen a group is responsible for in one place, including the screens that play together as a cluster.
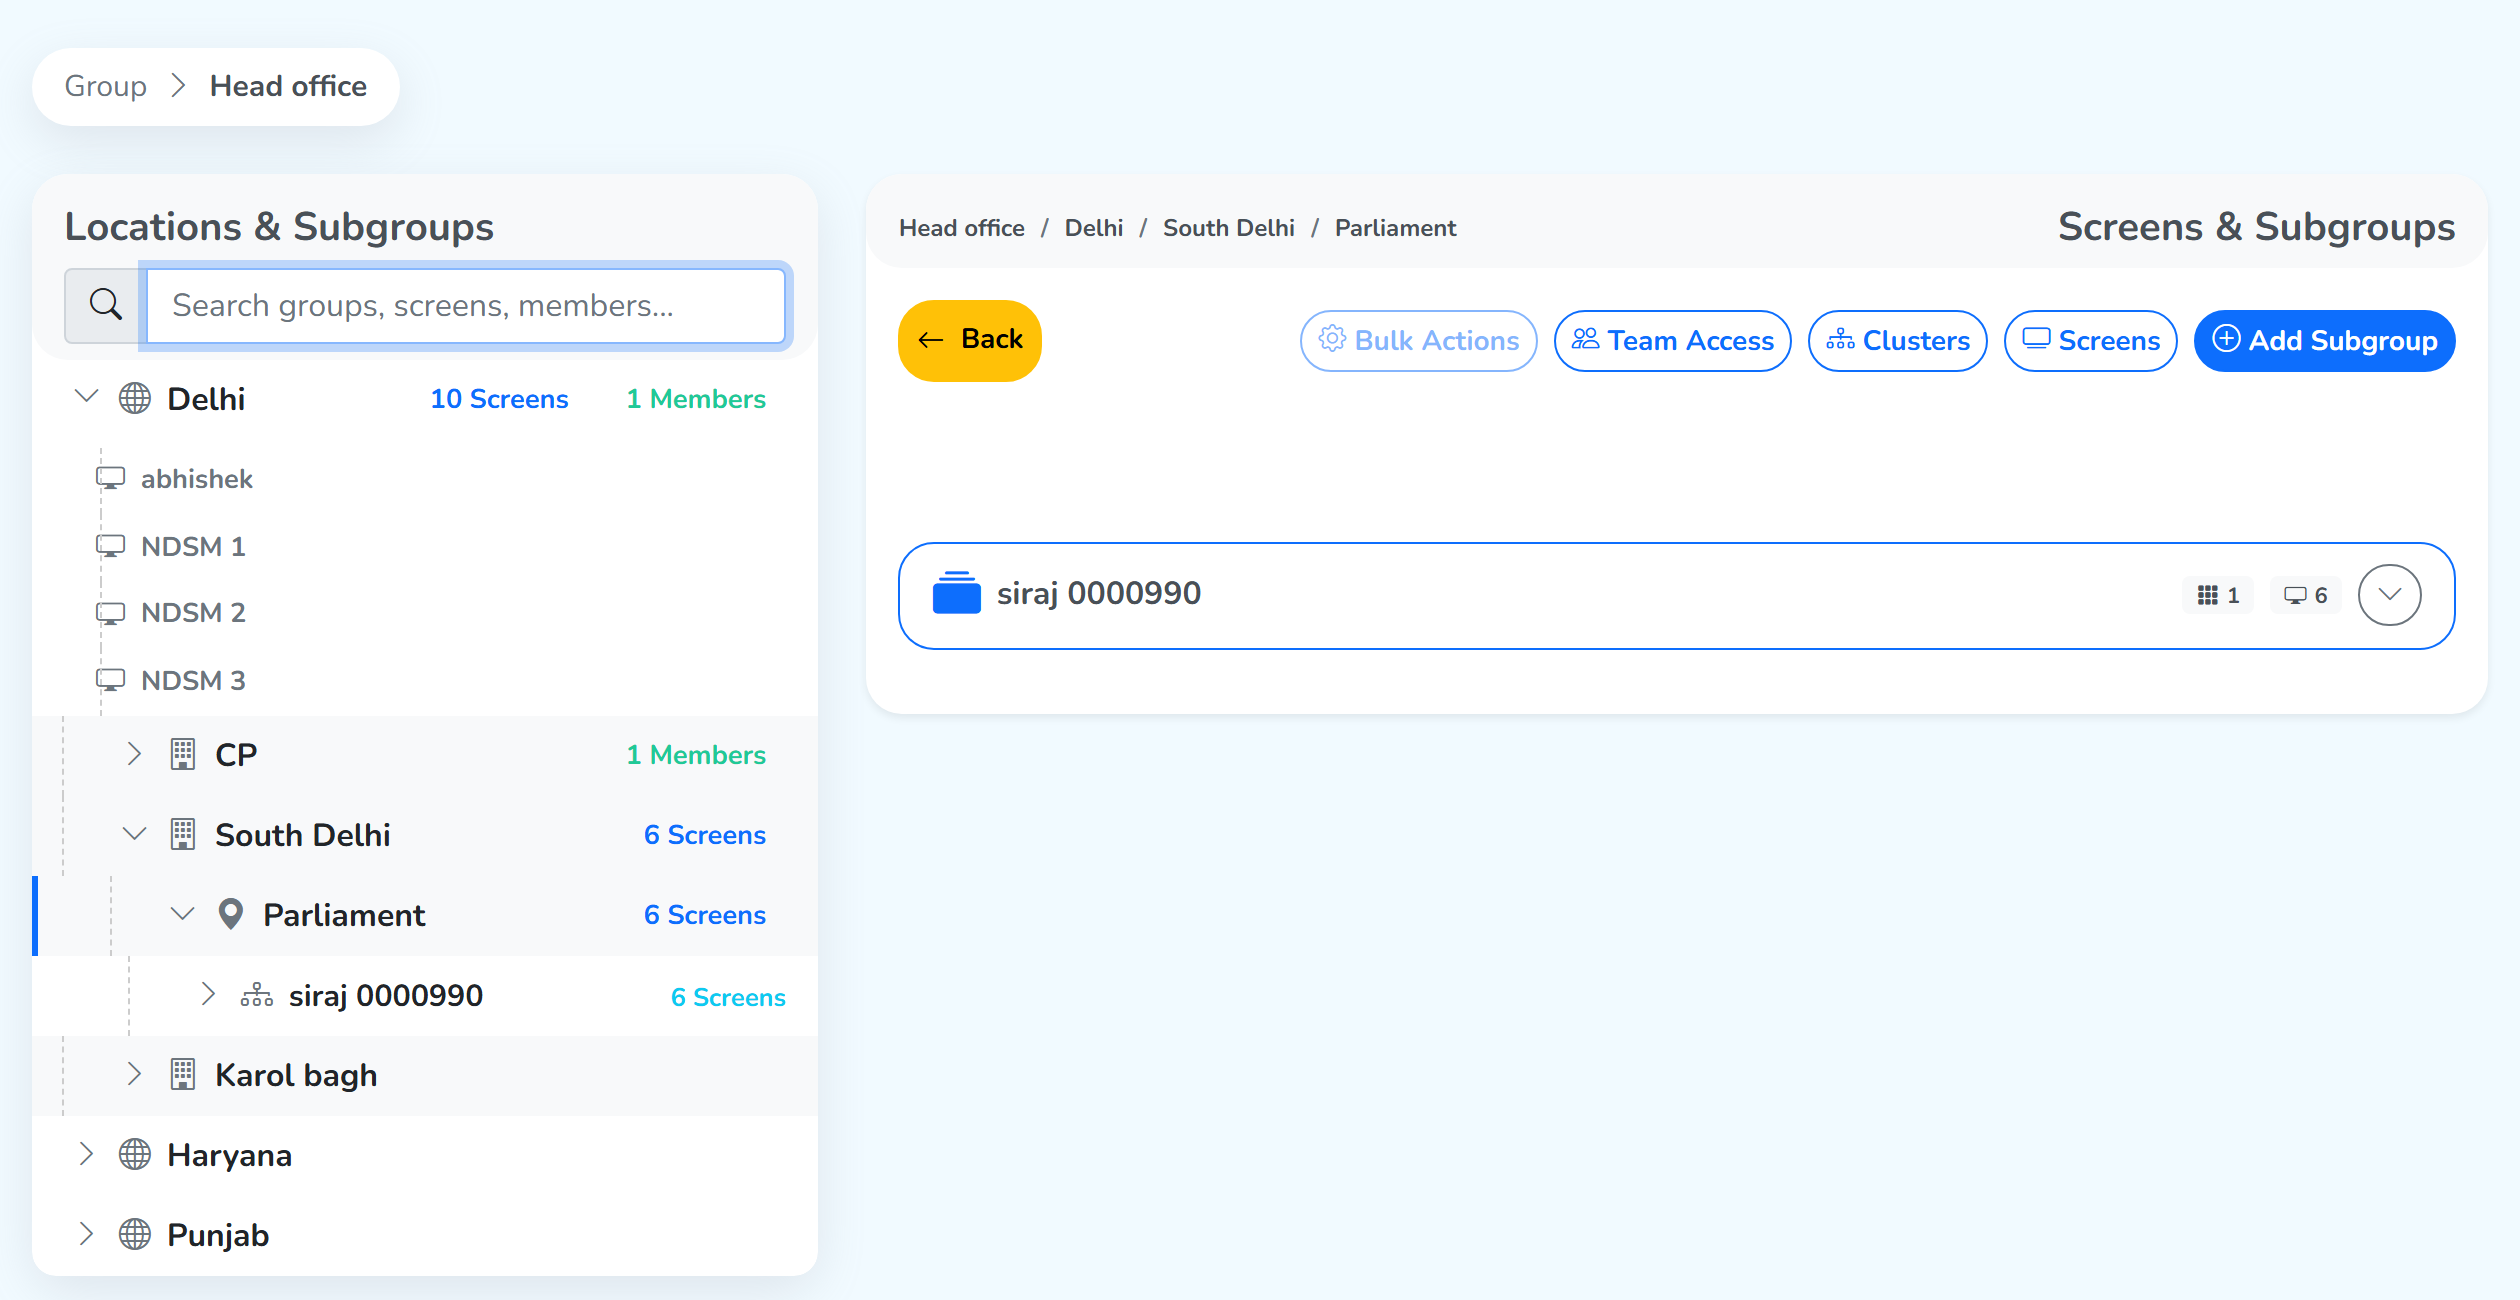 Its batches and screensGreyed out at this levelThe cluster in the tree
The cluster’s content stays managed from the cluster’s own page. Bulk Actions works on the screens that sit directly at a level, so it is greyed out at a level that holds only a cluster.
Clicking Clusters opens Manage Clusters, where you pick the clusters that belong to that level. The steps are in the Group Settings document.