Group Settings
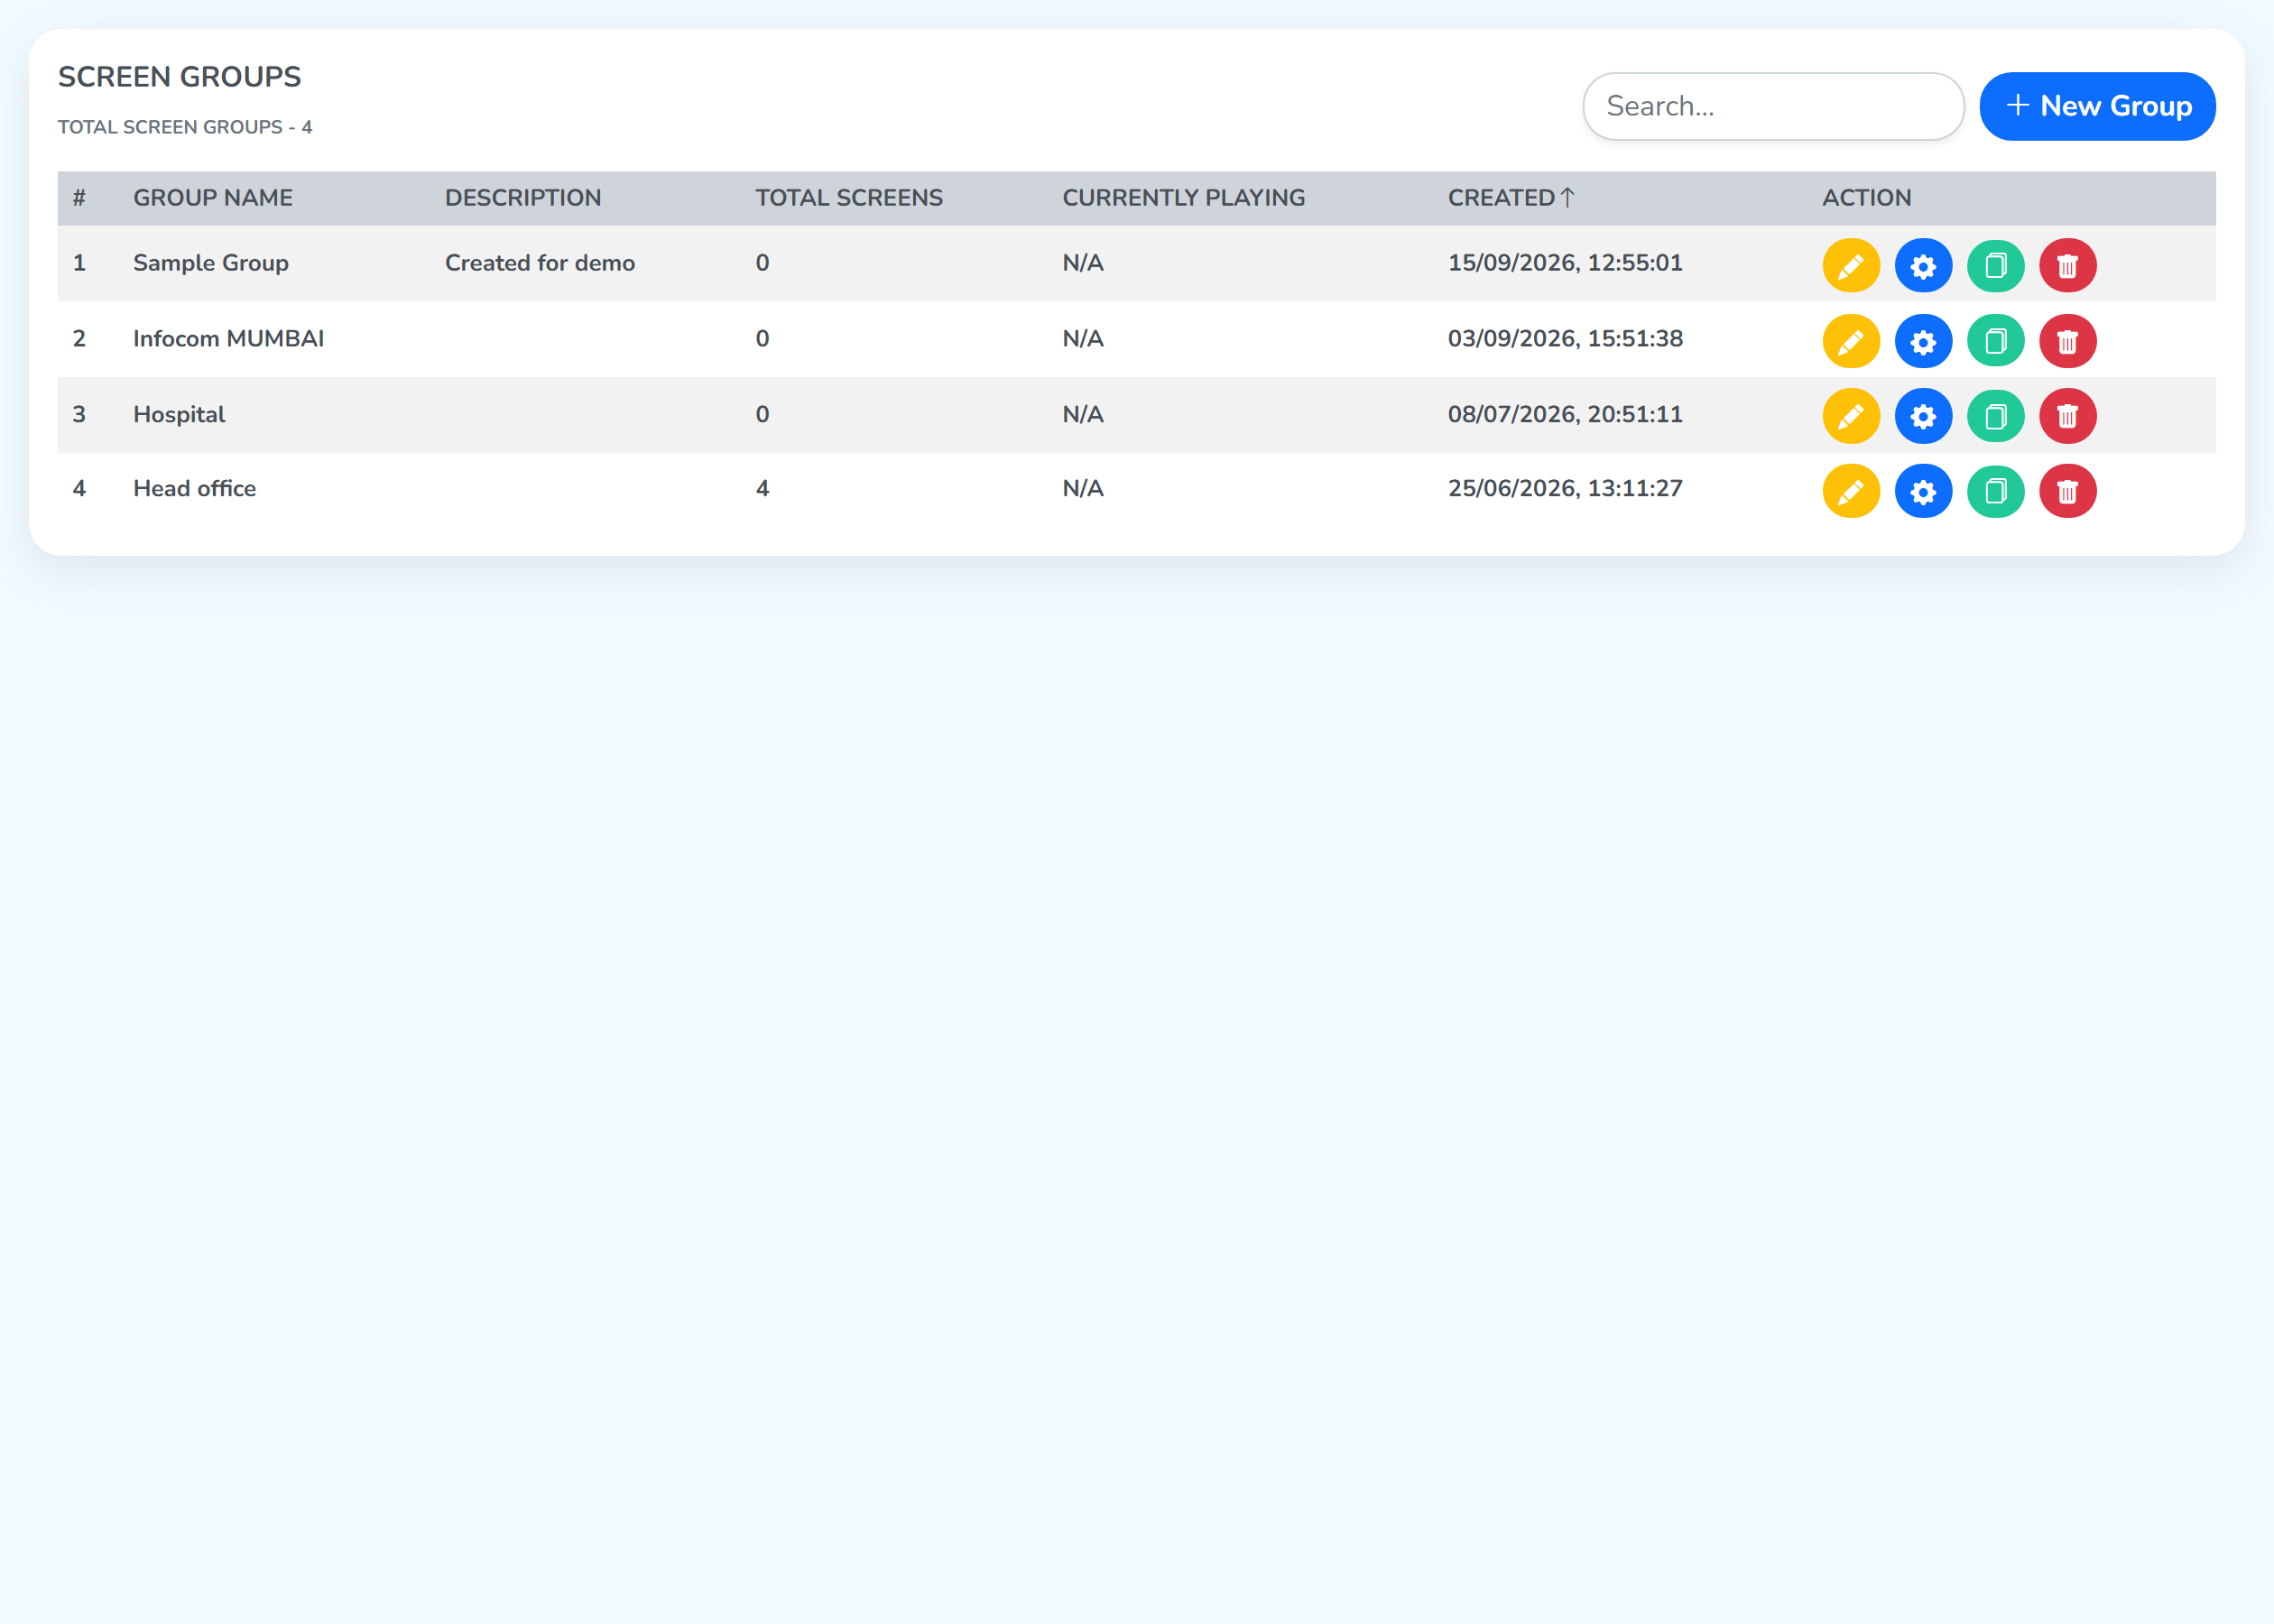
Group Settings page
Step 1: Click the blue ⚙️ Settings button next to the group you want to open.
The group settings page opens with the breadcrumb Group › and the group’s name at the top, and two panels below them.
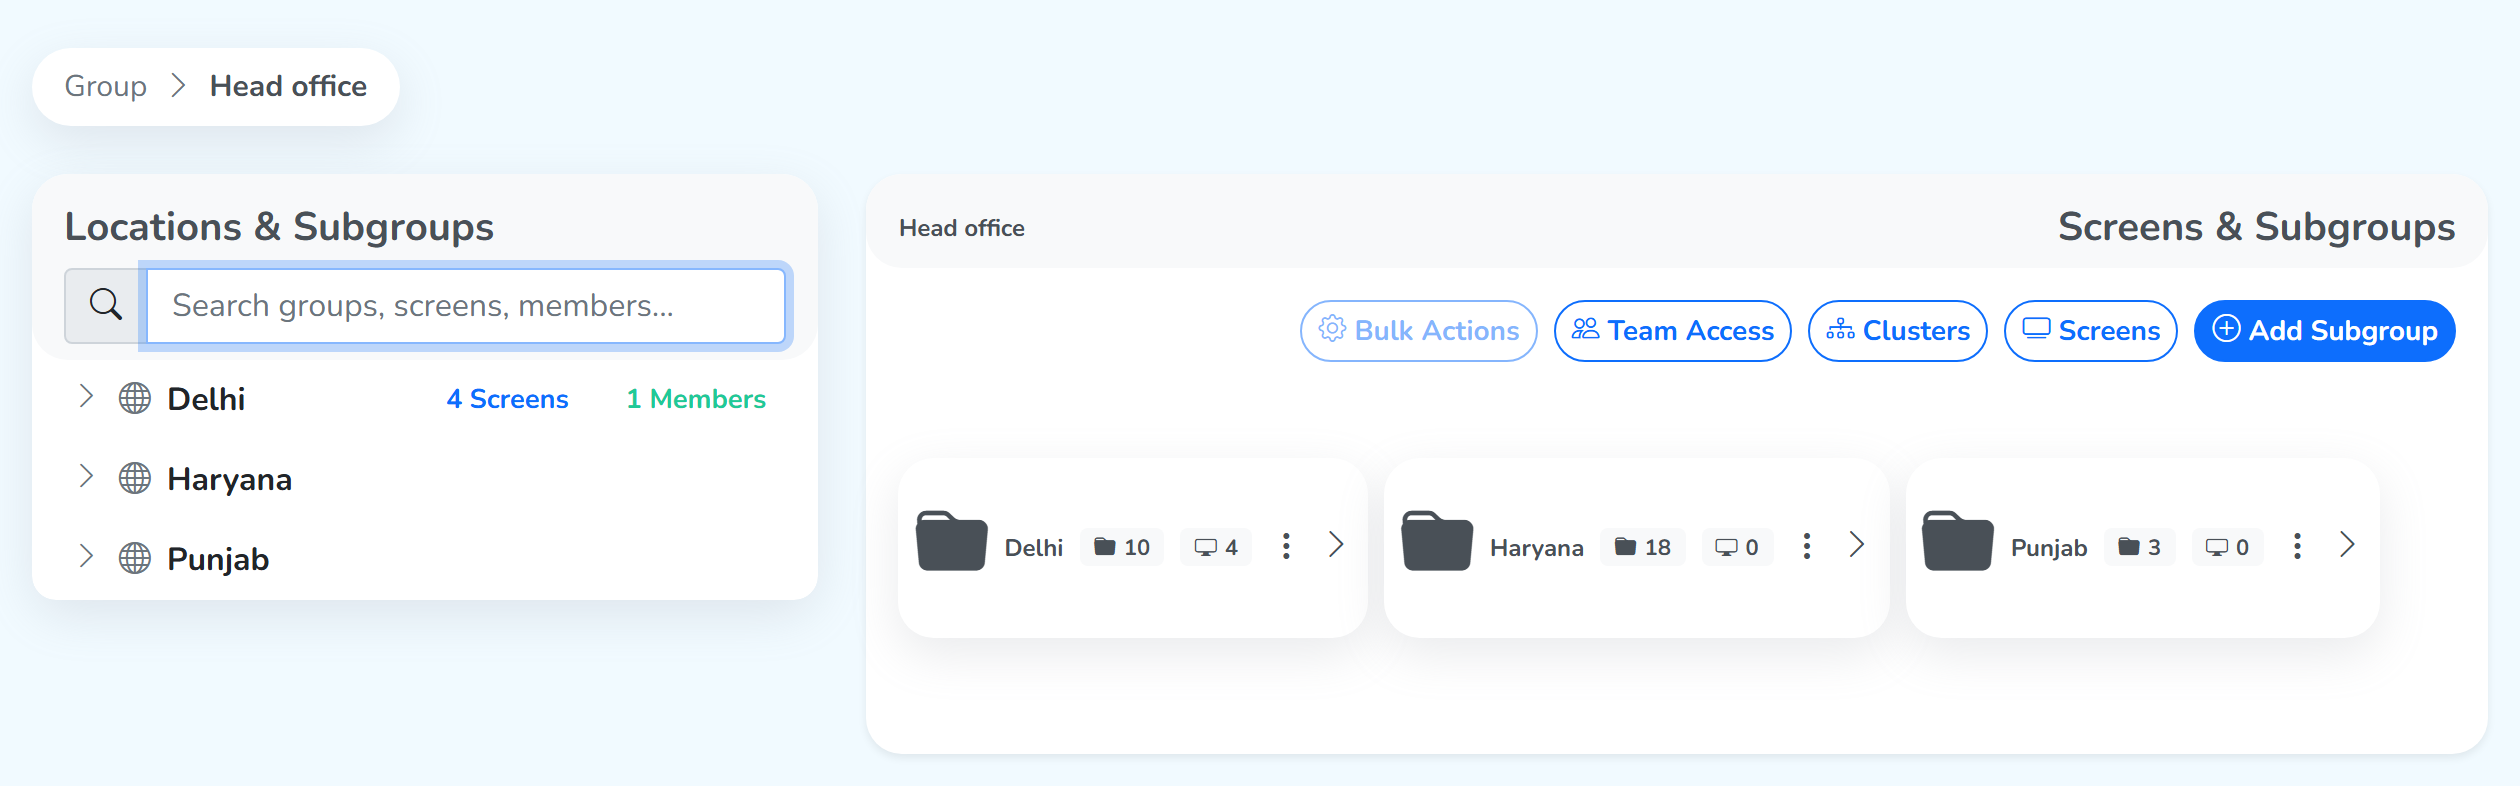 Panel on the leftPanel on the rightThe group you are in
Locations & Subgroups, on the left, is the tree of the group. Each row carries a subgroup’s name with the number of screens and members it holds. Click a name to open that level, or type in the search box to find groups, screens and members. Searching brings up the blueMatchbadge: it sits beside each name that matches what you typed, and the levels above that name open up, so the badge marks the result while the rows above it show where that name sits in the tree.Screens & Subgroups, on the right, shows the subgroups and screens at the level you are in, as cards. A subgroup card carries a folder icon beside its name, and a screen card carries the screen’s name, itsOnlineorOfflinestatus, its orientation and when it was last seen.
How to reach a different level: on the left, expand the names and click a name to move inside that level. On the right, click the > on a card to expand it and move inside its level.
Bulk Actions
Bulk Actionsworks when there are screens on the right to select and perform actions on.
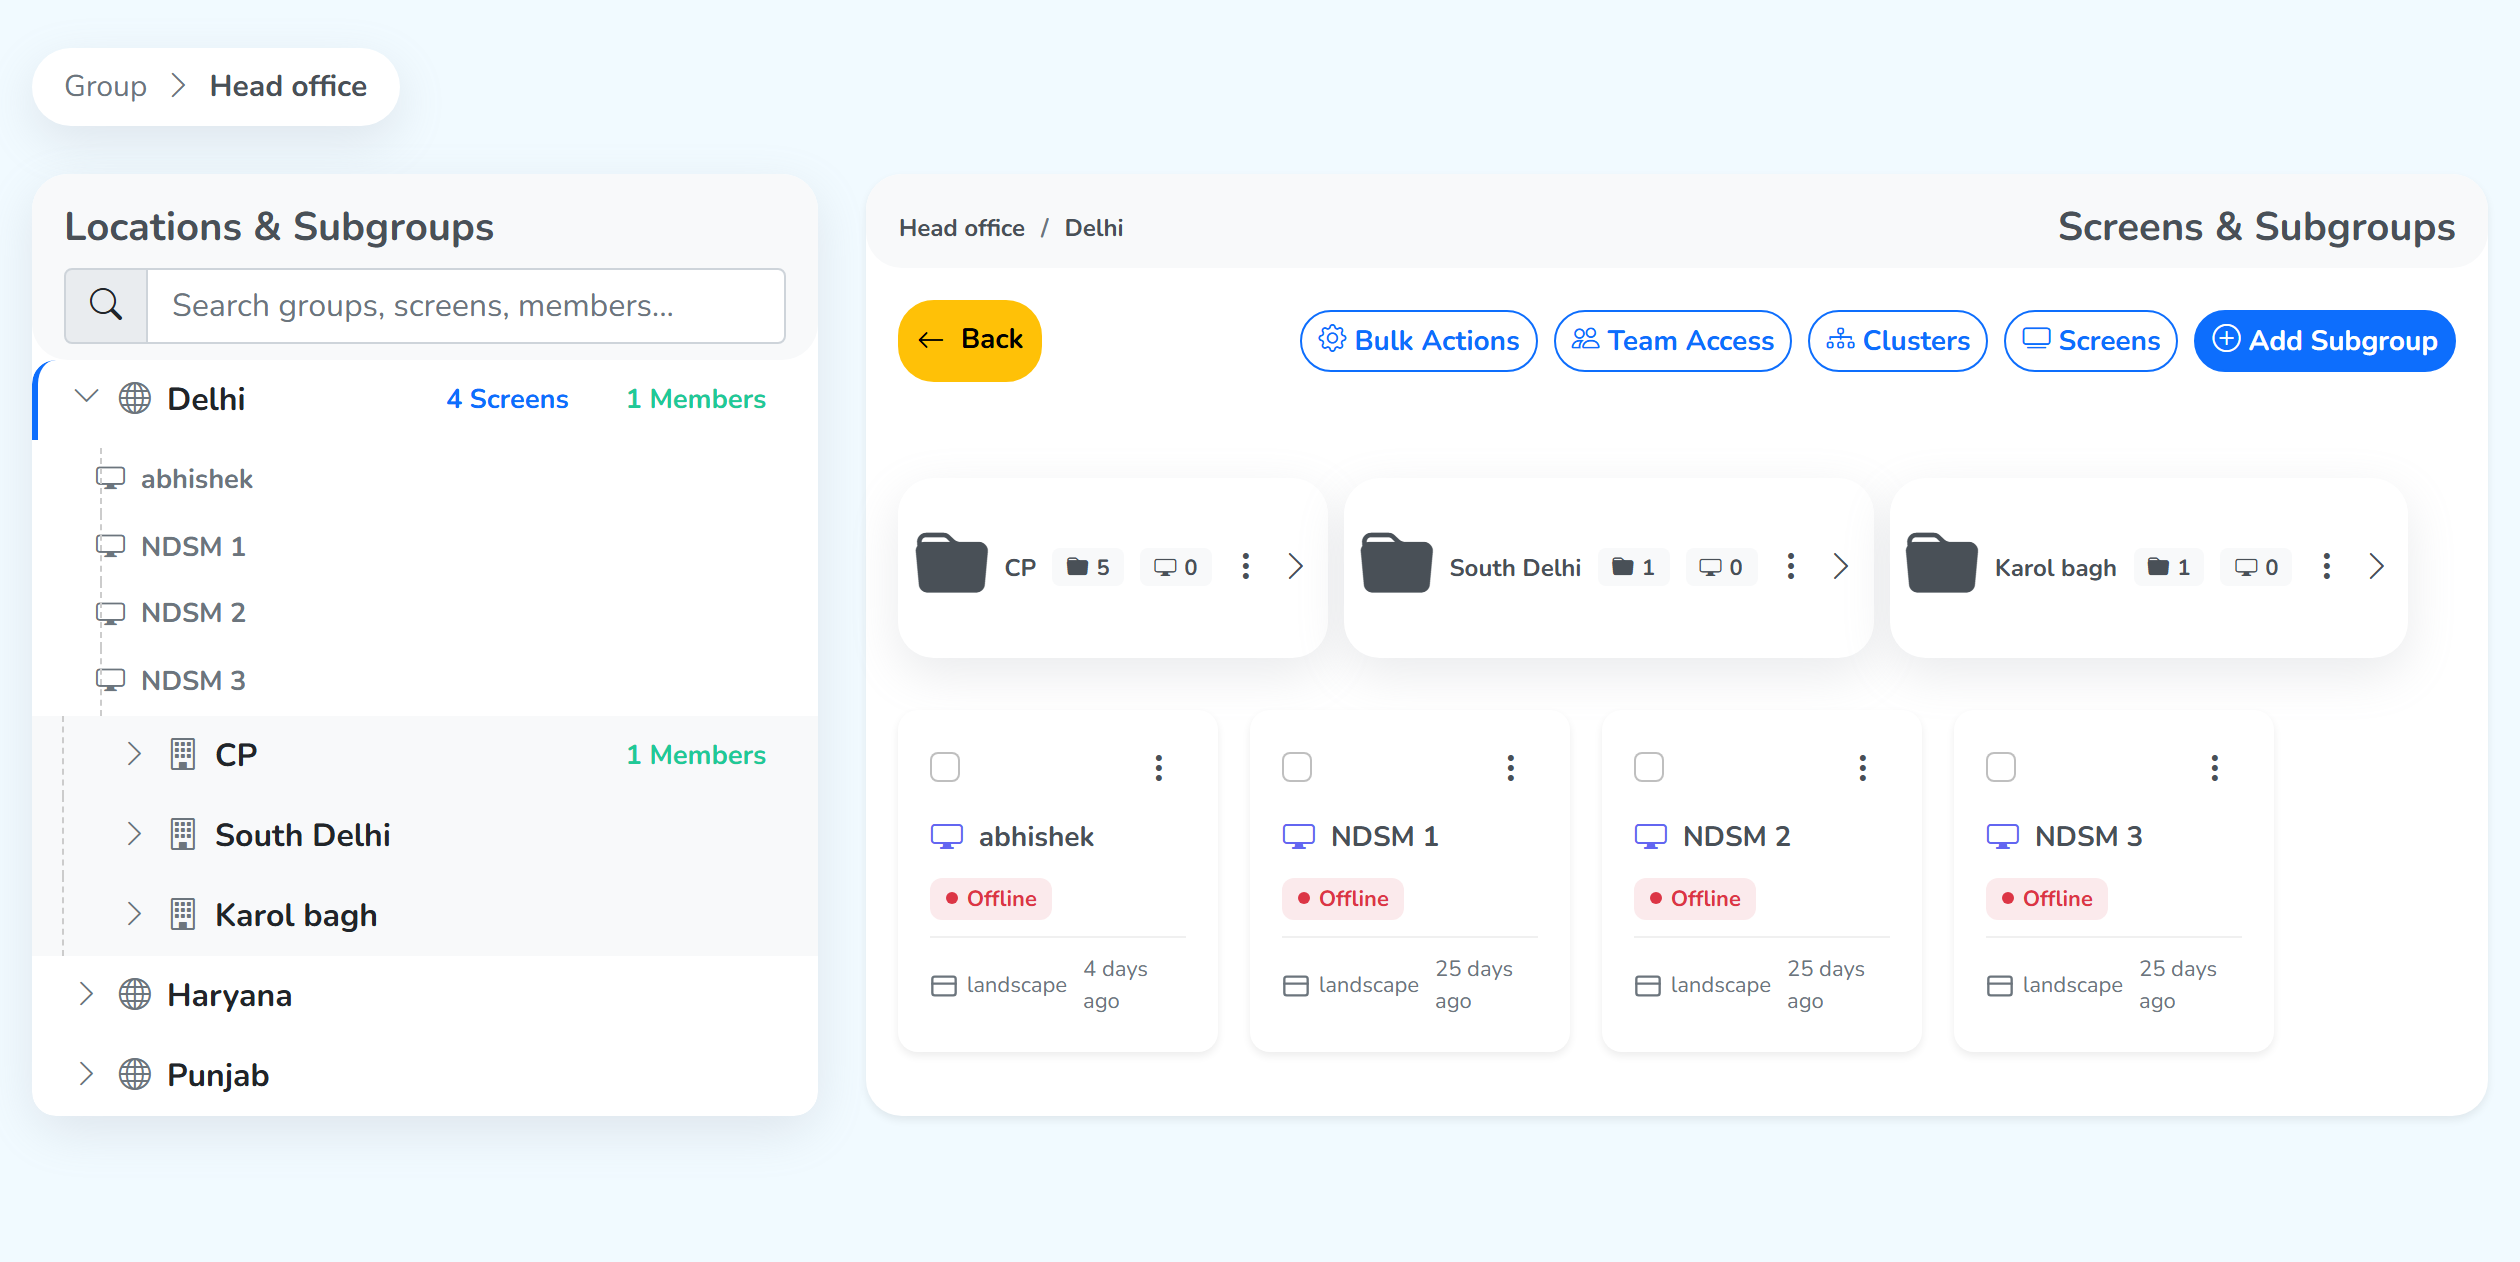 Active hereScreens at this level
Click Bulk Actions to open Screens Operations. The screens at that level come in already selected, and Selected Screens, on the right, lists them with their ID, name, status and what they are playing.
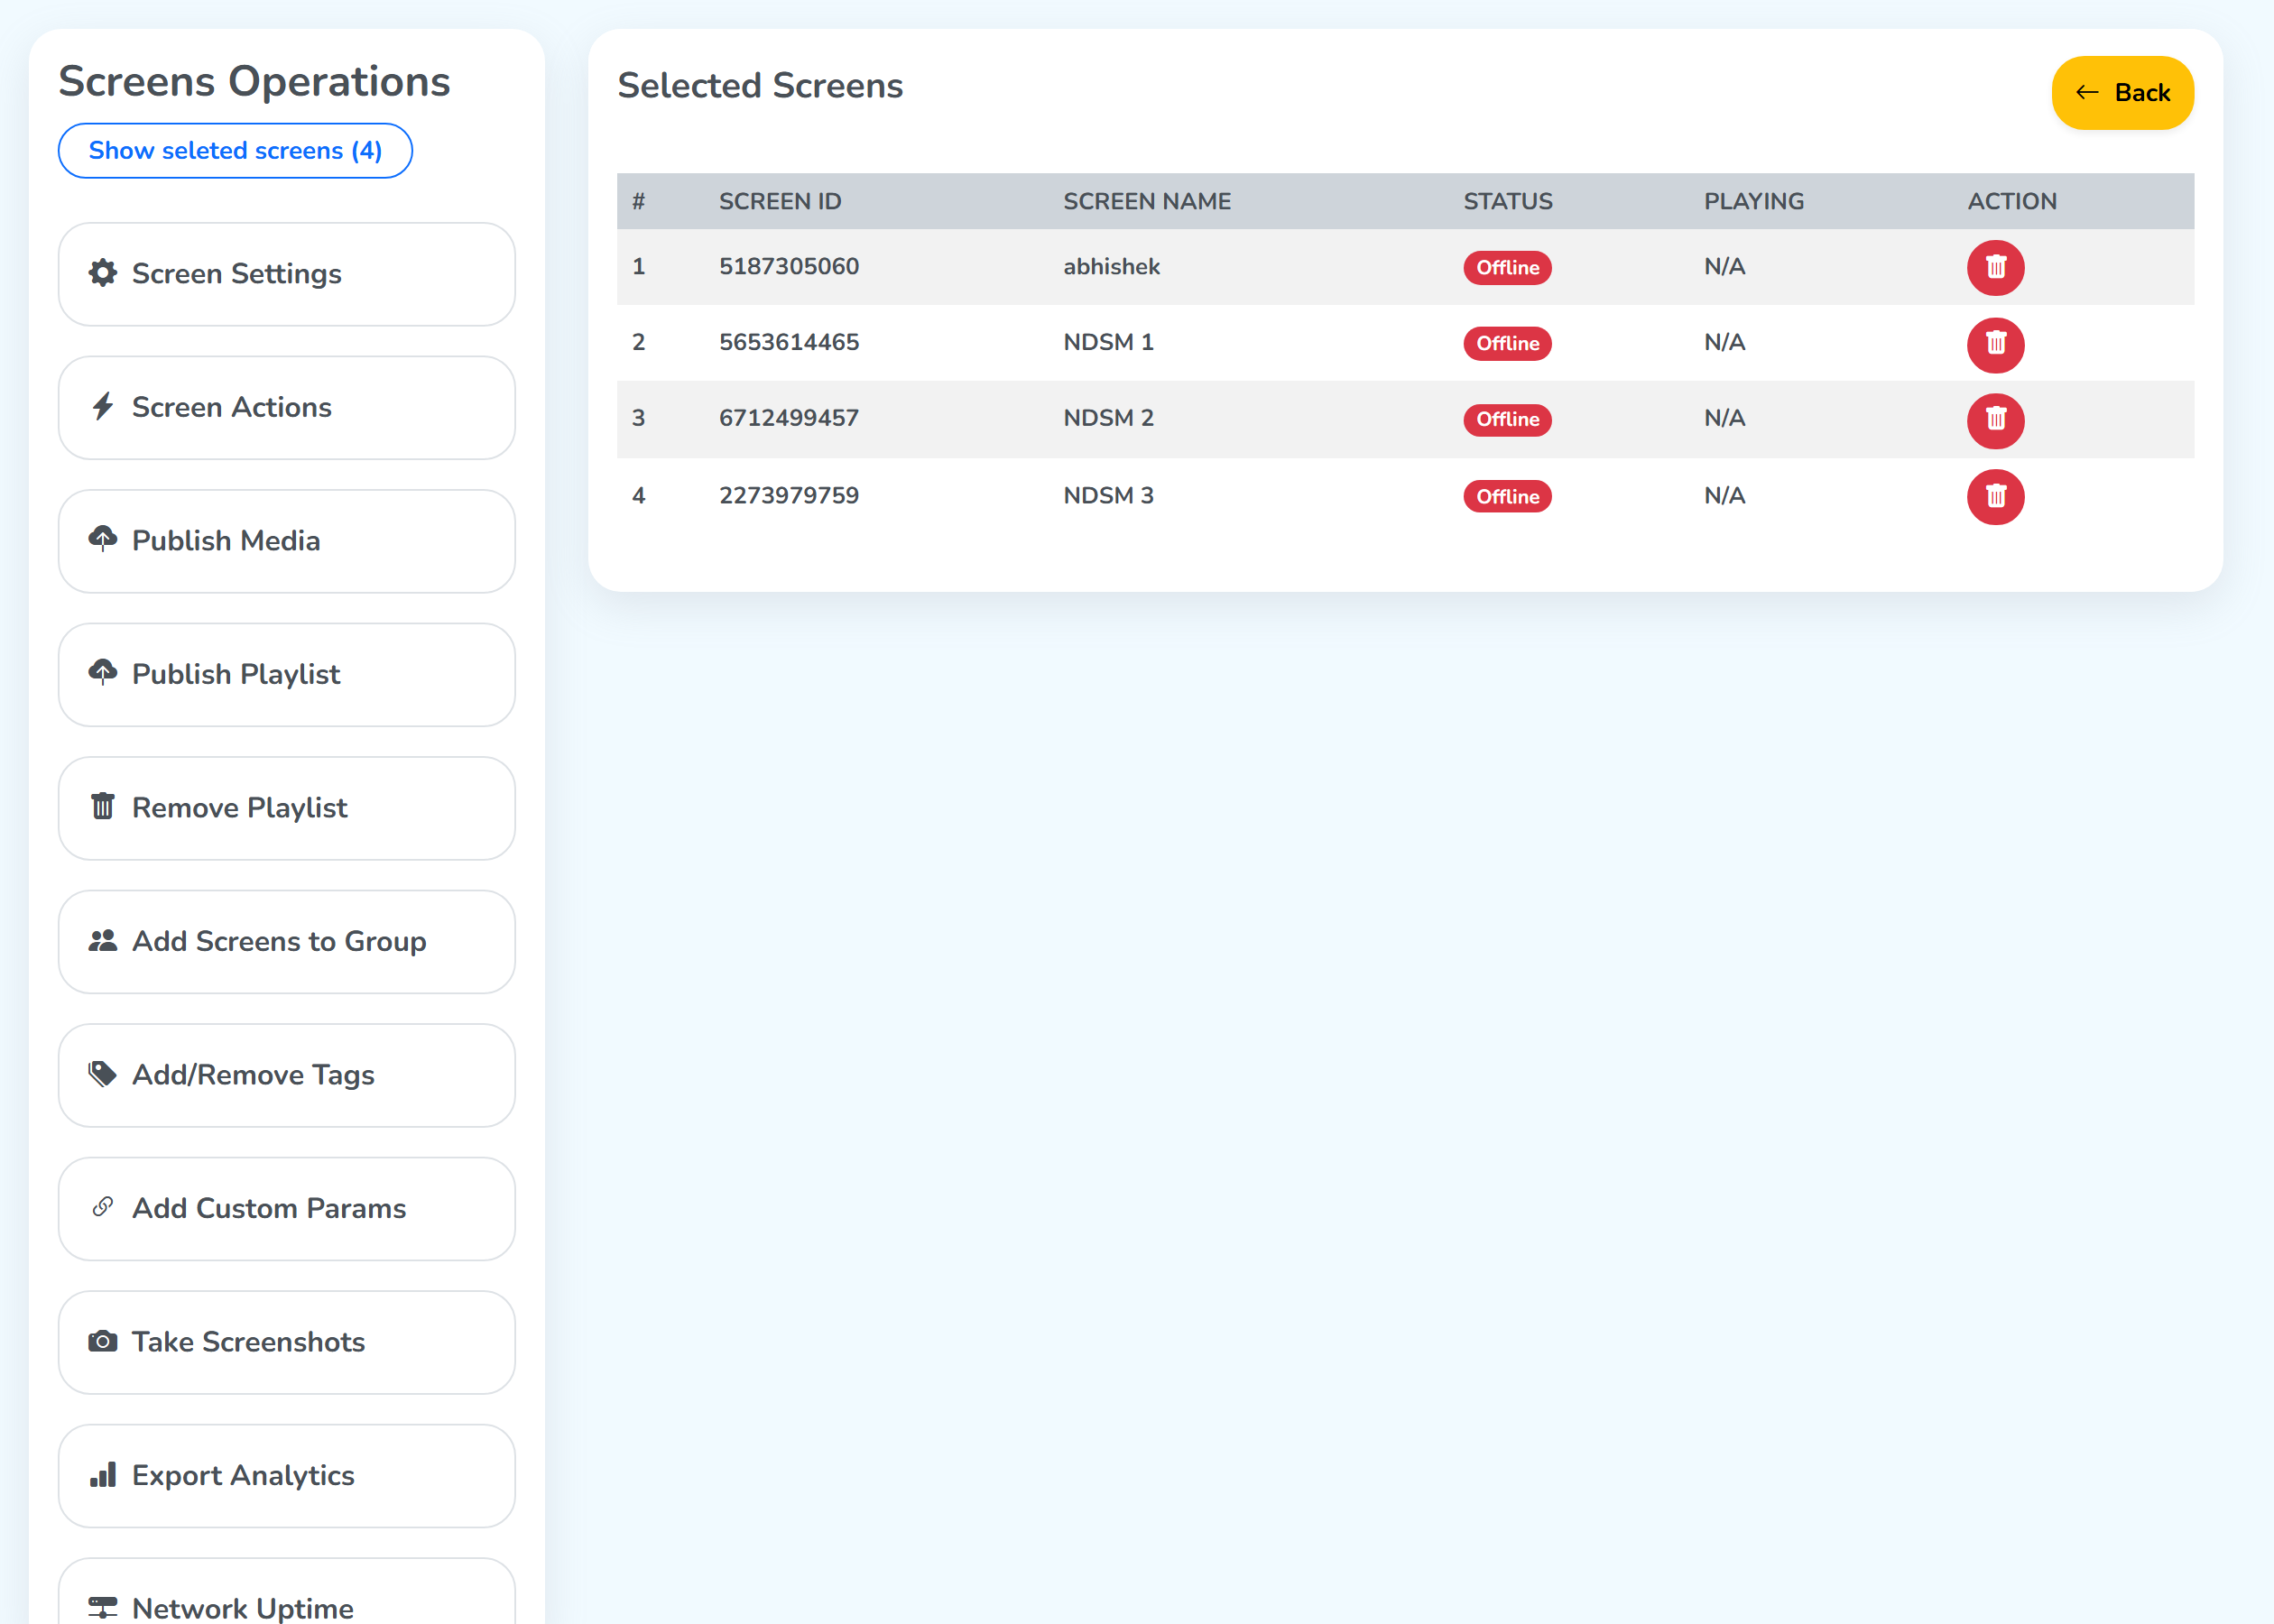 The screens from the open level
Every operation on this page is explained in the Bulk Operations document, under Screens.
Team Access
For more details about this section, read the Team document.
Click Team Access on the level you want to give access to. Manage Team Access opens.
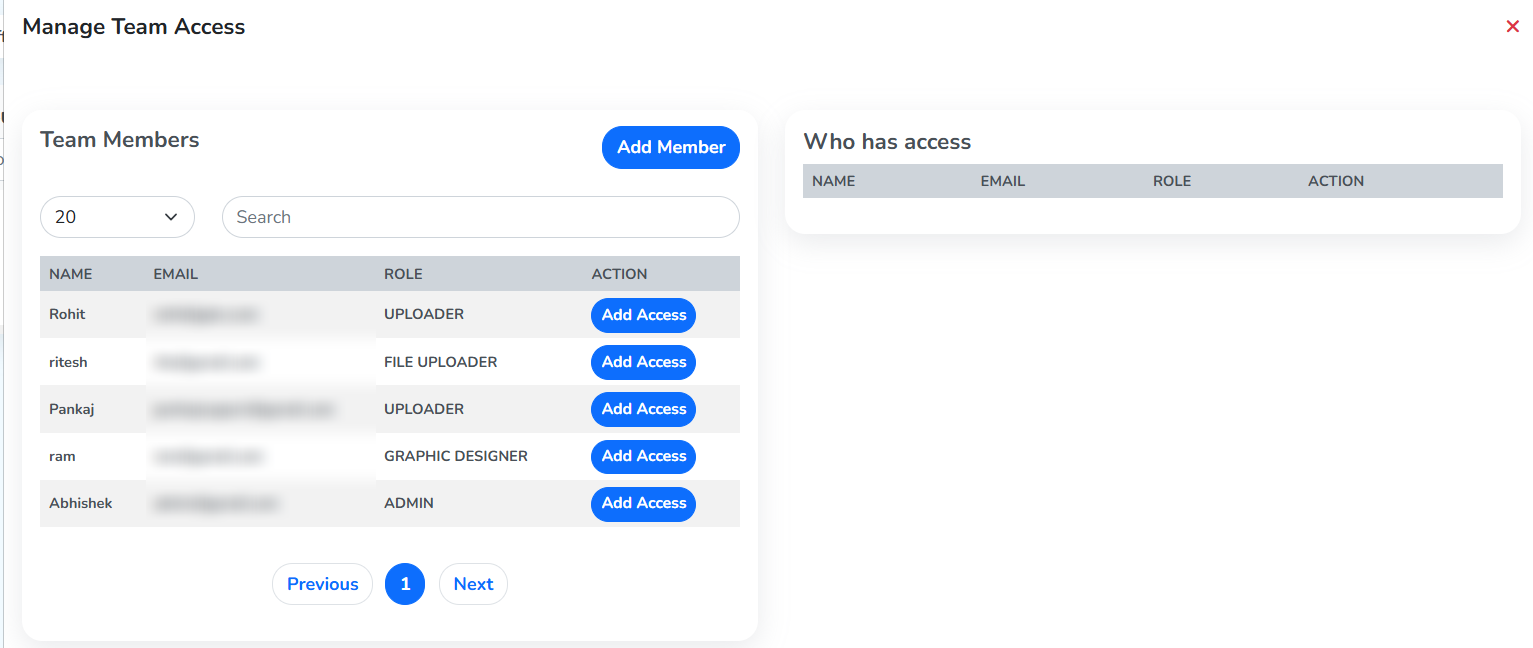 New memberHas accessGives access
Team Members, on the left, lists your team with each member’s name, email and role. The number box sets how many members show on a page, andSearchfinds a member.Add Access, on each row, gives that member access to the level you are on.Who has access, on the right, lists the members who have access to this level.Add Memberadds a new person to the team.
Click Add Access on a member’s row. The member moves to Who has access, and there is a Remove button beside them to take the access back.
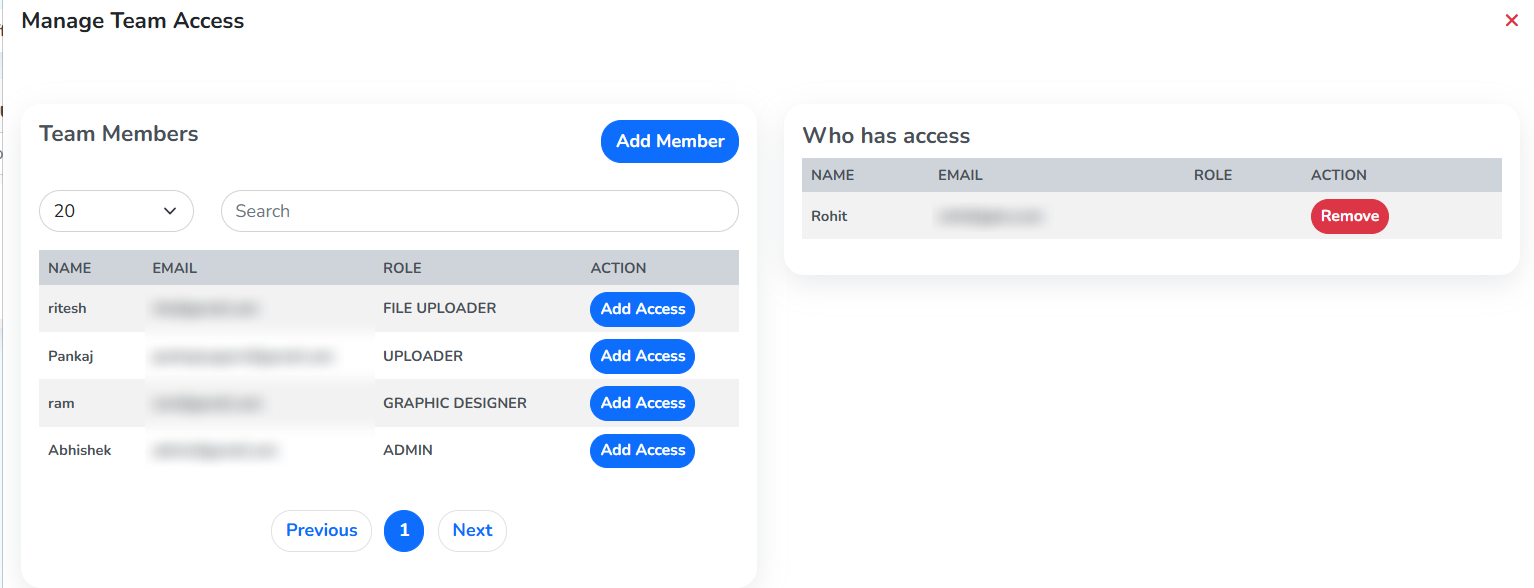 Access givenRemoves access
Add Member opens the Team section, with four tabs at the top.
Members lists everyone on the team, with their email, role and the date they were added, a status switch, and buttons to view, edit and delete each member.
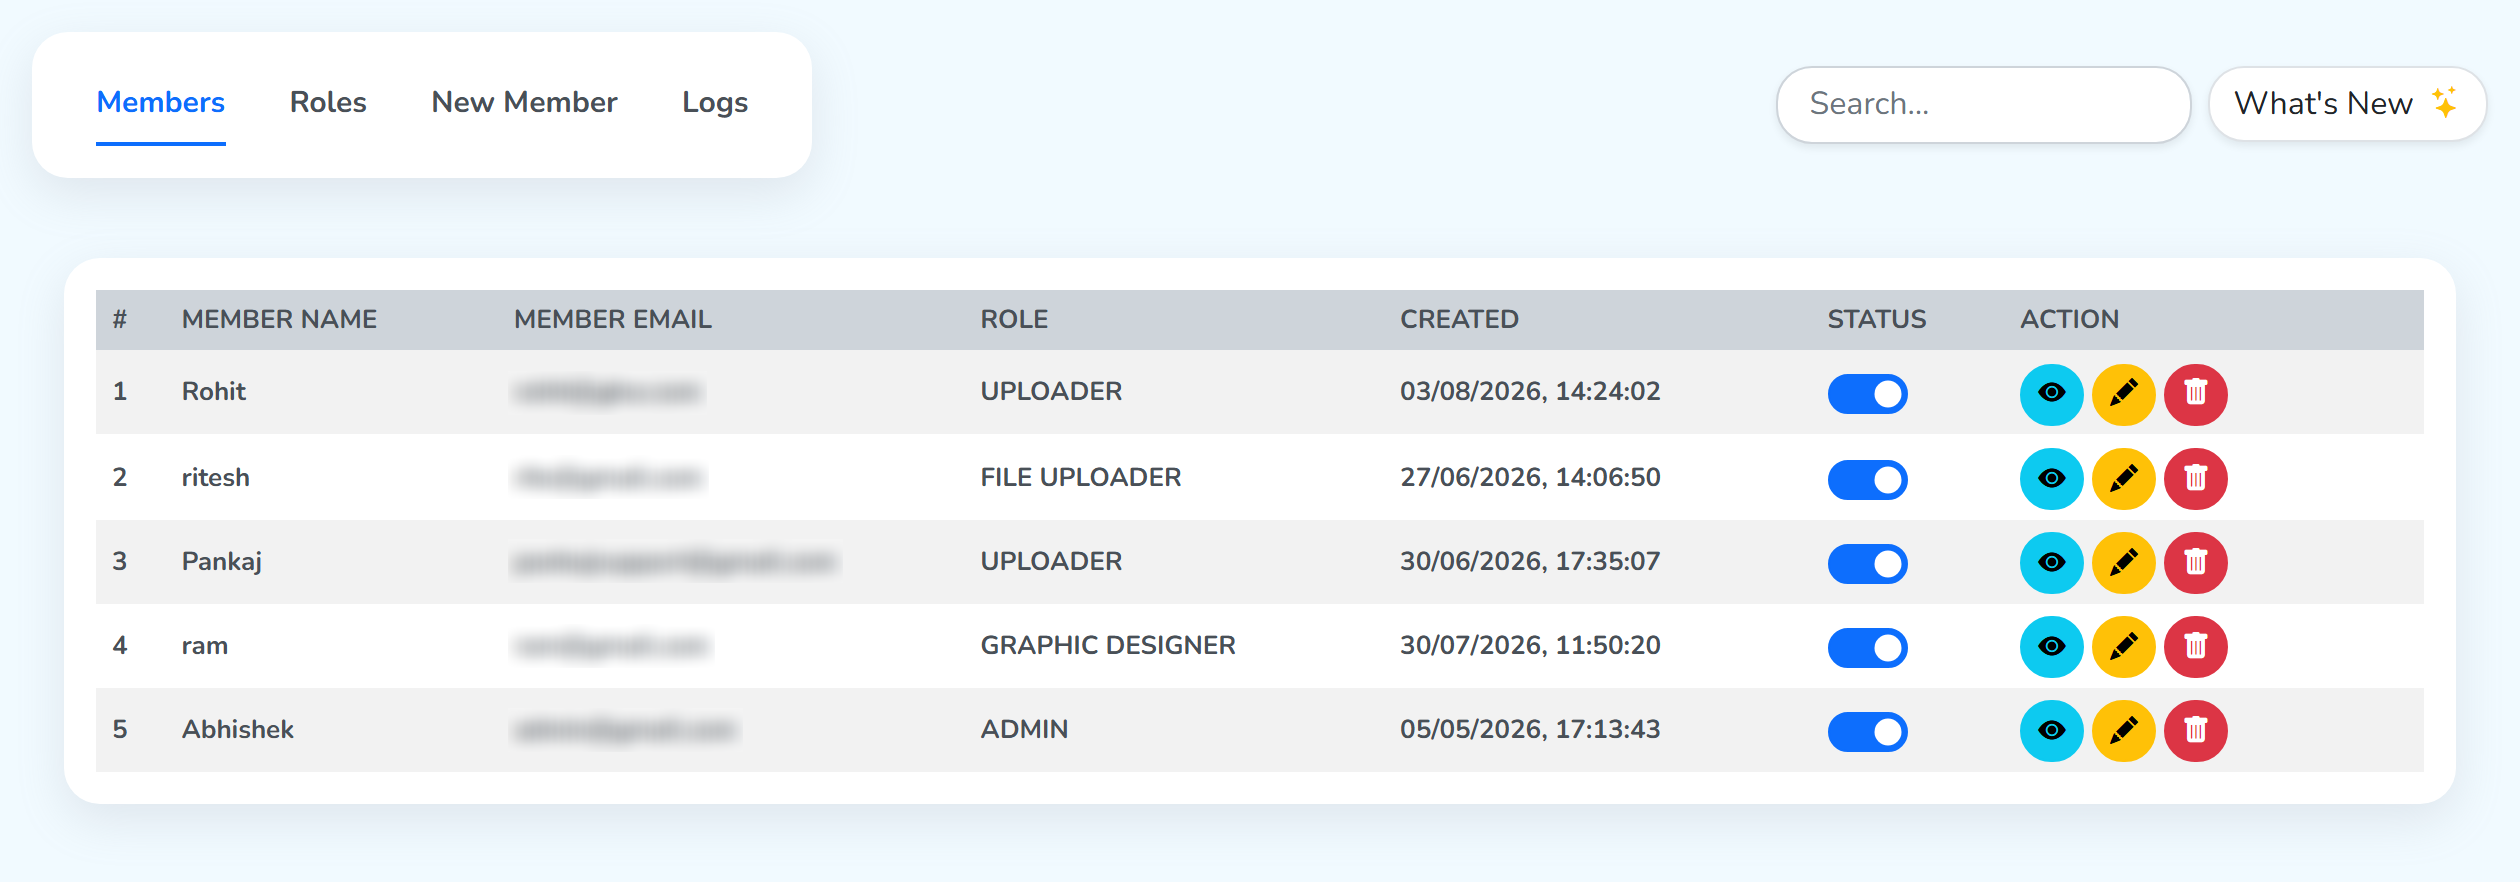 All members
Roles shows each role as a card, with its permissions, who it reports to and the members assigned to it. Create Custom Role makes a new role.
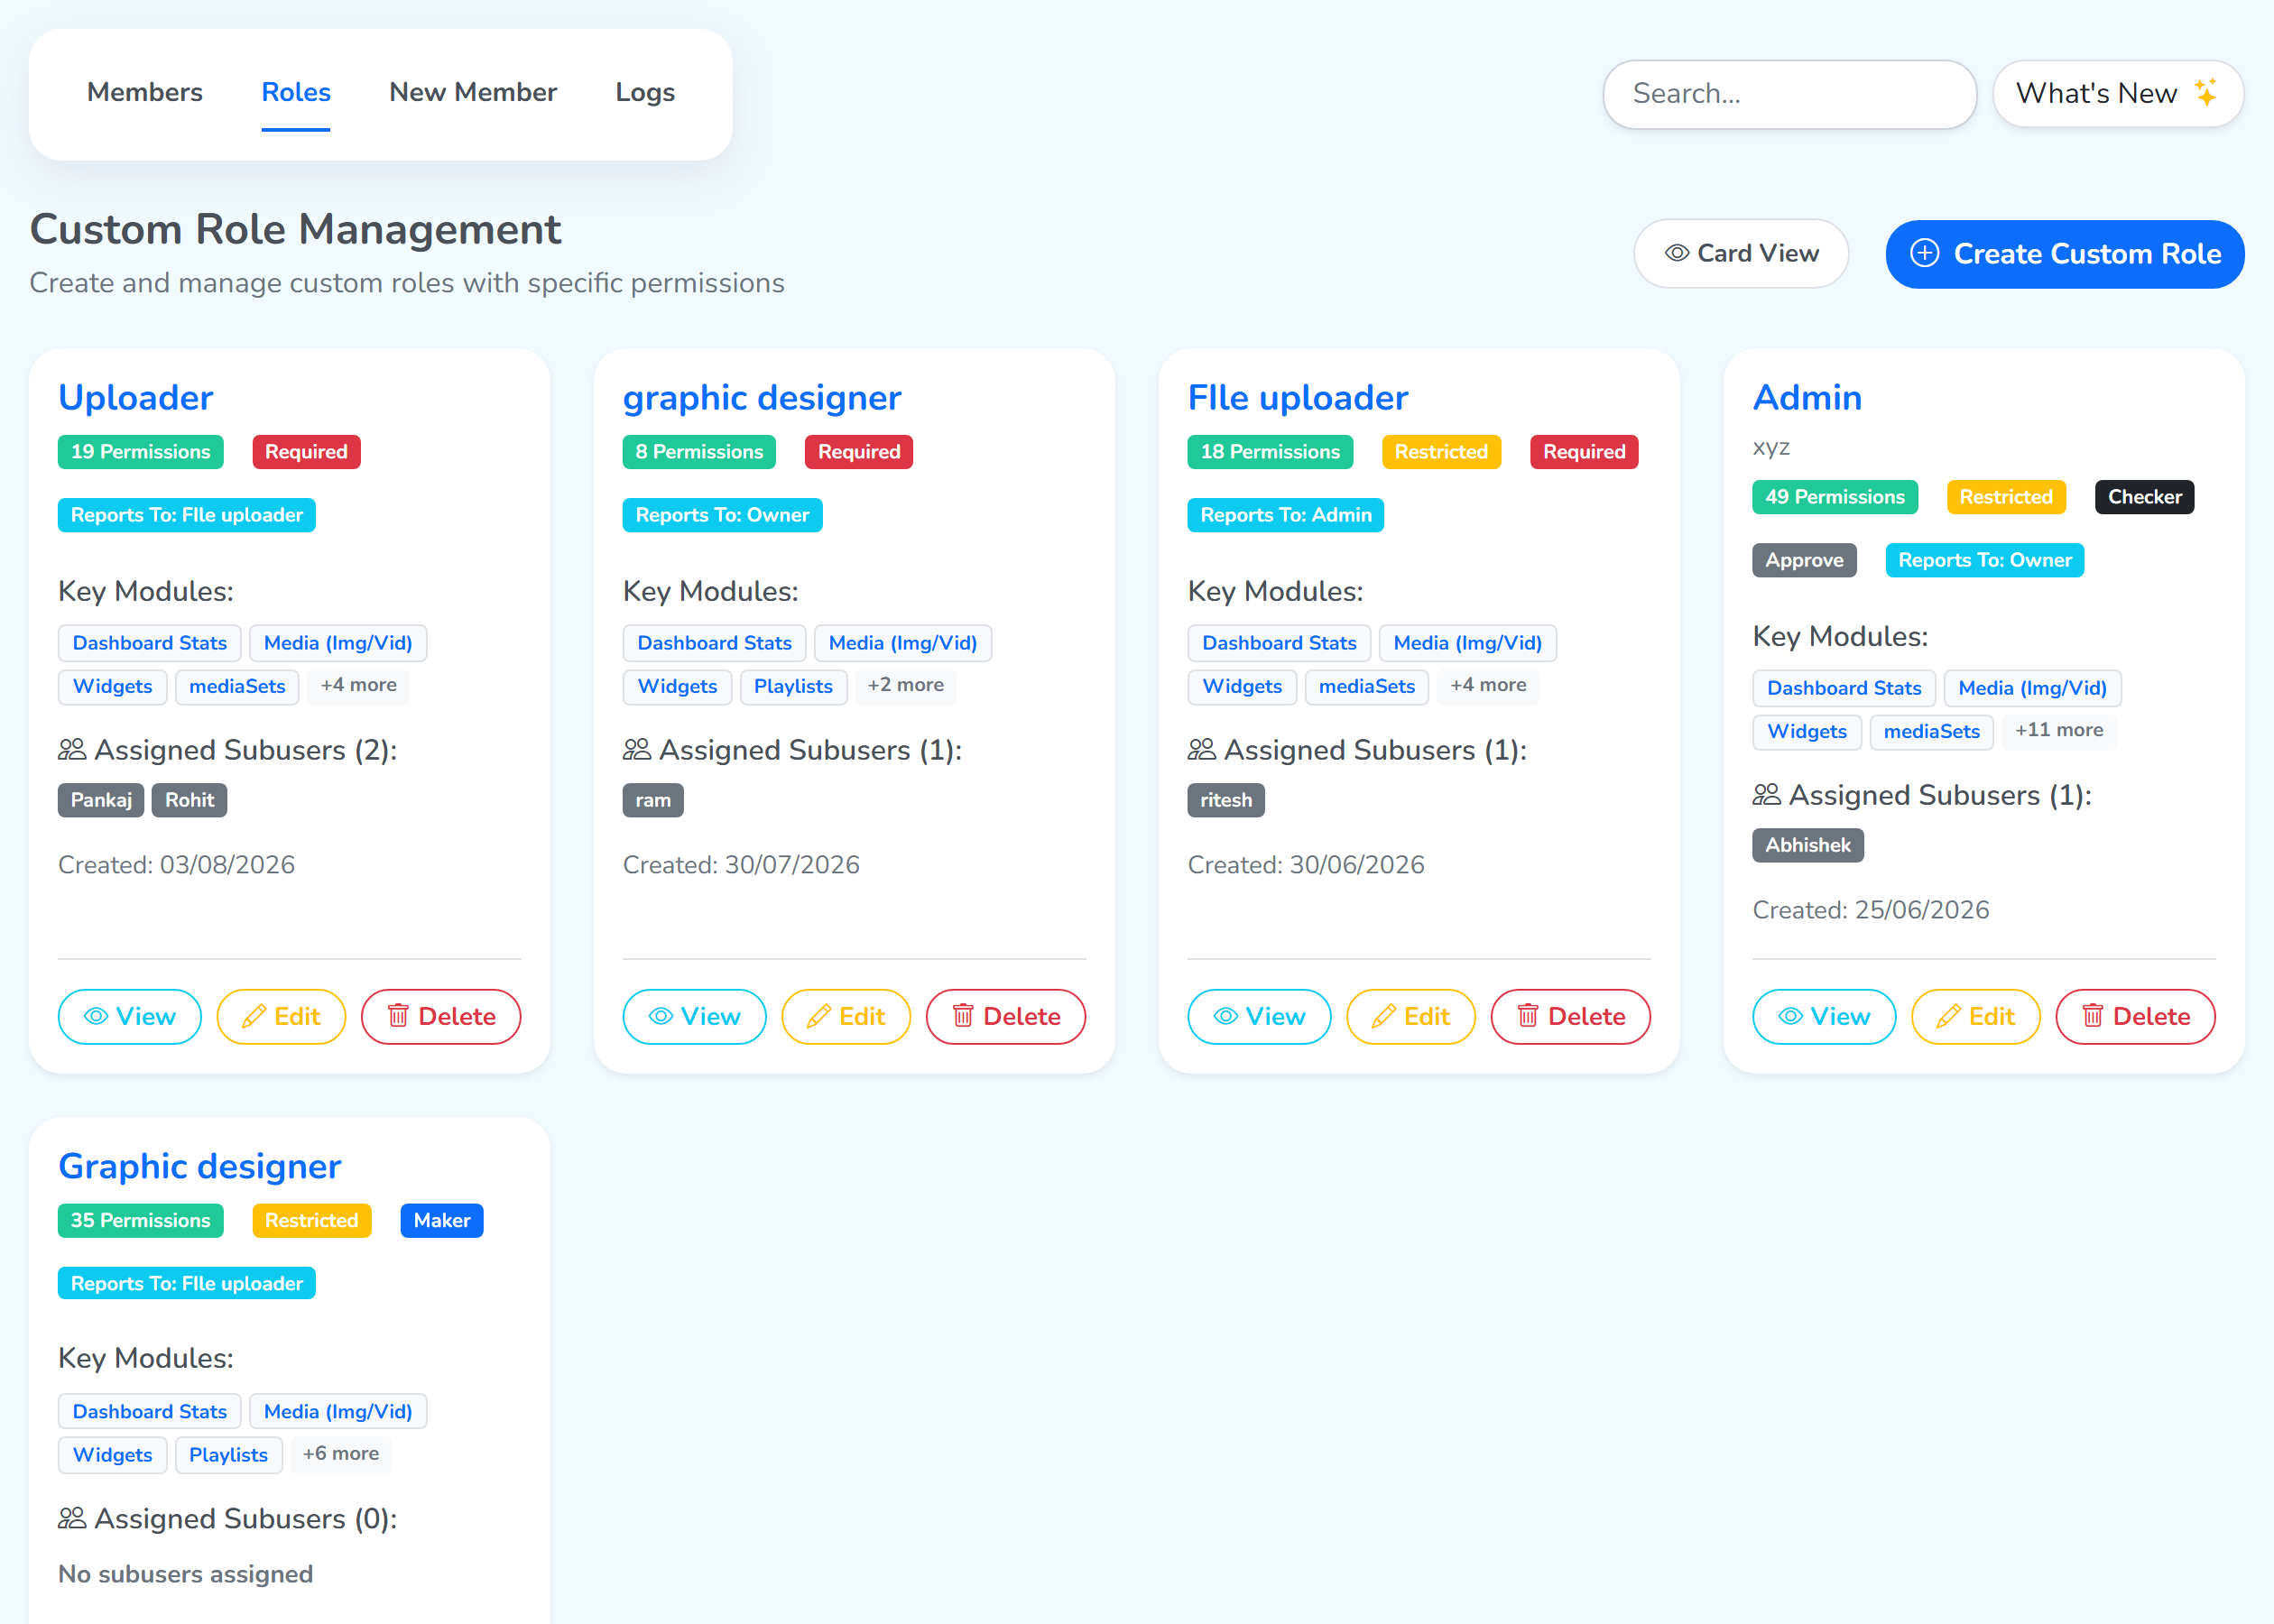 New role
New Member is the form for adding a member: their name, email, password and role. Create Member adds them to the team.
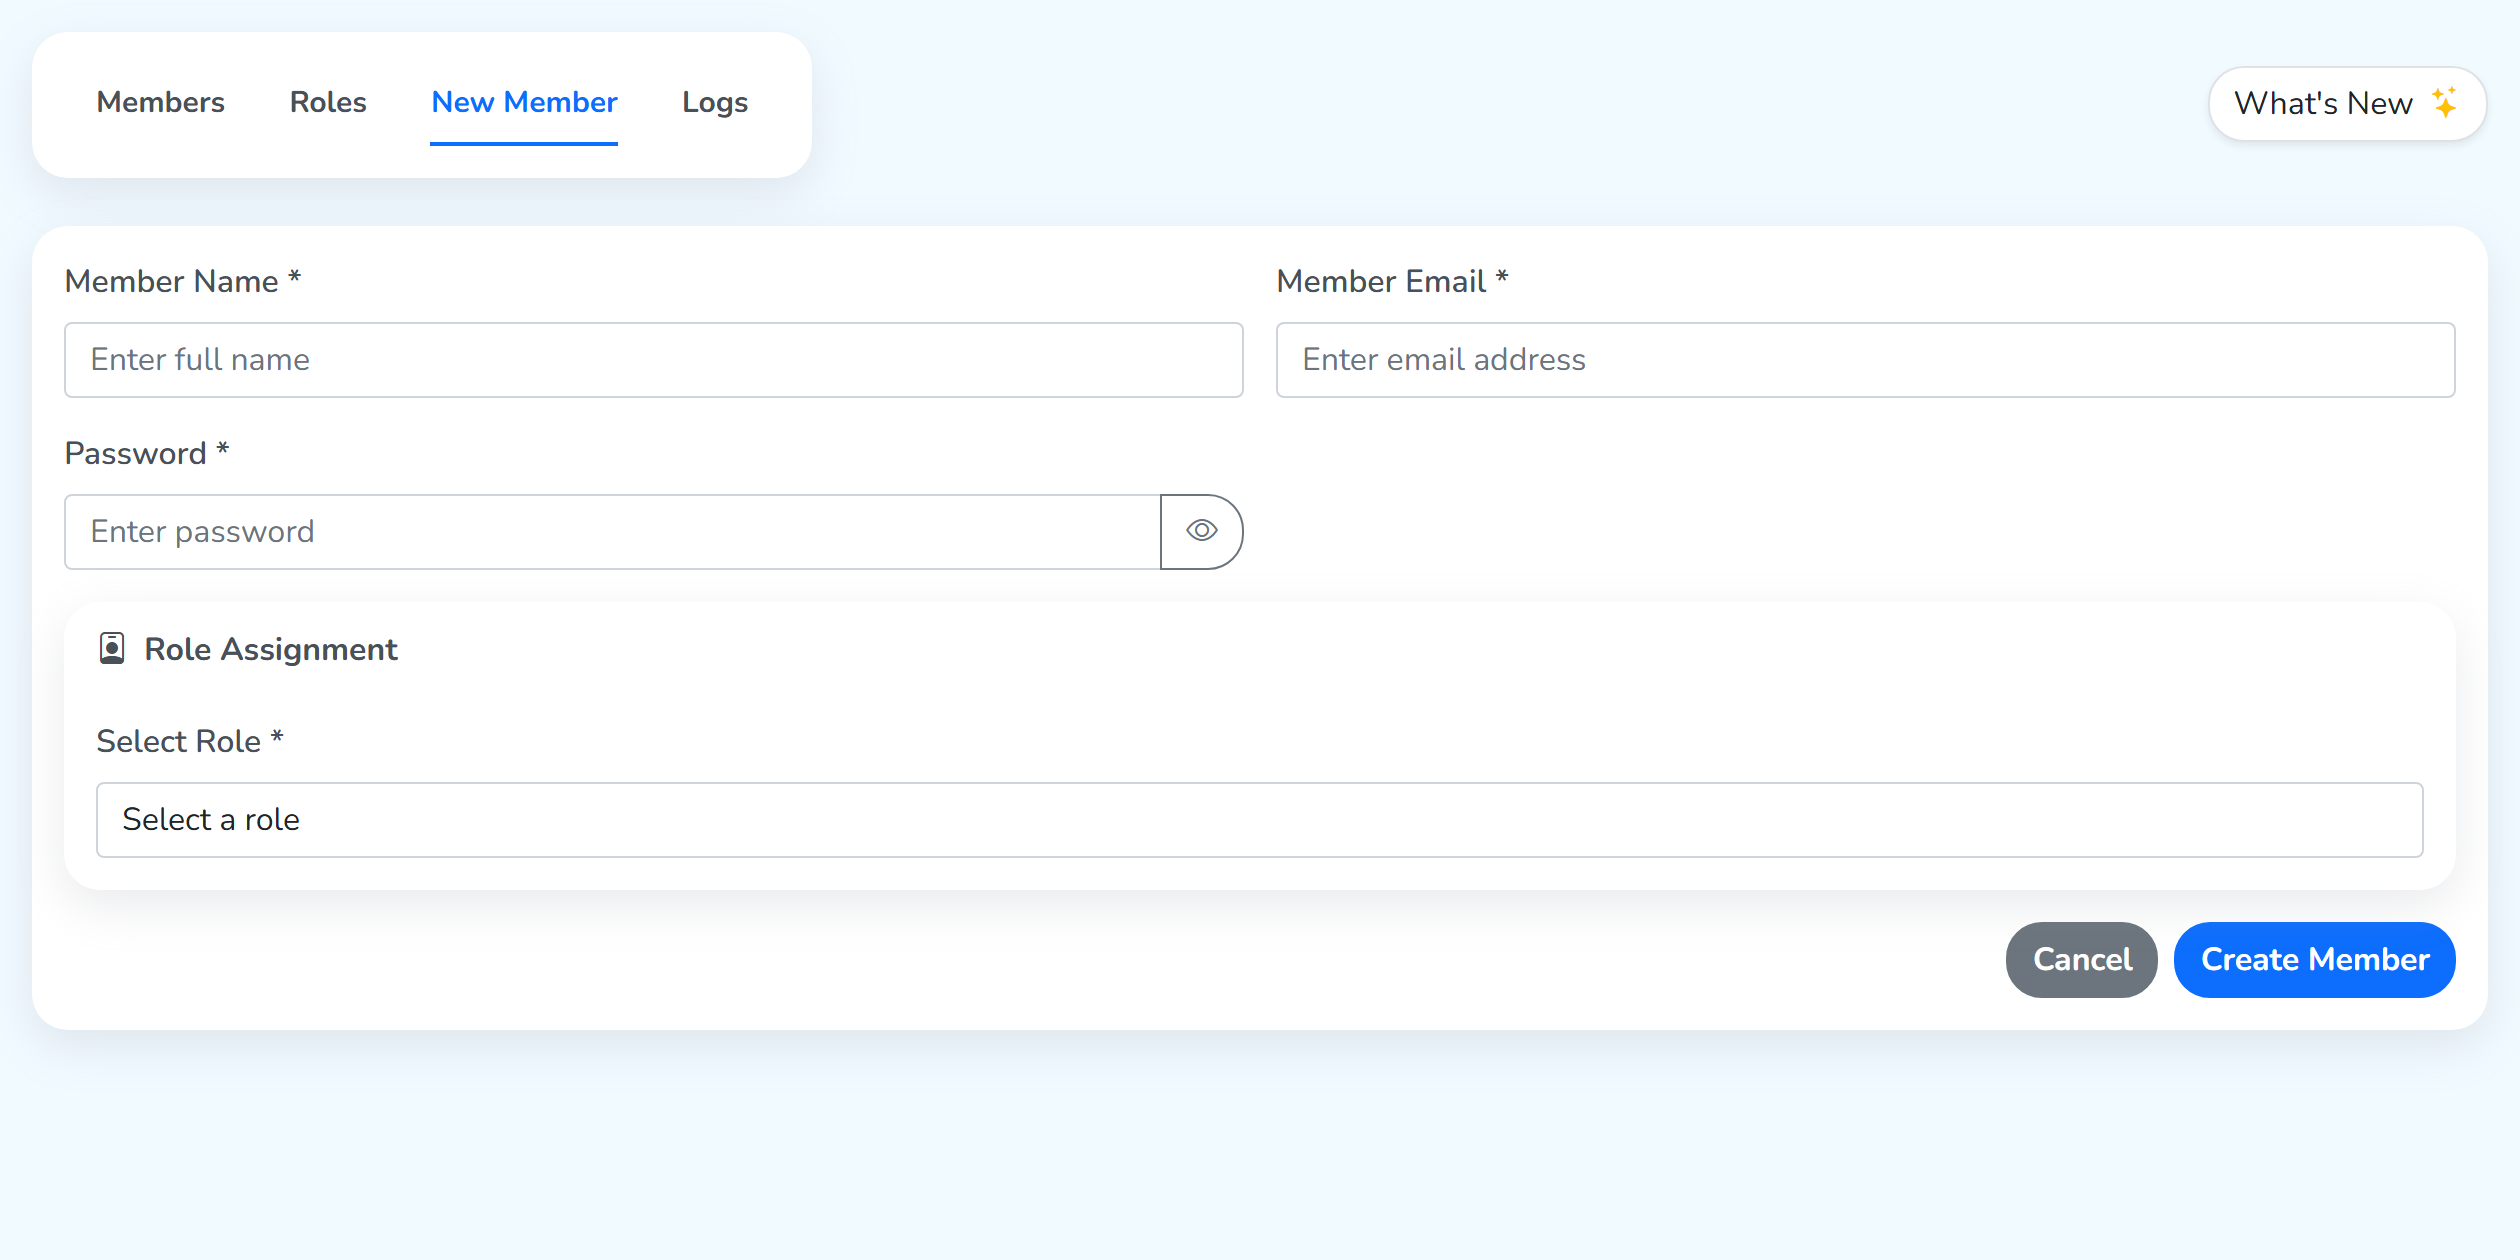 Adds the member
Logs lists the activity on the account, with who did what and when. The dates, Search Logs and the filter narrow the list, and Export Logs exports it.
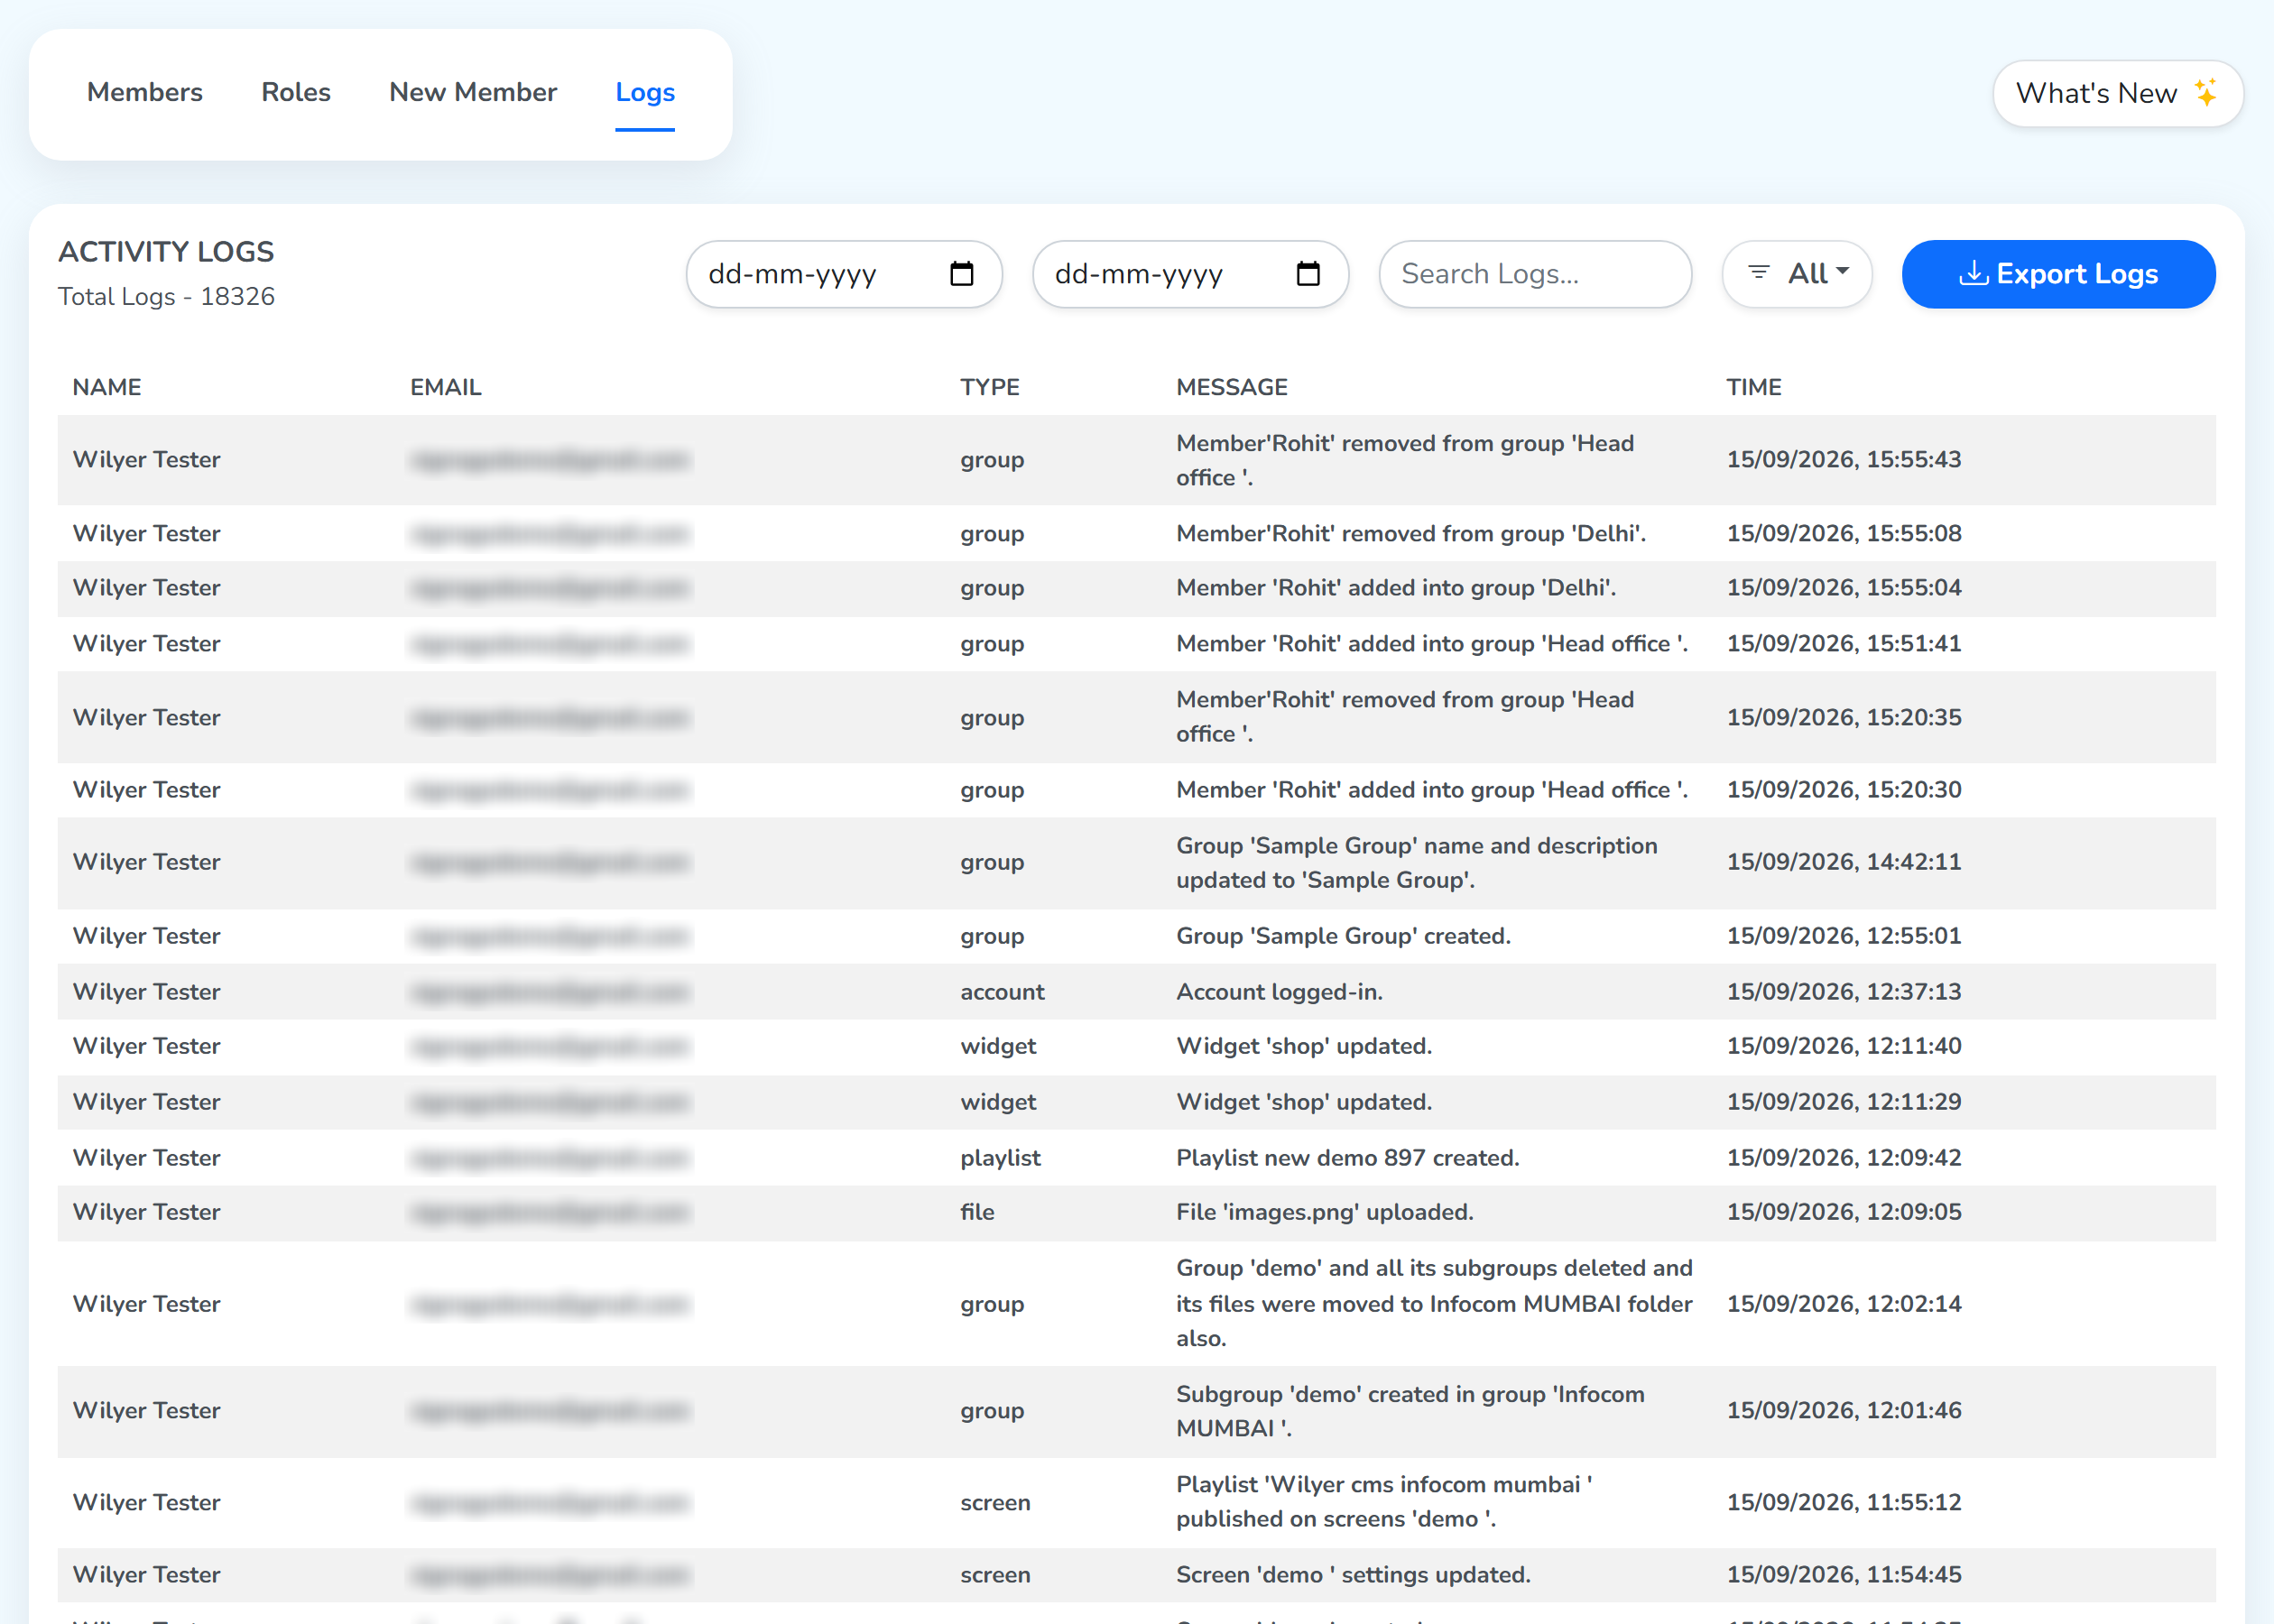 Narrow or export
Clusters
The Clusters section is covered in more depth in the Clusters document.
Click Clusters to open Manage Clusters.
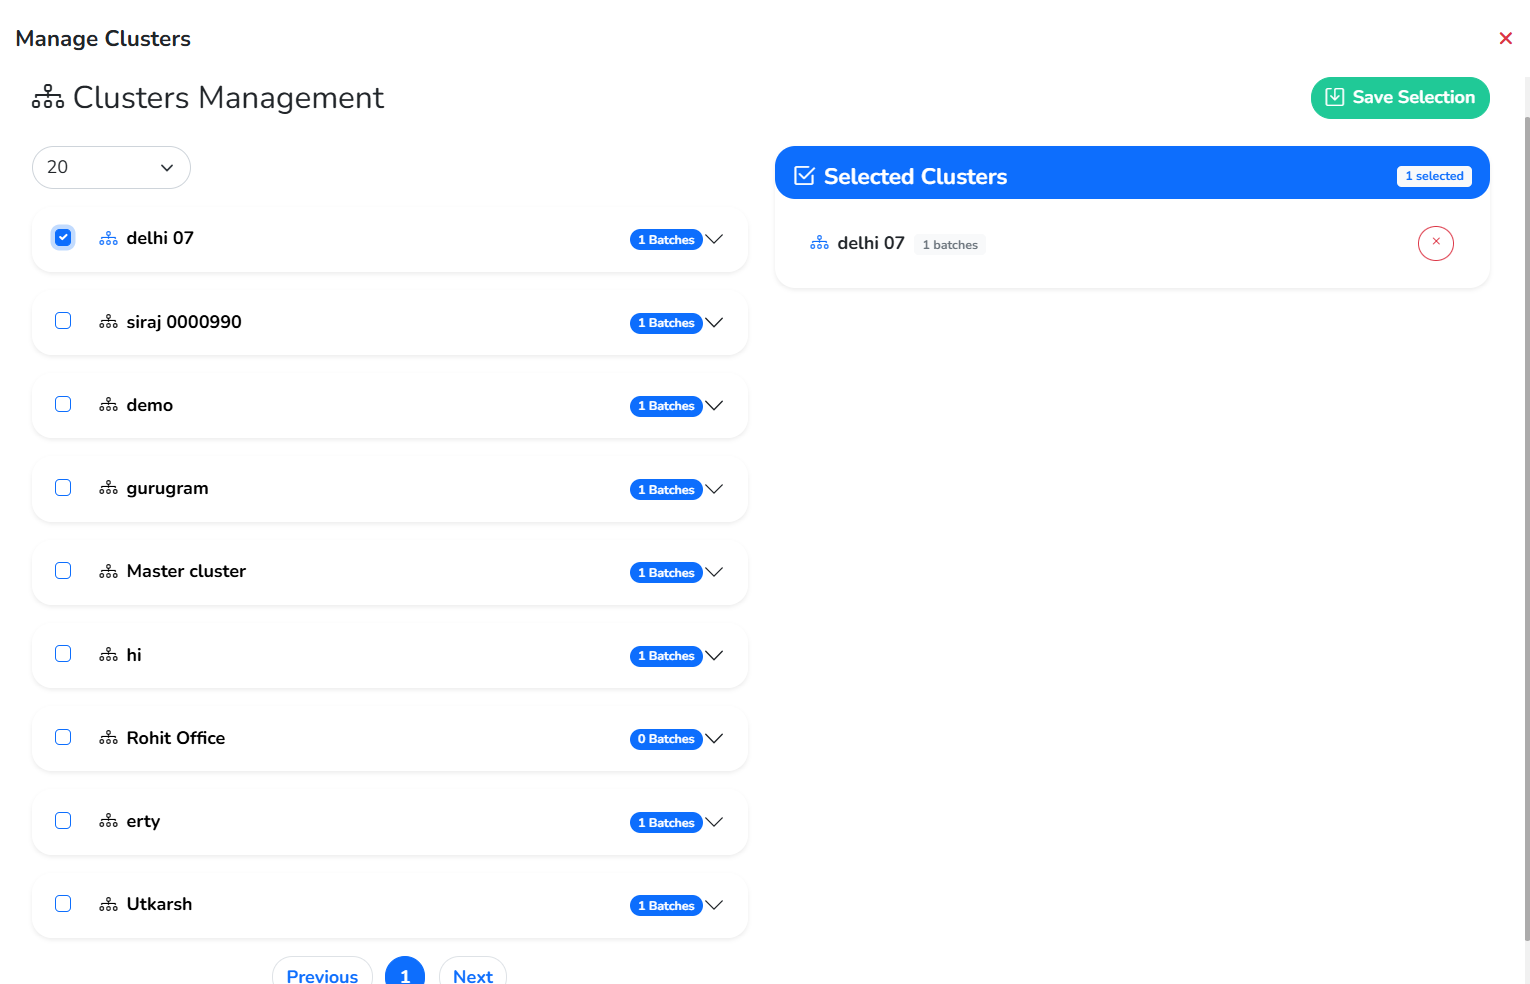 Its batchesTicked clustersRemovesSaves
- The number box sets how many clusters show on a page.
Clusters Management, on the left, lists your clusters with the number of batches in each. The arrow on a row opens its batches, with the number of screens in each.- Tick a cluster to add it to
Selected Clusters, on the right, which carries the count. The red ✕ on a row takes it out. Save Selectionsaves the choice.
A linked cluster’s screens count toward the screen totals of that level and every level above it.
Add screens to a group
Step 1: Open the level the screens go into – the group itself, or one of its subgroups.
Step 2: Click the Screens button to open Manage Screens.
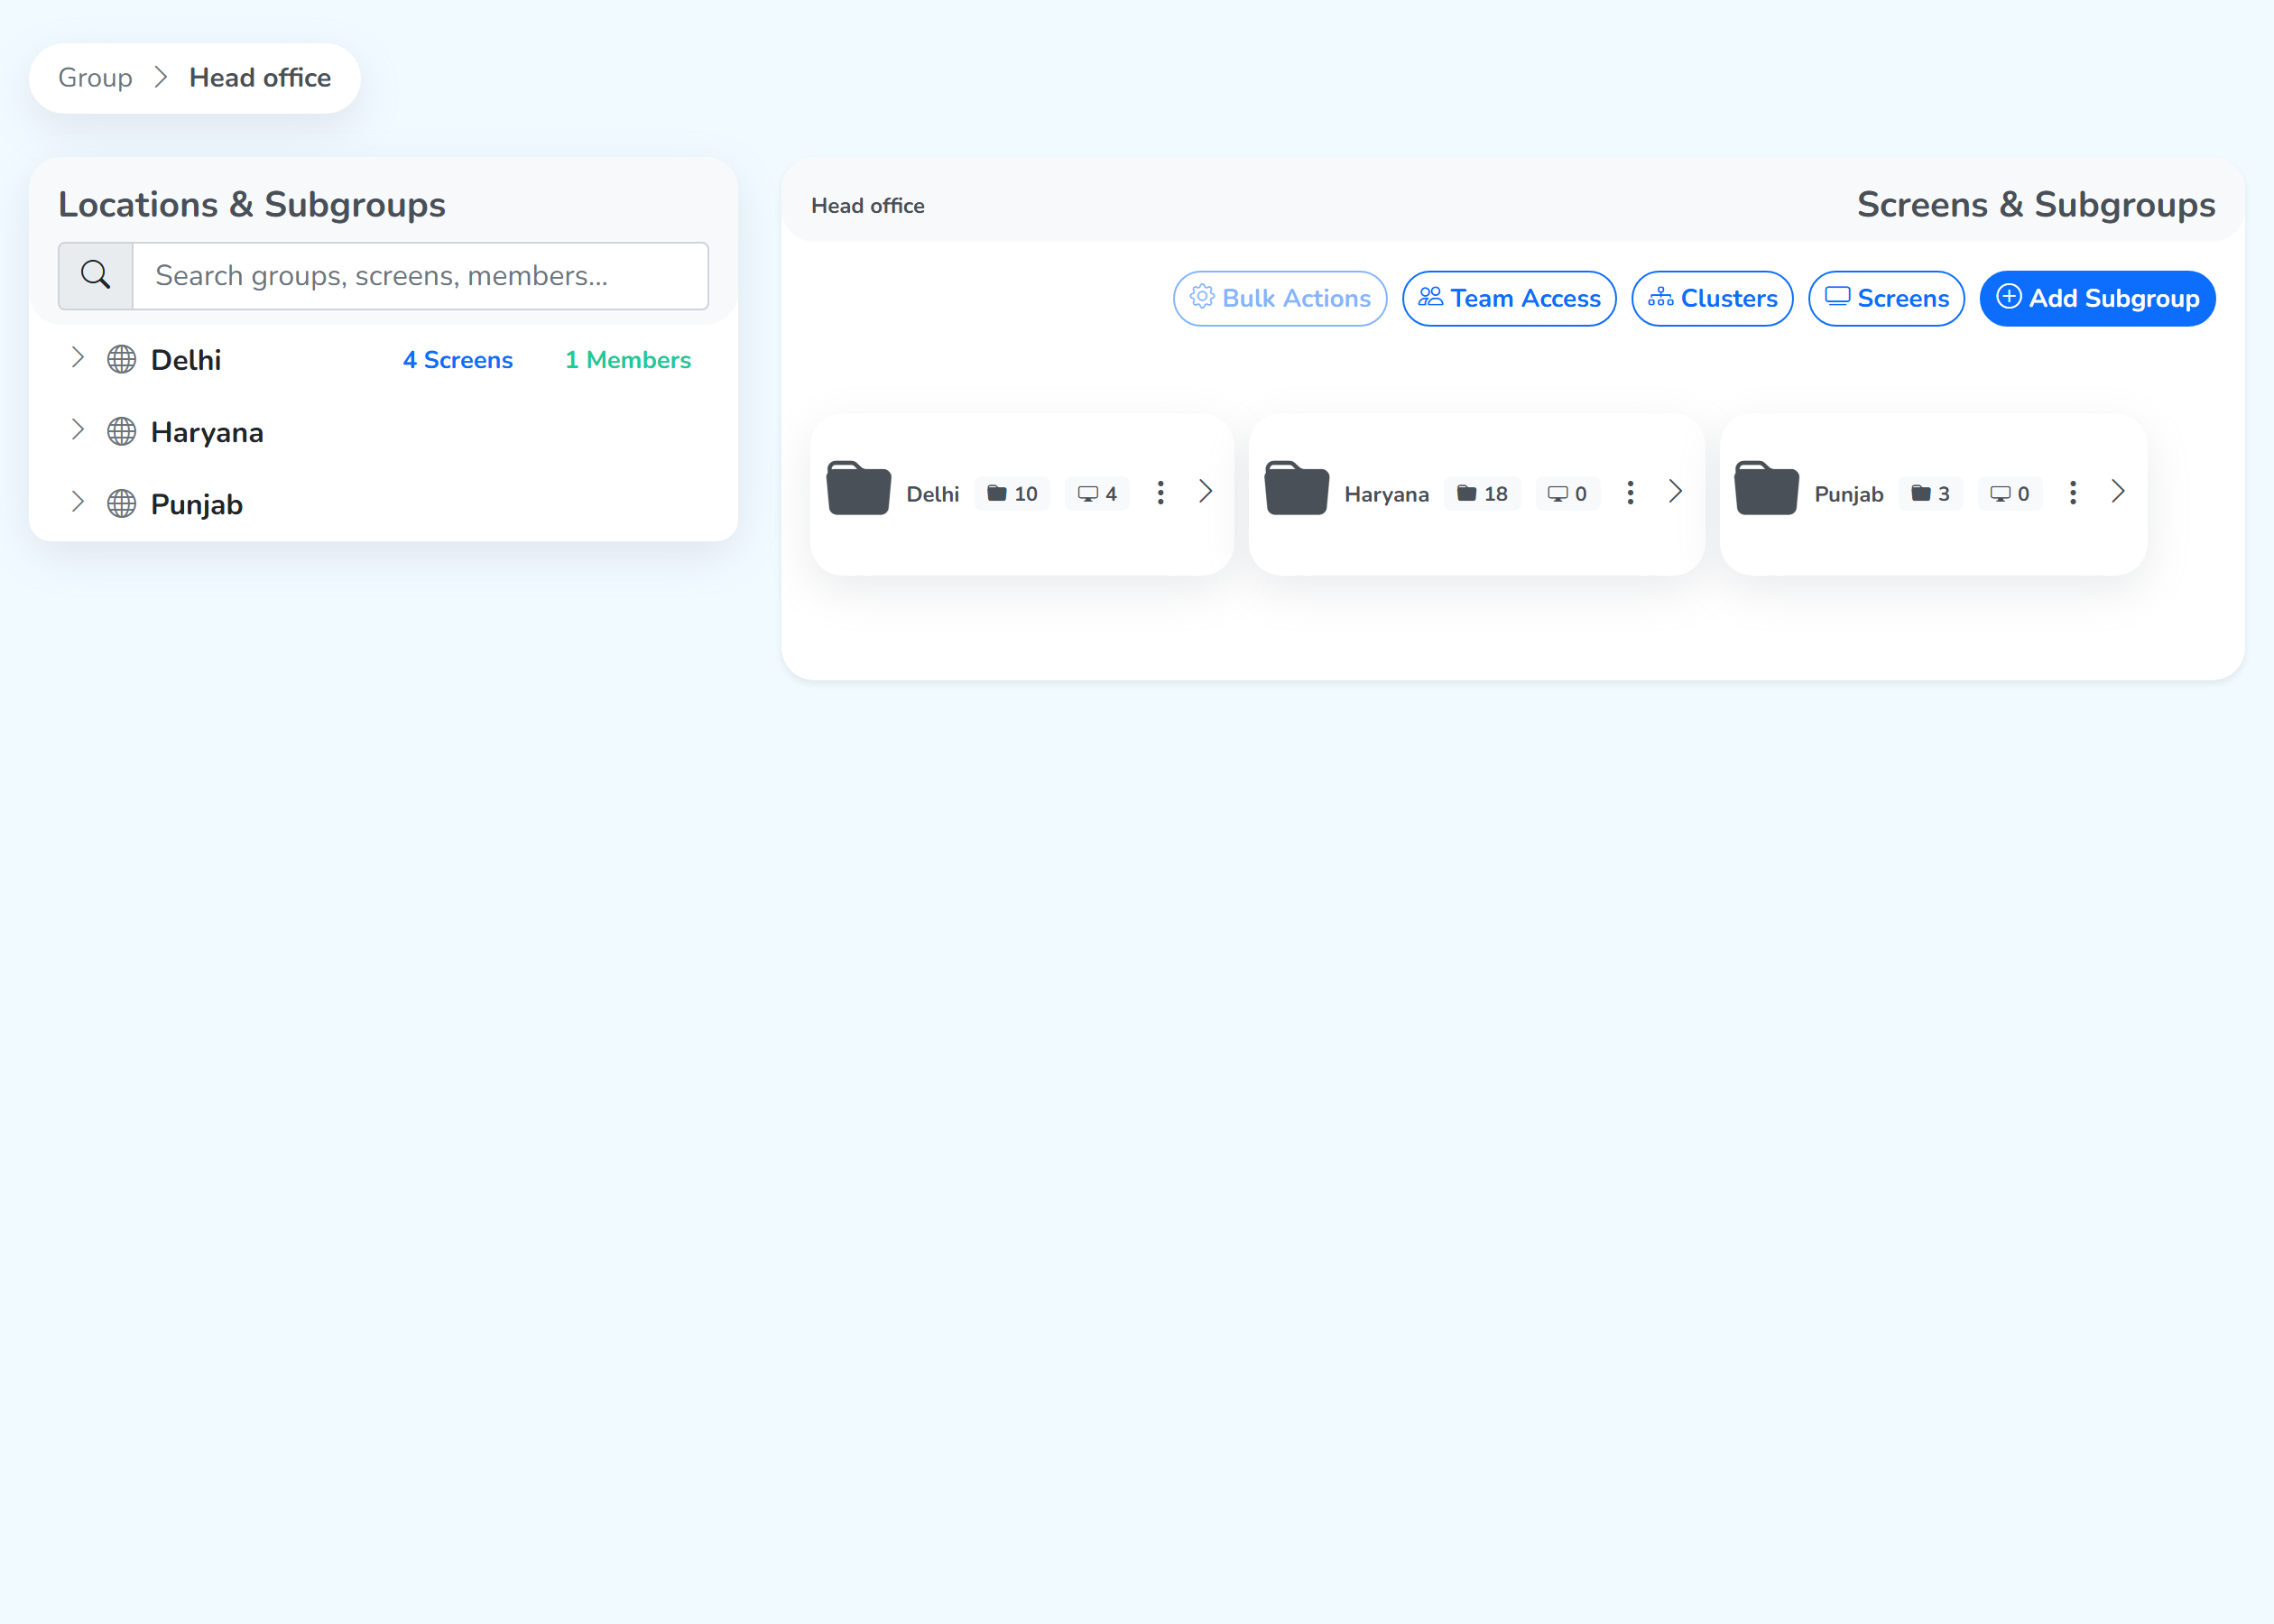 Opens Manage Screens
Step 3: Tick the screens you want in the group. All Screens, on the left, carries each screen’s tags, location and status. Select Tags and the search box narrow that list first, and Must Include all Tags keeps the screens that carry every tag you picked.
Step 4: Click the Save group button to save the changes.
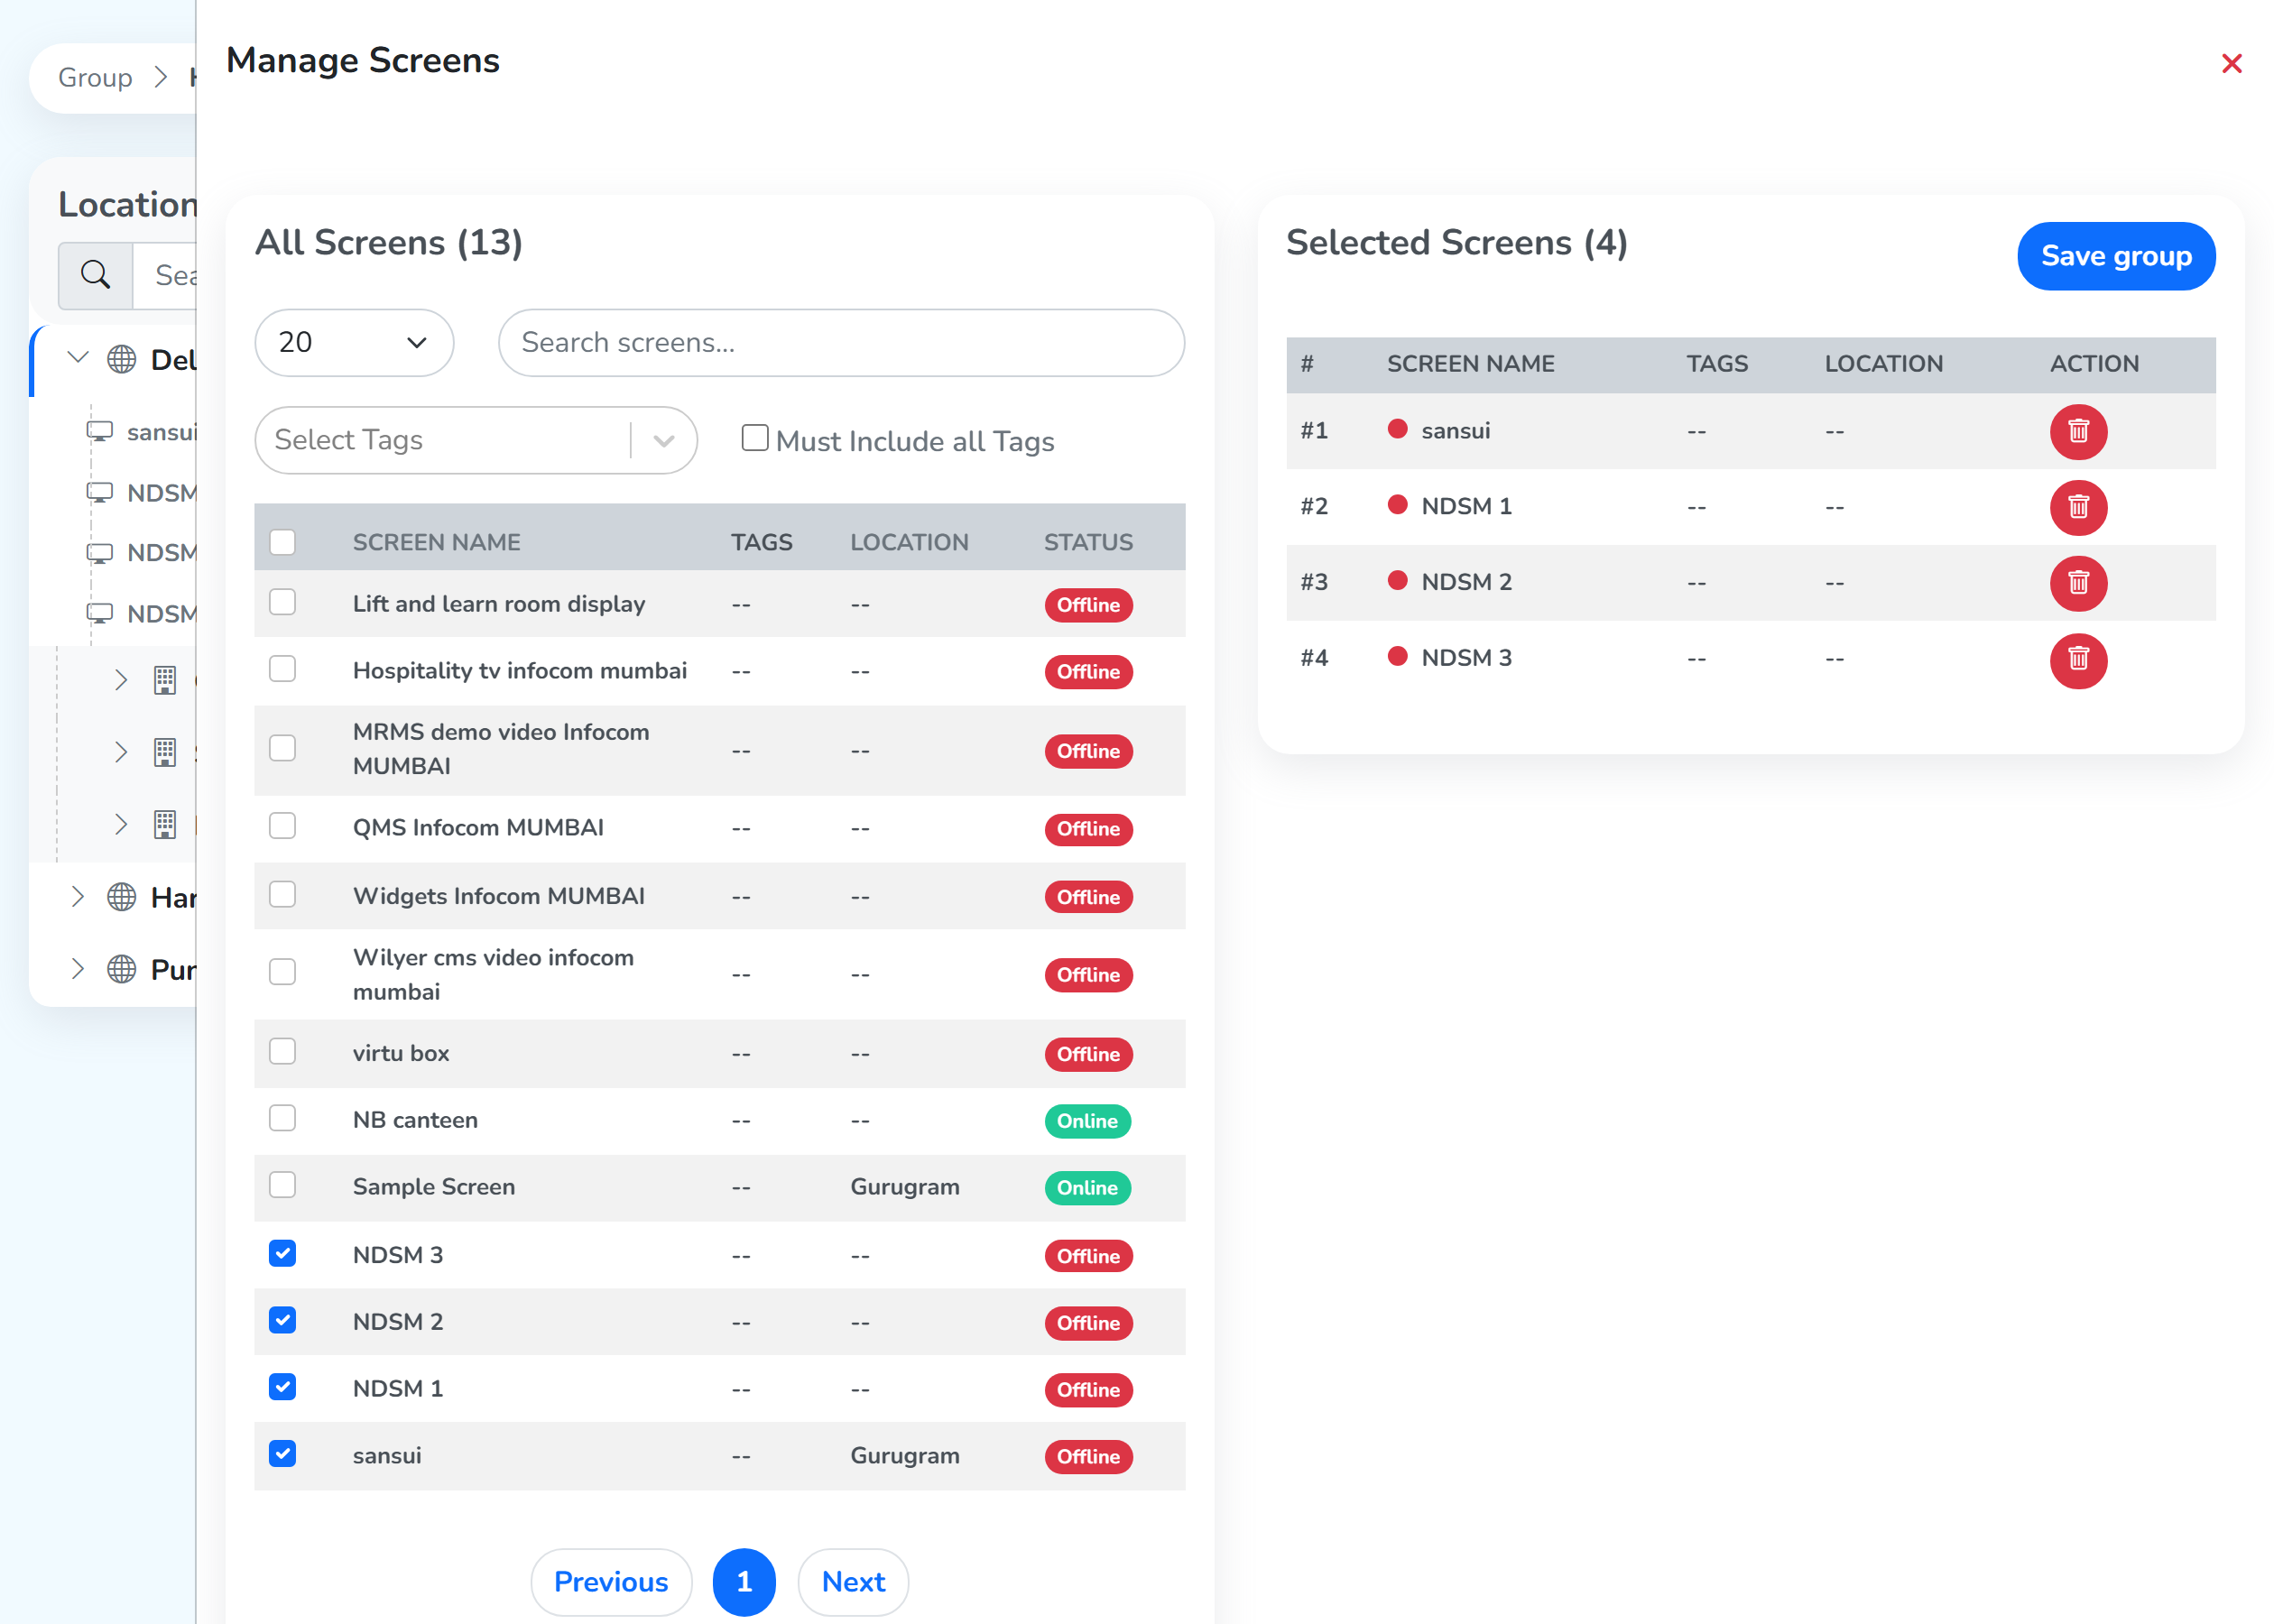 Every screen on the accountThe ones in this group
To remove a screen, click the red 🗑️ button on its row in Selected Screens, then Save group. The screen stays on the account, in the All Screens list on the left.
Add Subgroup
Click Add Subgroup to open the Add Subgroup window. Creating in shows the level the subgroup goes into. Enter a Name and click Create.
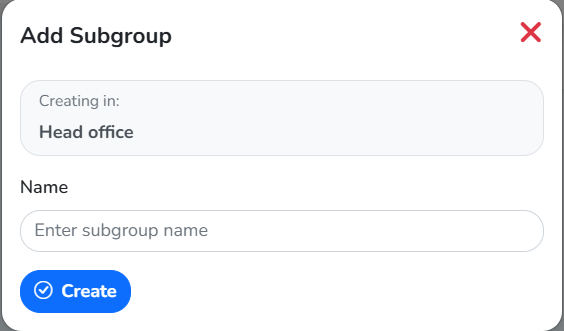 Where it goesThe subgroup's nameCreates it
Move a screen to a subgroup
Step 1: Open the level that holds the screen, and tick the checkbox on its card. Move Selected appears, with the number of screens you ticked.
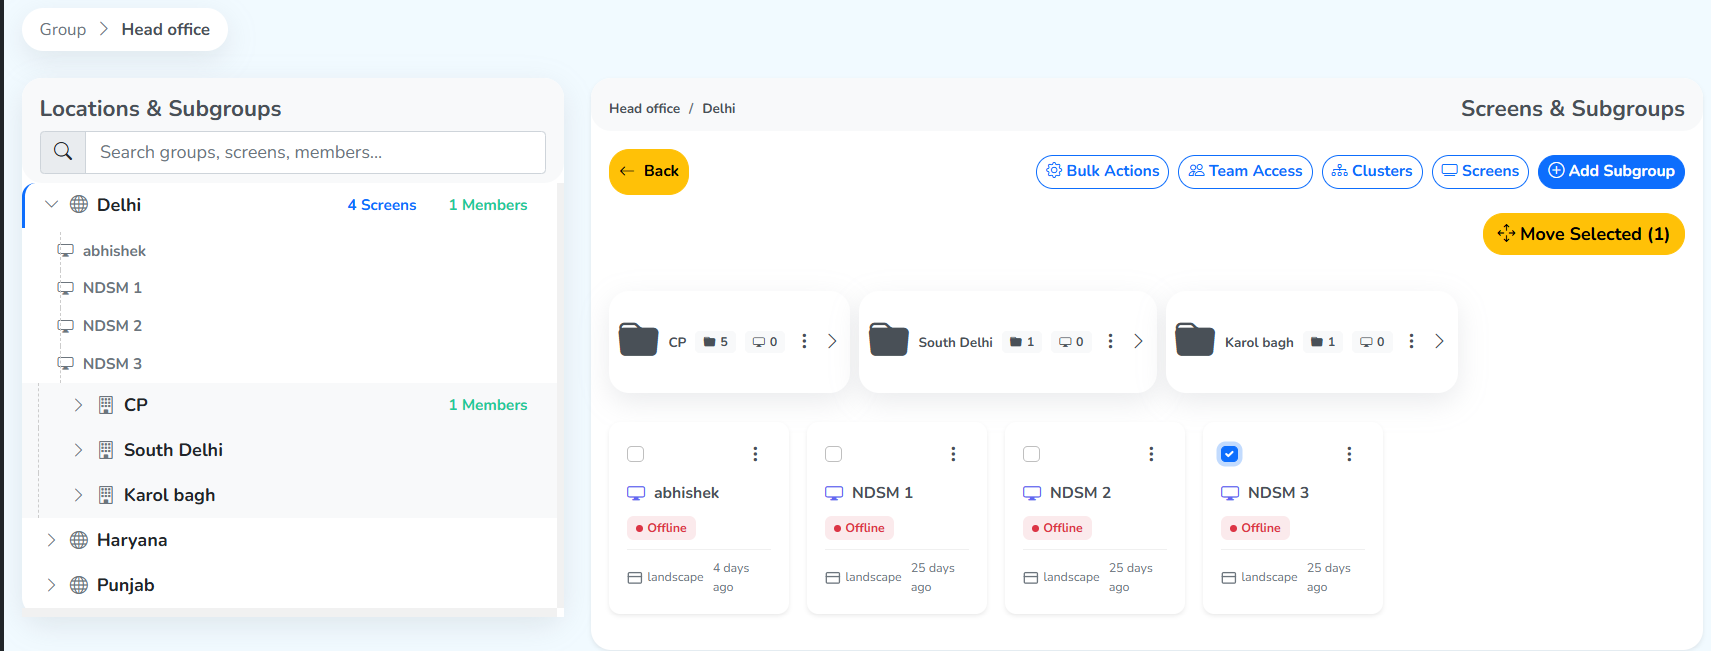 Appears on selectionSelected screen
Step 2: Click Move Selected. In the Move Screen window, select Move to Subgroup and open the list, which shows the root group’s subgroups.
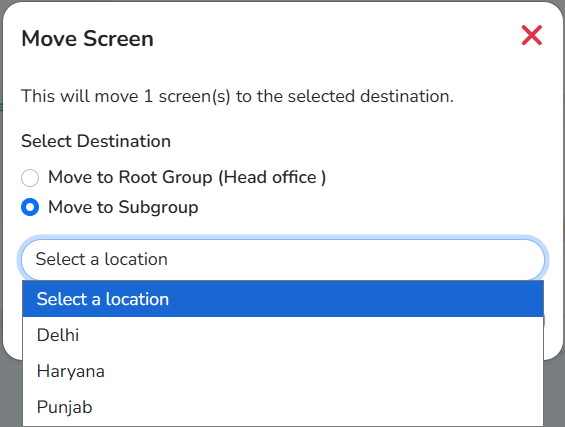 SelectedThe root group's subgroups
Step 3: Pick a subgroup. The path under Select Destination updates, and the list now shows the subgroups inside it, with Place in and the subgroup’s name at the top to place the screen at that level.
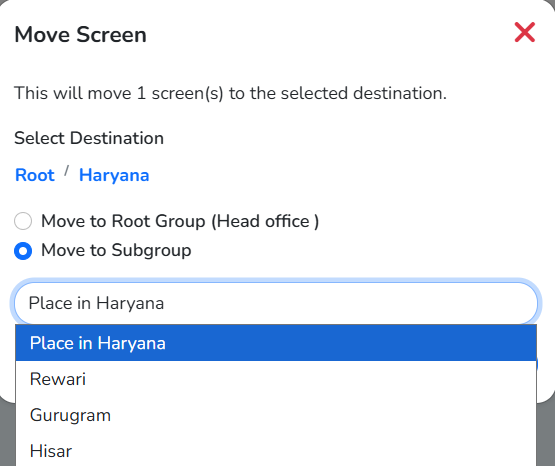 Path updatesIts subgroups
Step 4: Click Move to move the screen.