Initial Setup of Digital Signage
The advert hoarding at the airport, the menu board over the coffee counter – none of it is printed. It is a screen with a player app on it, and somebody clicking Publish from a browser.
Pair your first screen
Download the Signage Player app on the screen you want to turn into a digital display. It shows a 6-digit pairing code when opened.
Android, Windows and Ubuntu install a file you download and run. Samsung Tizen and LG WebOS have no app store, so you enter the link in the display’s own settings and the screen fetches the player itself – or install from a USB stick when the screen has no internet at setup.
→ Step-by-step for each platform: Download Player Apps.
On your computer:
Caution: one phone number can create only one account, so sign up with the number you plan to keep. To give a colleague access, add them as a Team Member rather than opening a second account.
Step 1: Open the official dashboard.
Step 2: Sign up as a first time user or log in if you already have an account.
Step 3: You will reach the dashboard, where you can see the main menu on the left.
First-time users see the four setup steps at the top of the dashboard, each still carrying a grey tick.
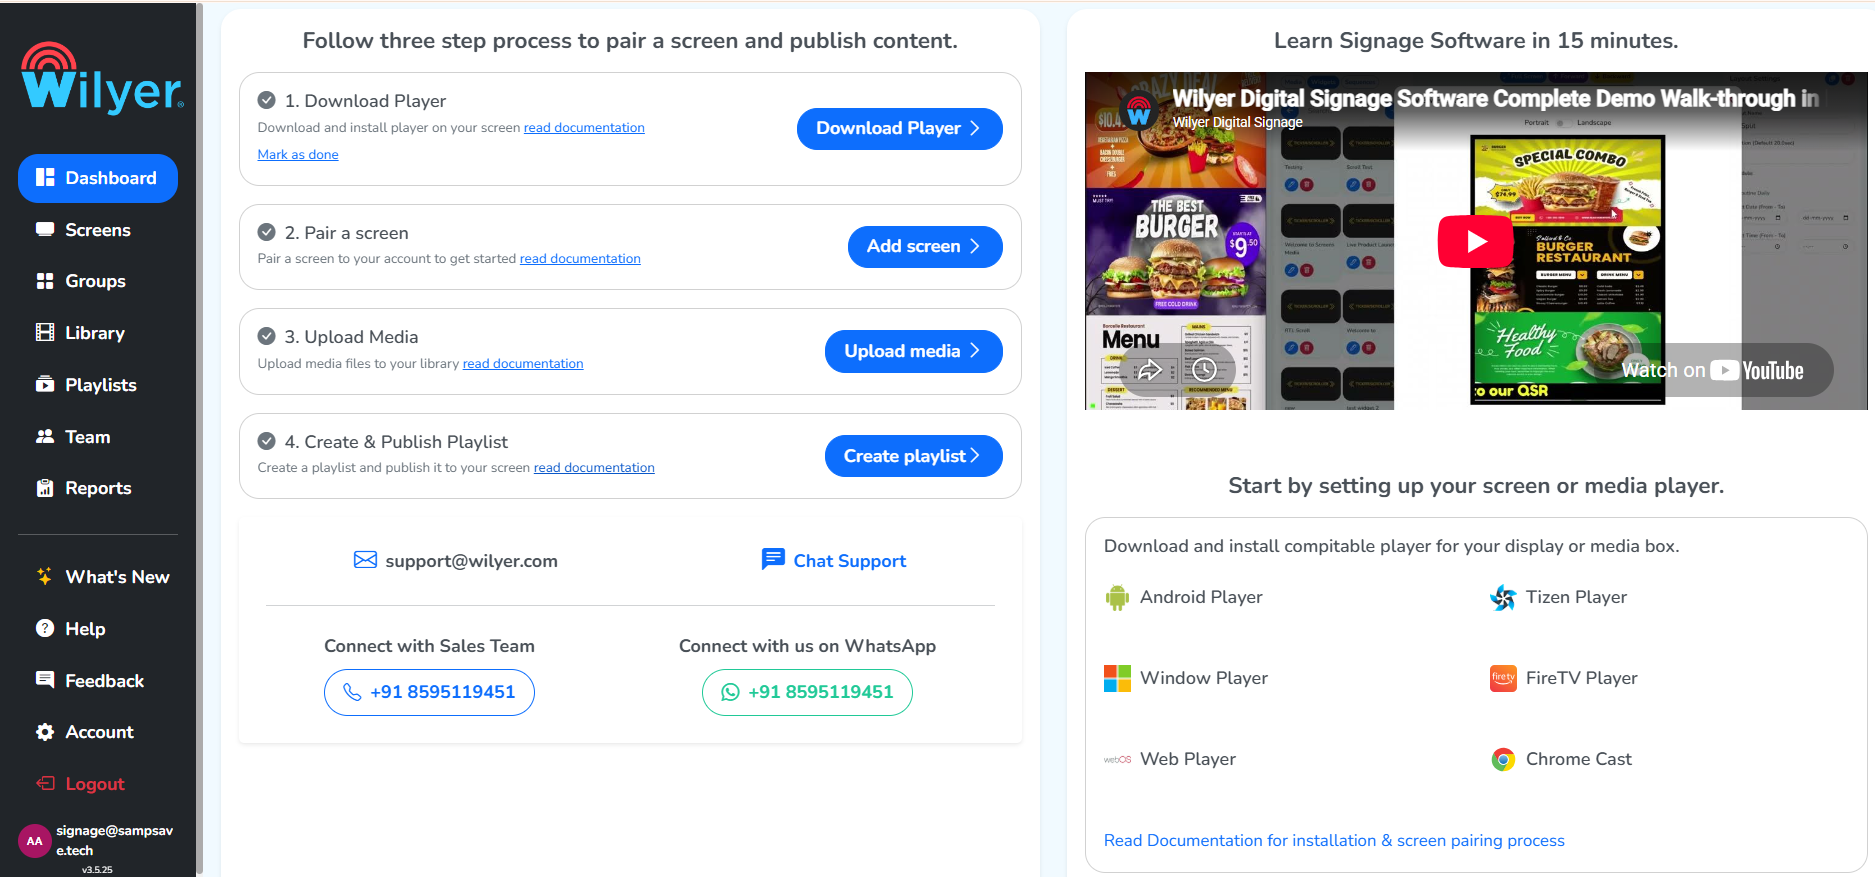 The four setup steps
Those four steps are the rest of this page: download the player, pair a screen, upload media, then create and publish a playlist. Each one turns green as you finish it; for the first, click Mark as done yourself. Once all four are done the checklist gives way to your working dashboard – screen counts, storage, licenses and a map of where your screens are.
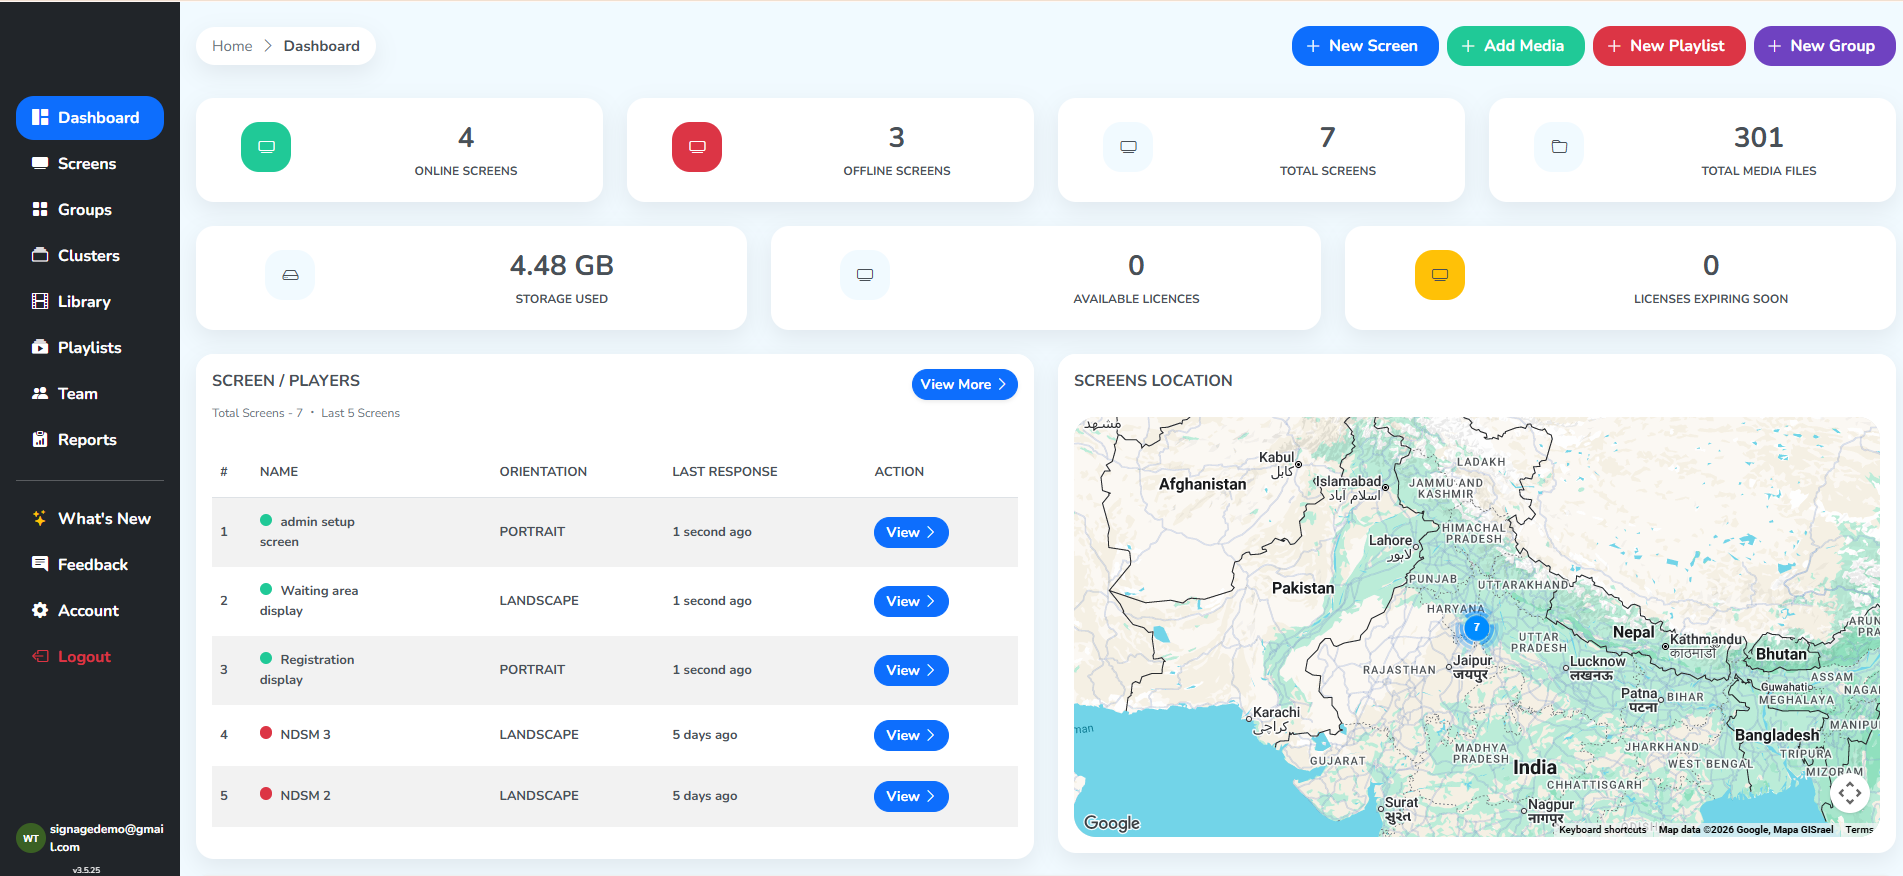 Screen counts, storage, licensesWhere your screens are
Step 4: Click the + New Screen button at the top right. This button is also available on the Screens page.
First-time users can click Add Screen, second of four steps in the checklist which opens the same dialog.
Step 5: Enter the following details:
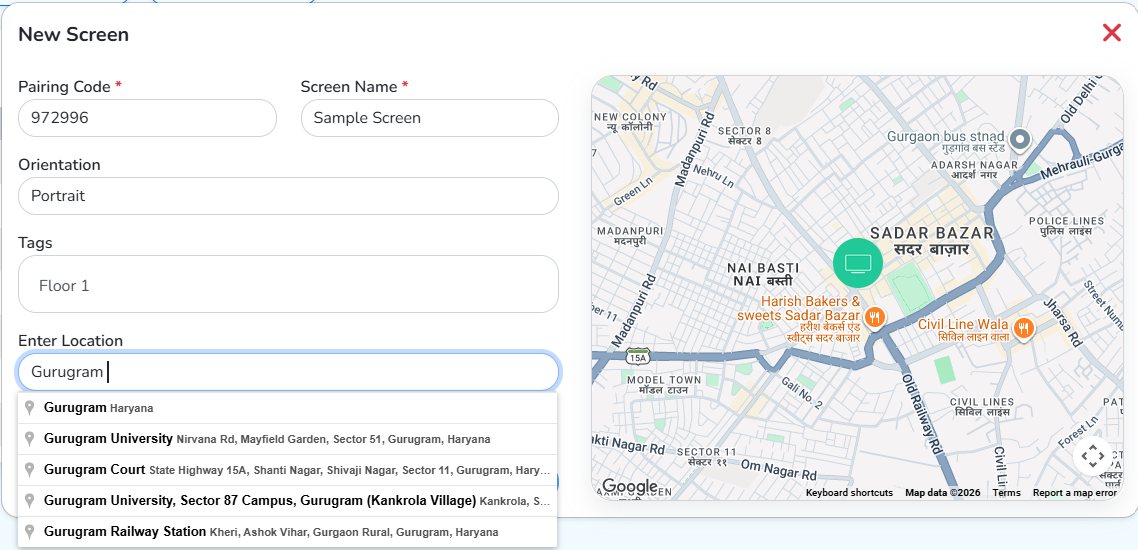
Screen Name– a friendly name for the screen (e.g. Sample Screen).Pairing Code– the 6-digit code displayed on the screen.Orientation– choose Landscape, Portrait or keep Auto to let the player app detect the orientation automatically.Tags– optional tags to help you categorize the screen (e.g. Floor 1, Conference Room).Location– optional location information (e.g. Building A, 1st Floor). An interactive map is also available to help you set the location.Select Plan– the plan this screen takes its license from. The badge on each plan shows how many licenses it has left.
Step 6: Click Pair Screen. The screen is now joined to your account.
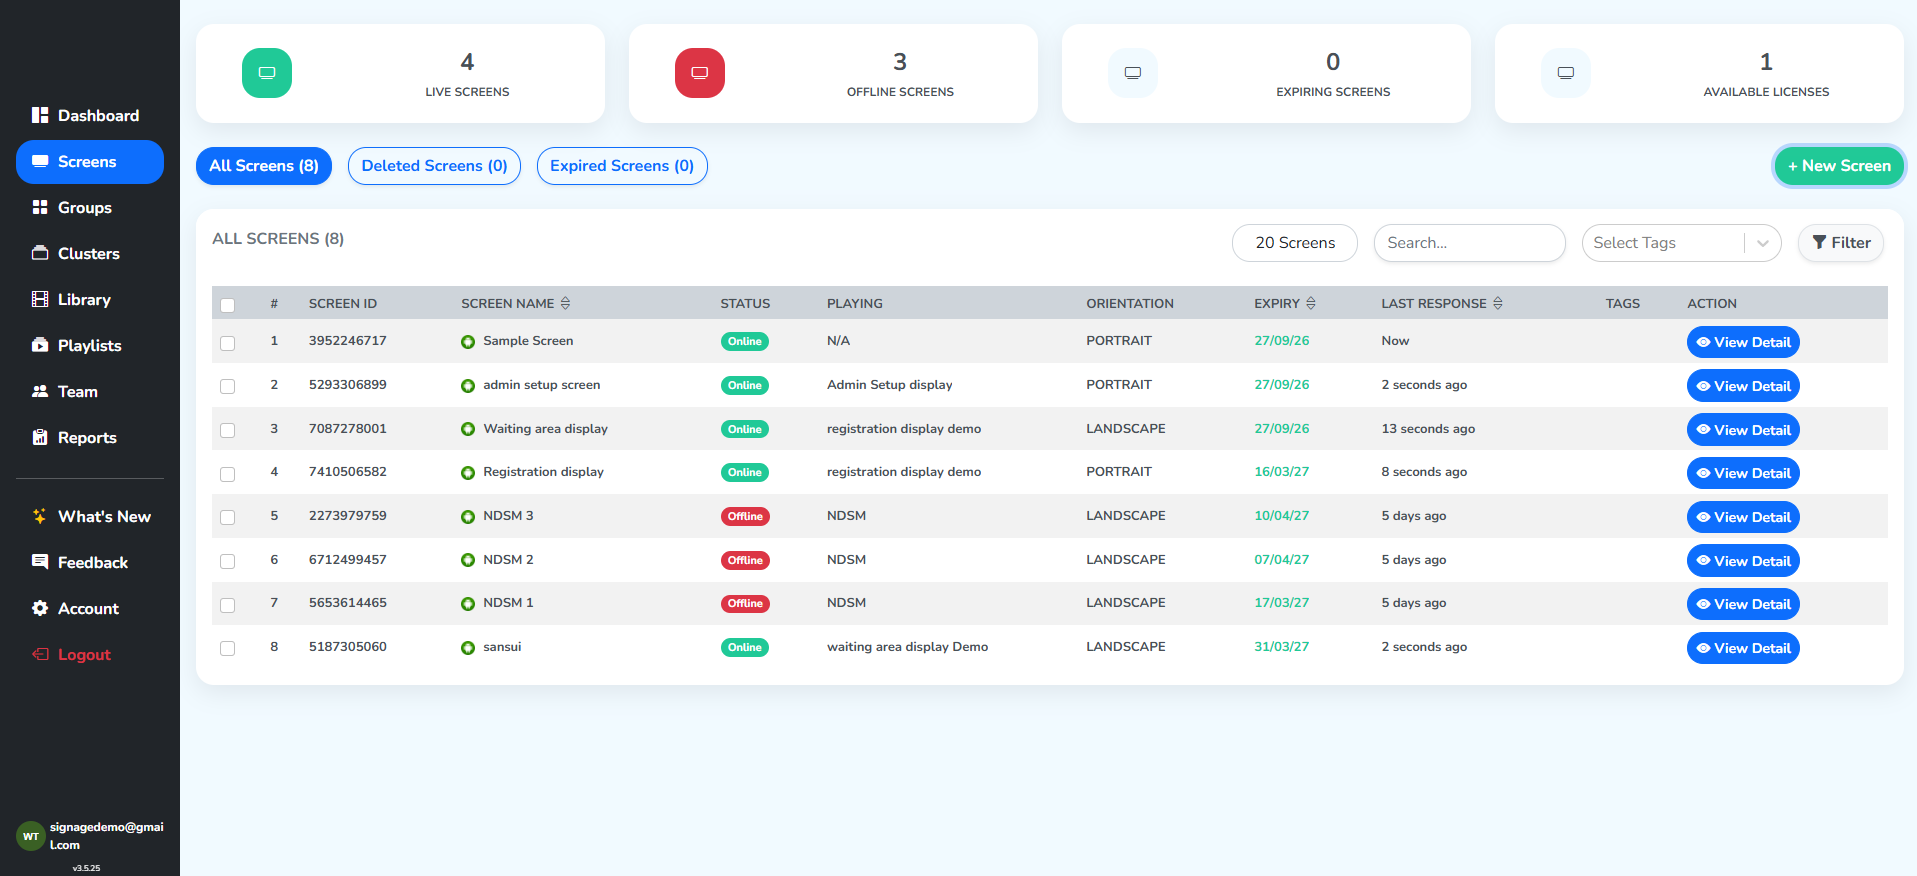 Your new screen, Online
Within a few seconds, the screen appears in your All Screens list and starts playing the default content (or a black screen if no playlist is published yet).
→ Full walkthrough: Screens → Pair a new screen.
Upload some media
Anything you want to put on a screen needs to be stored in your Library as an image or a video.
Step 1: Click the + Add Media button at the top right. This button is also available on the Library page, where it is labelled + Upload Media.
First-time users can click Upload media, third of four steps in the checklist which opens the same panel.
Step 2: The Upload Files panel opens. Check the Upload files to: Root line at the top left – this is the default folder your files will land in.
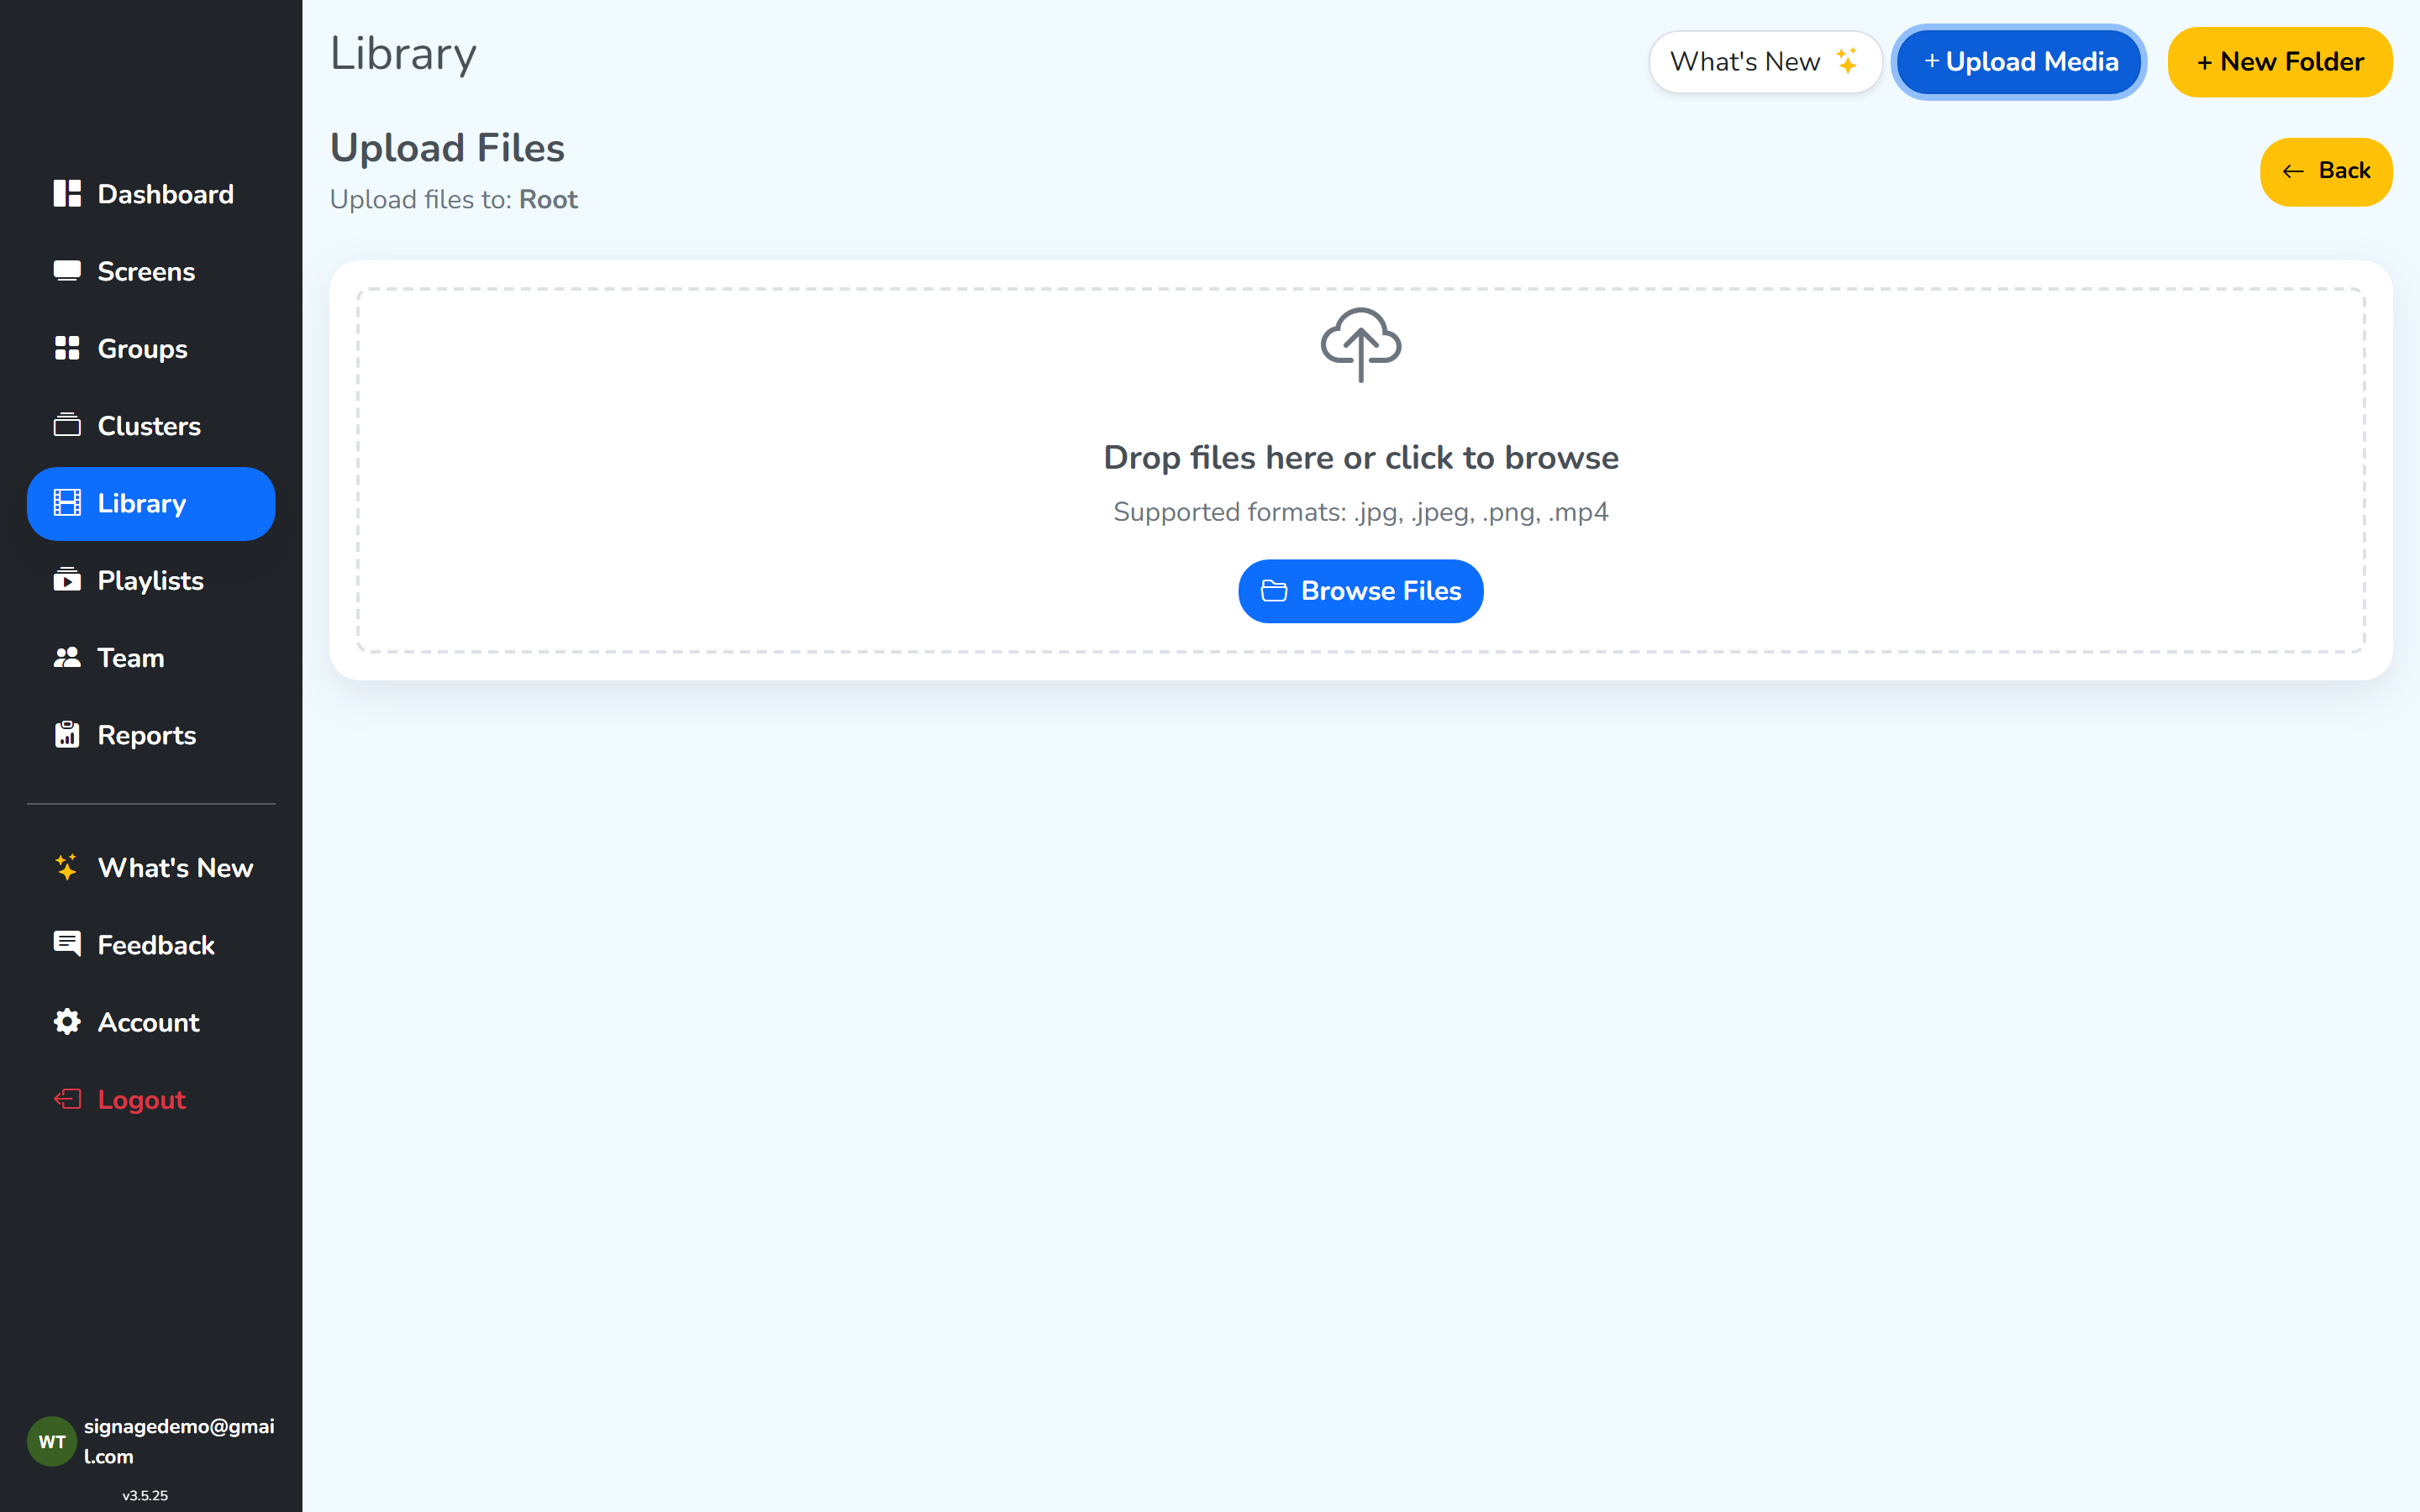
Step 3: Add your files in whichever way suits you:
- Drag & drop – drag files straight from your computer onto the dashed
Drop files here or click to browsearea. Browse Files– click the button and pick files from your device; you can select several at once.- Supported formats –
.jpg,.jpeg,.pngand.mp4.
Step 4: Wait for each upload to finish. The file then appears as a tile in your Library, ready to drop into a playlist.
To publish a single file without building a playlist, open the Library in the left panel and click the publish option (the paper-airplane icon) on that file. Click Select Screens at the top right, tick the checkbox of the screen name, then click Publish at the top right.
Your media now lives in the cloud, available to every screen on your account.
Heavy video: a video longer than the Adaptive Content limit isn’t converted, and can stutter if the display doesn’t suit its resolution or bit rate. Create a lighter Variant for it in the Library. If you see no Variants icon on the tile, ask support to turn it on for your account (contacts below).
→ Full walkthrough: Library → Upload Media.
Publish a set of files to your screen
Your files are in the Library now, and publishing is what puts them on a display. There are two ways to get a set of files playing.
Method A – publish files straight from the library
Quickest when you just want a few files on a screen, for one-time use.
Step 1: Open the Library in the left panel.
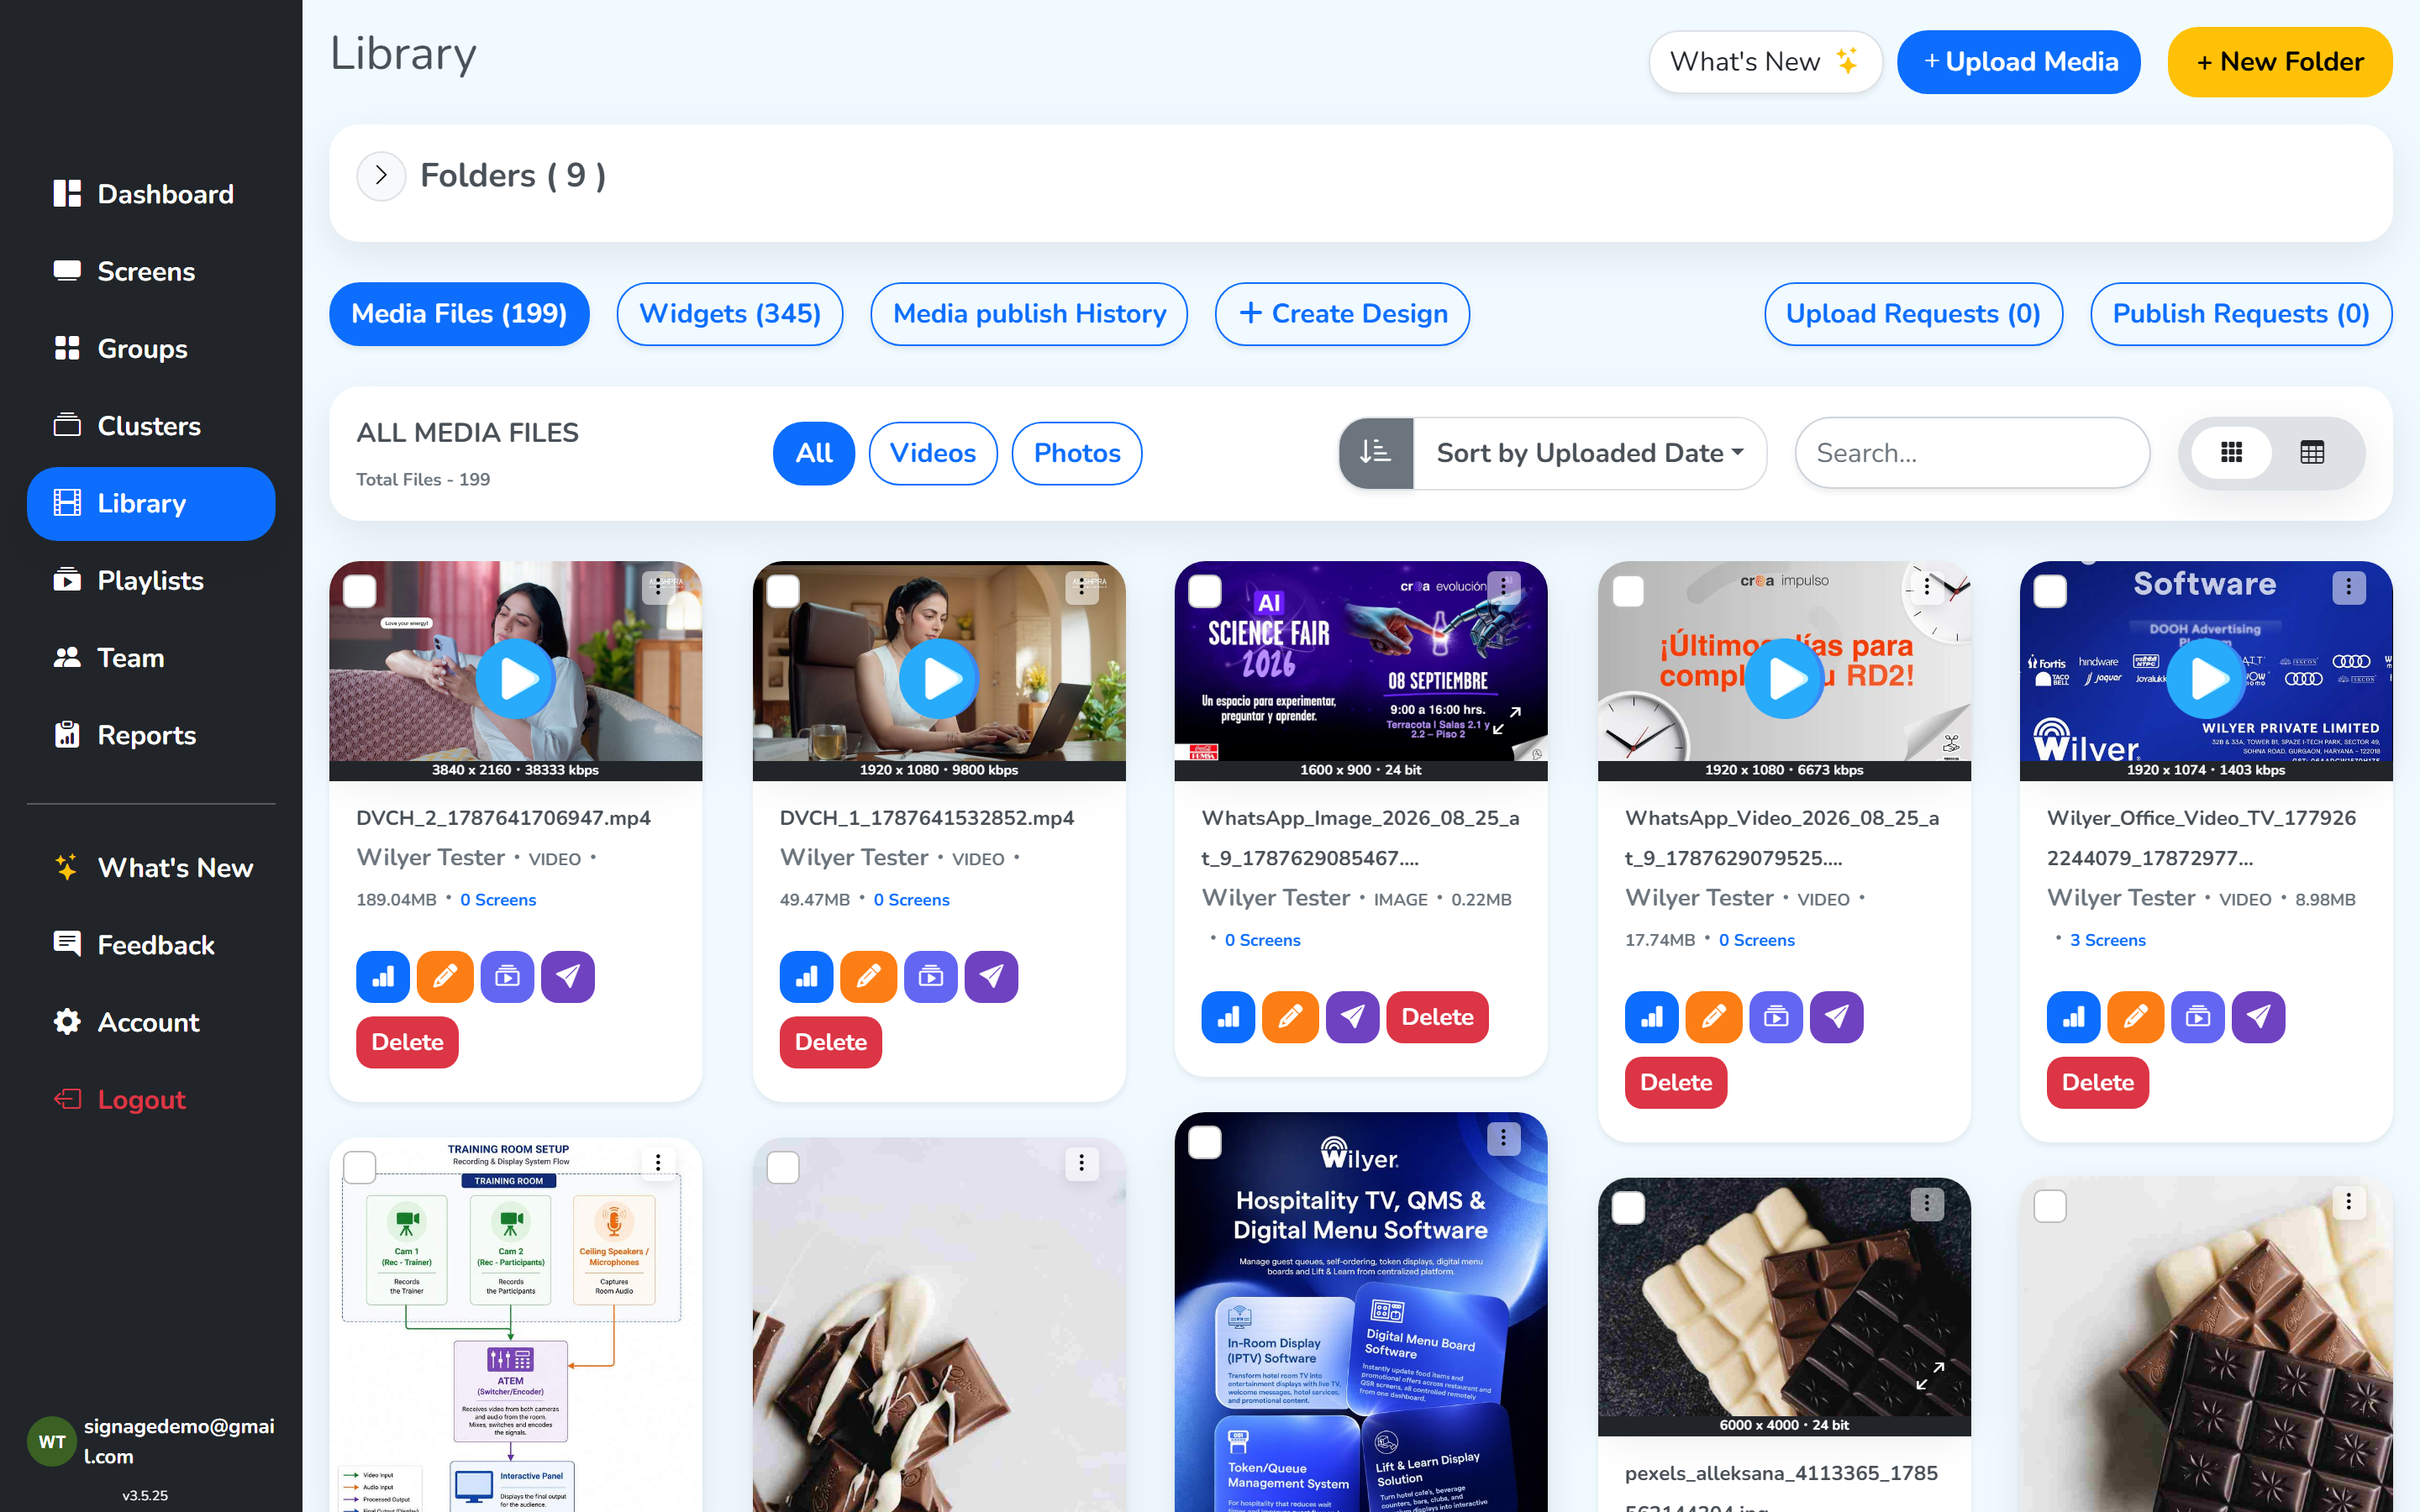
Step 2: Tick the checkbox on each file that should go to the screen.
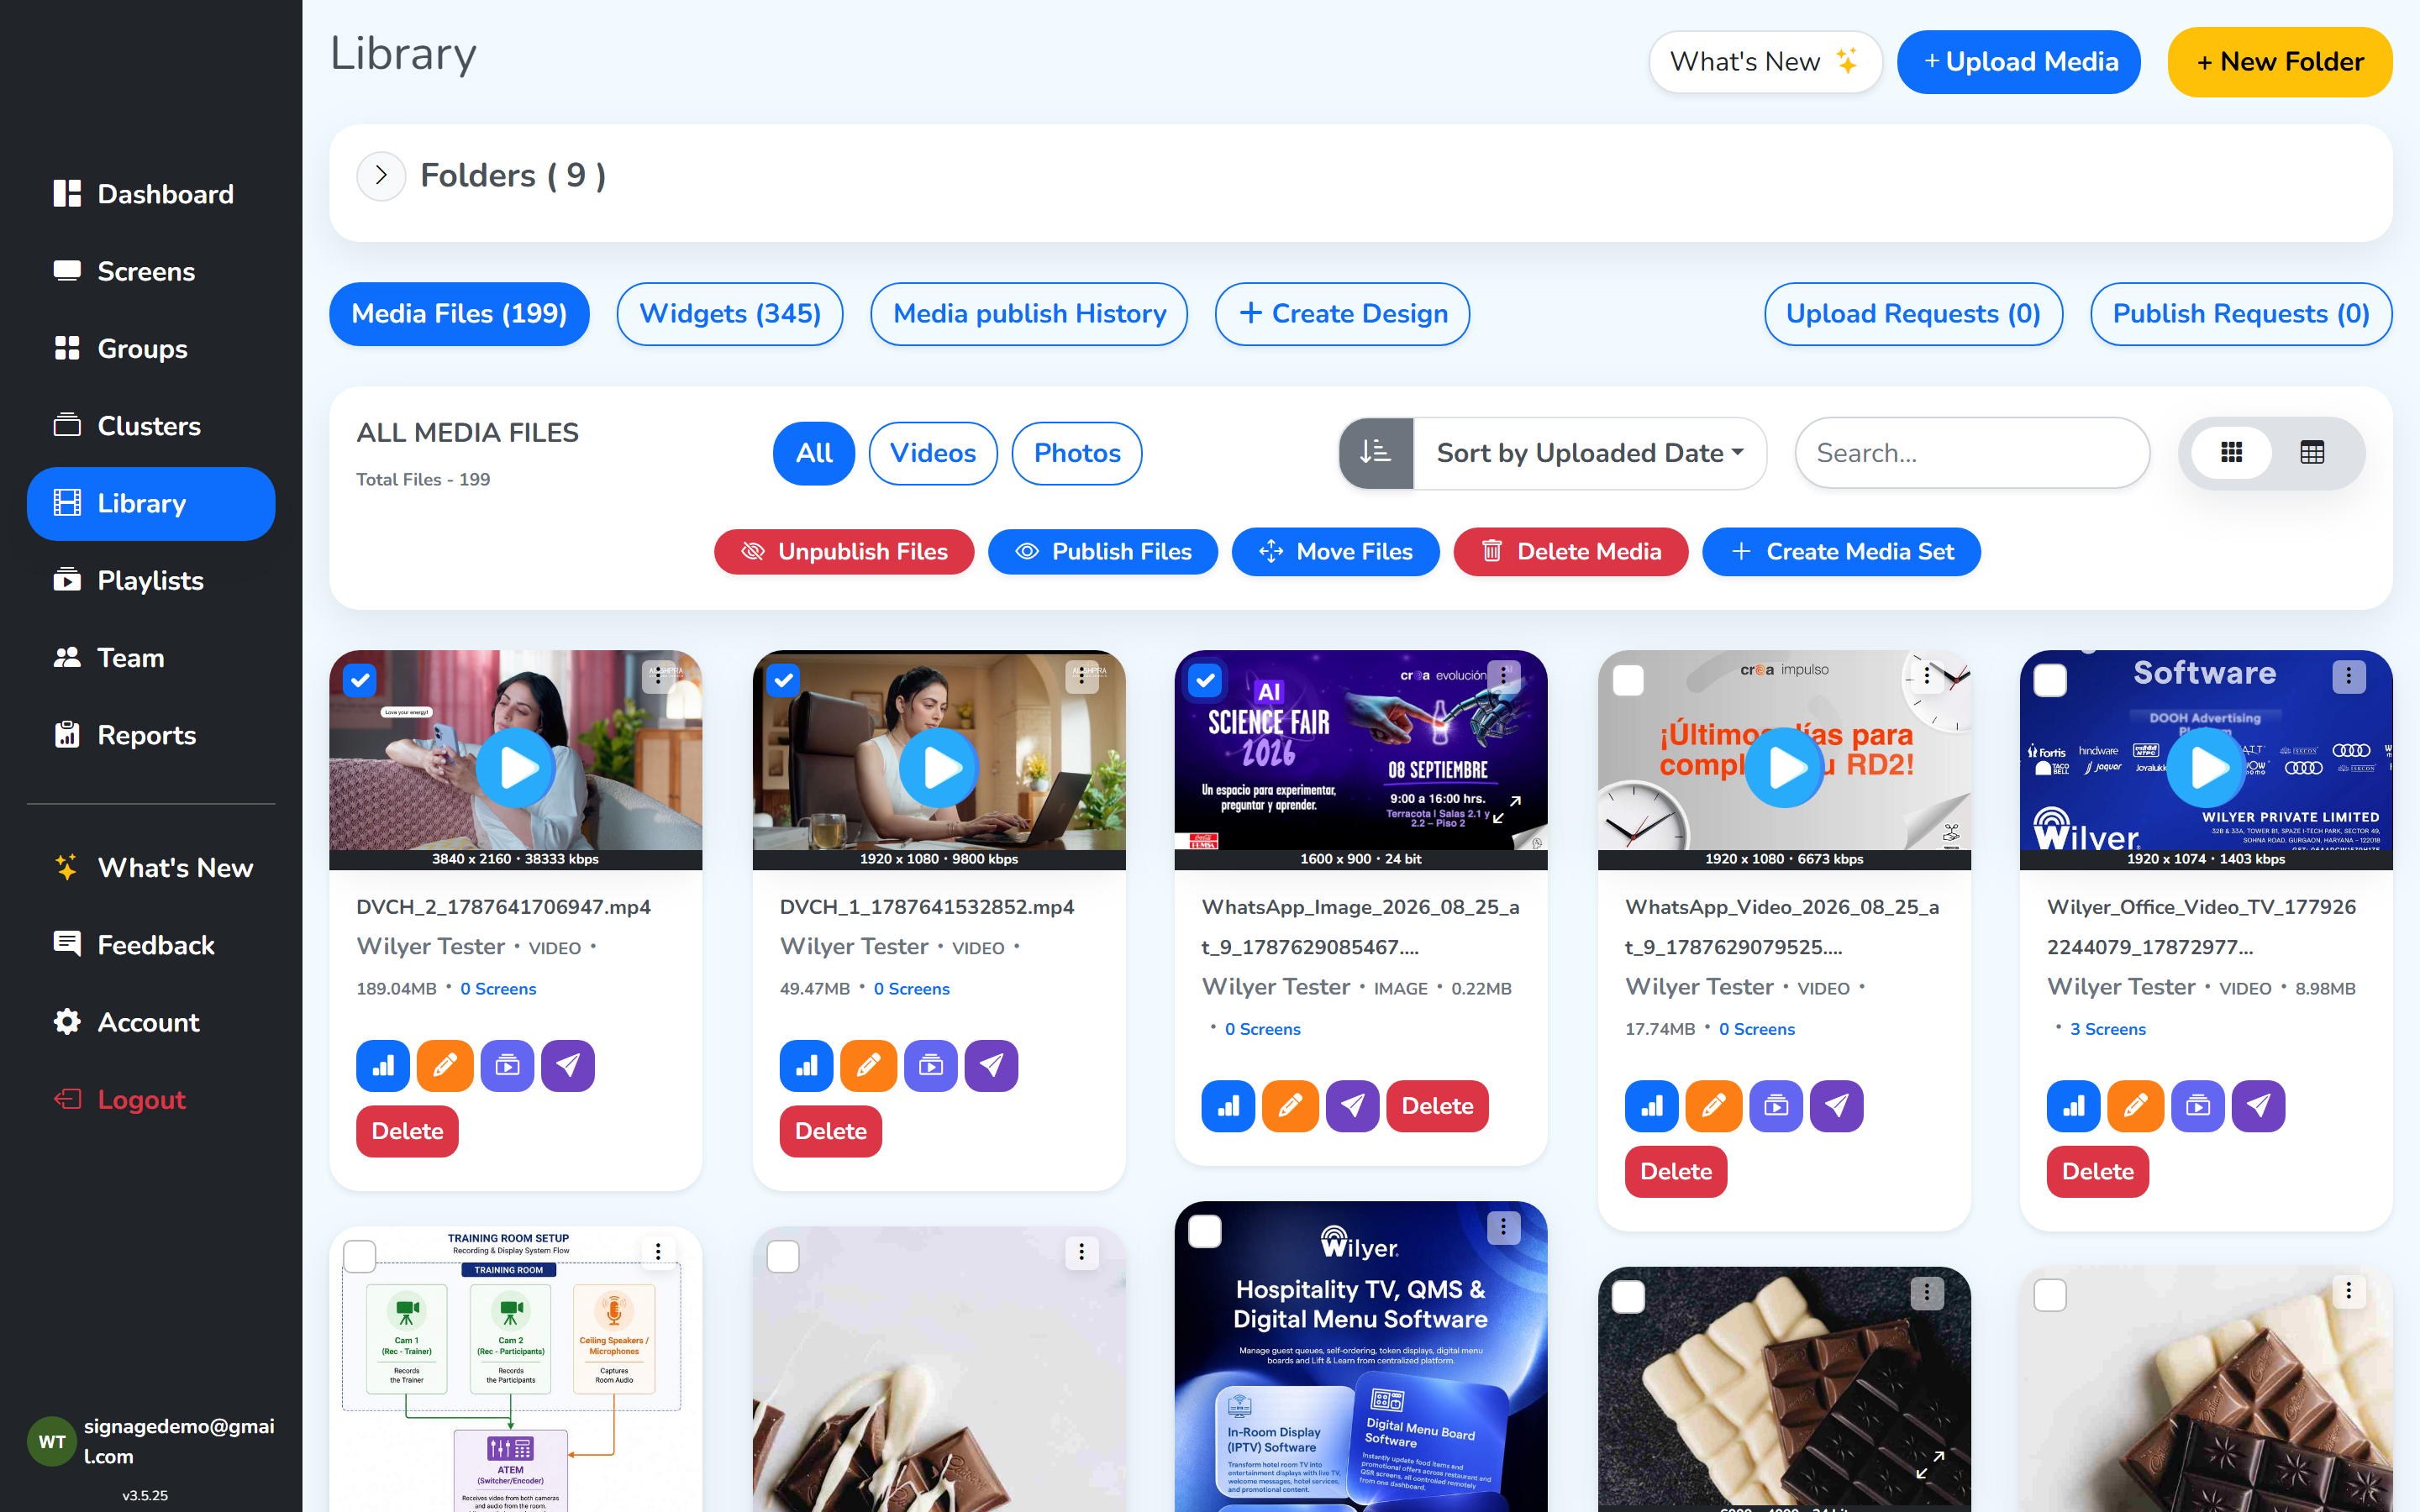 Selected files
Step 3: Click Publish Files (eye icon), then click Select Screens at the top right.
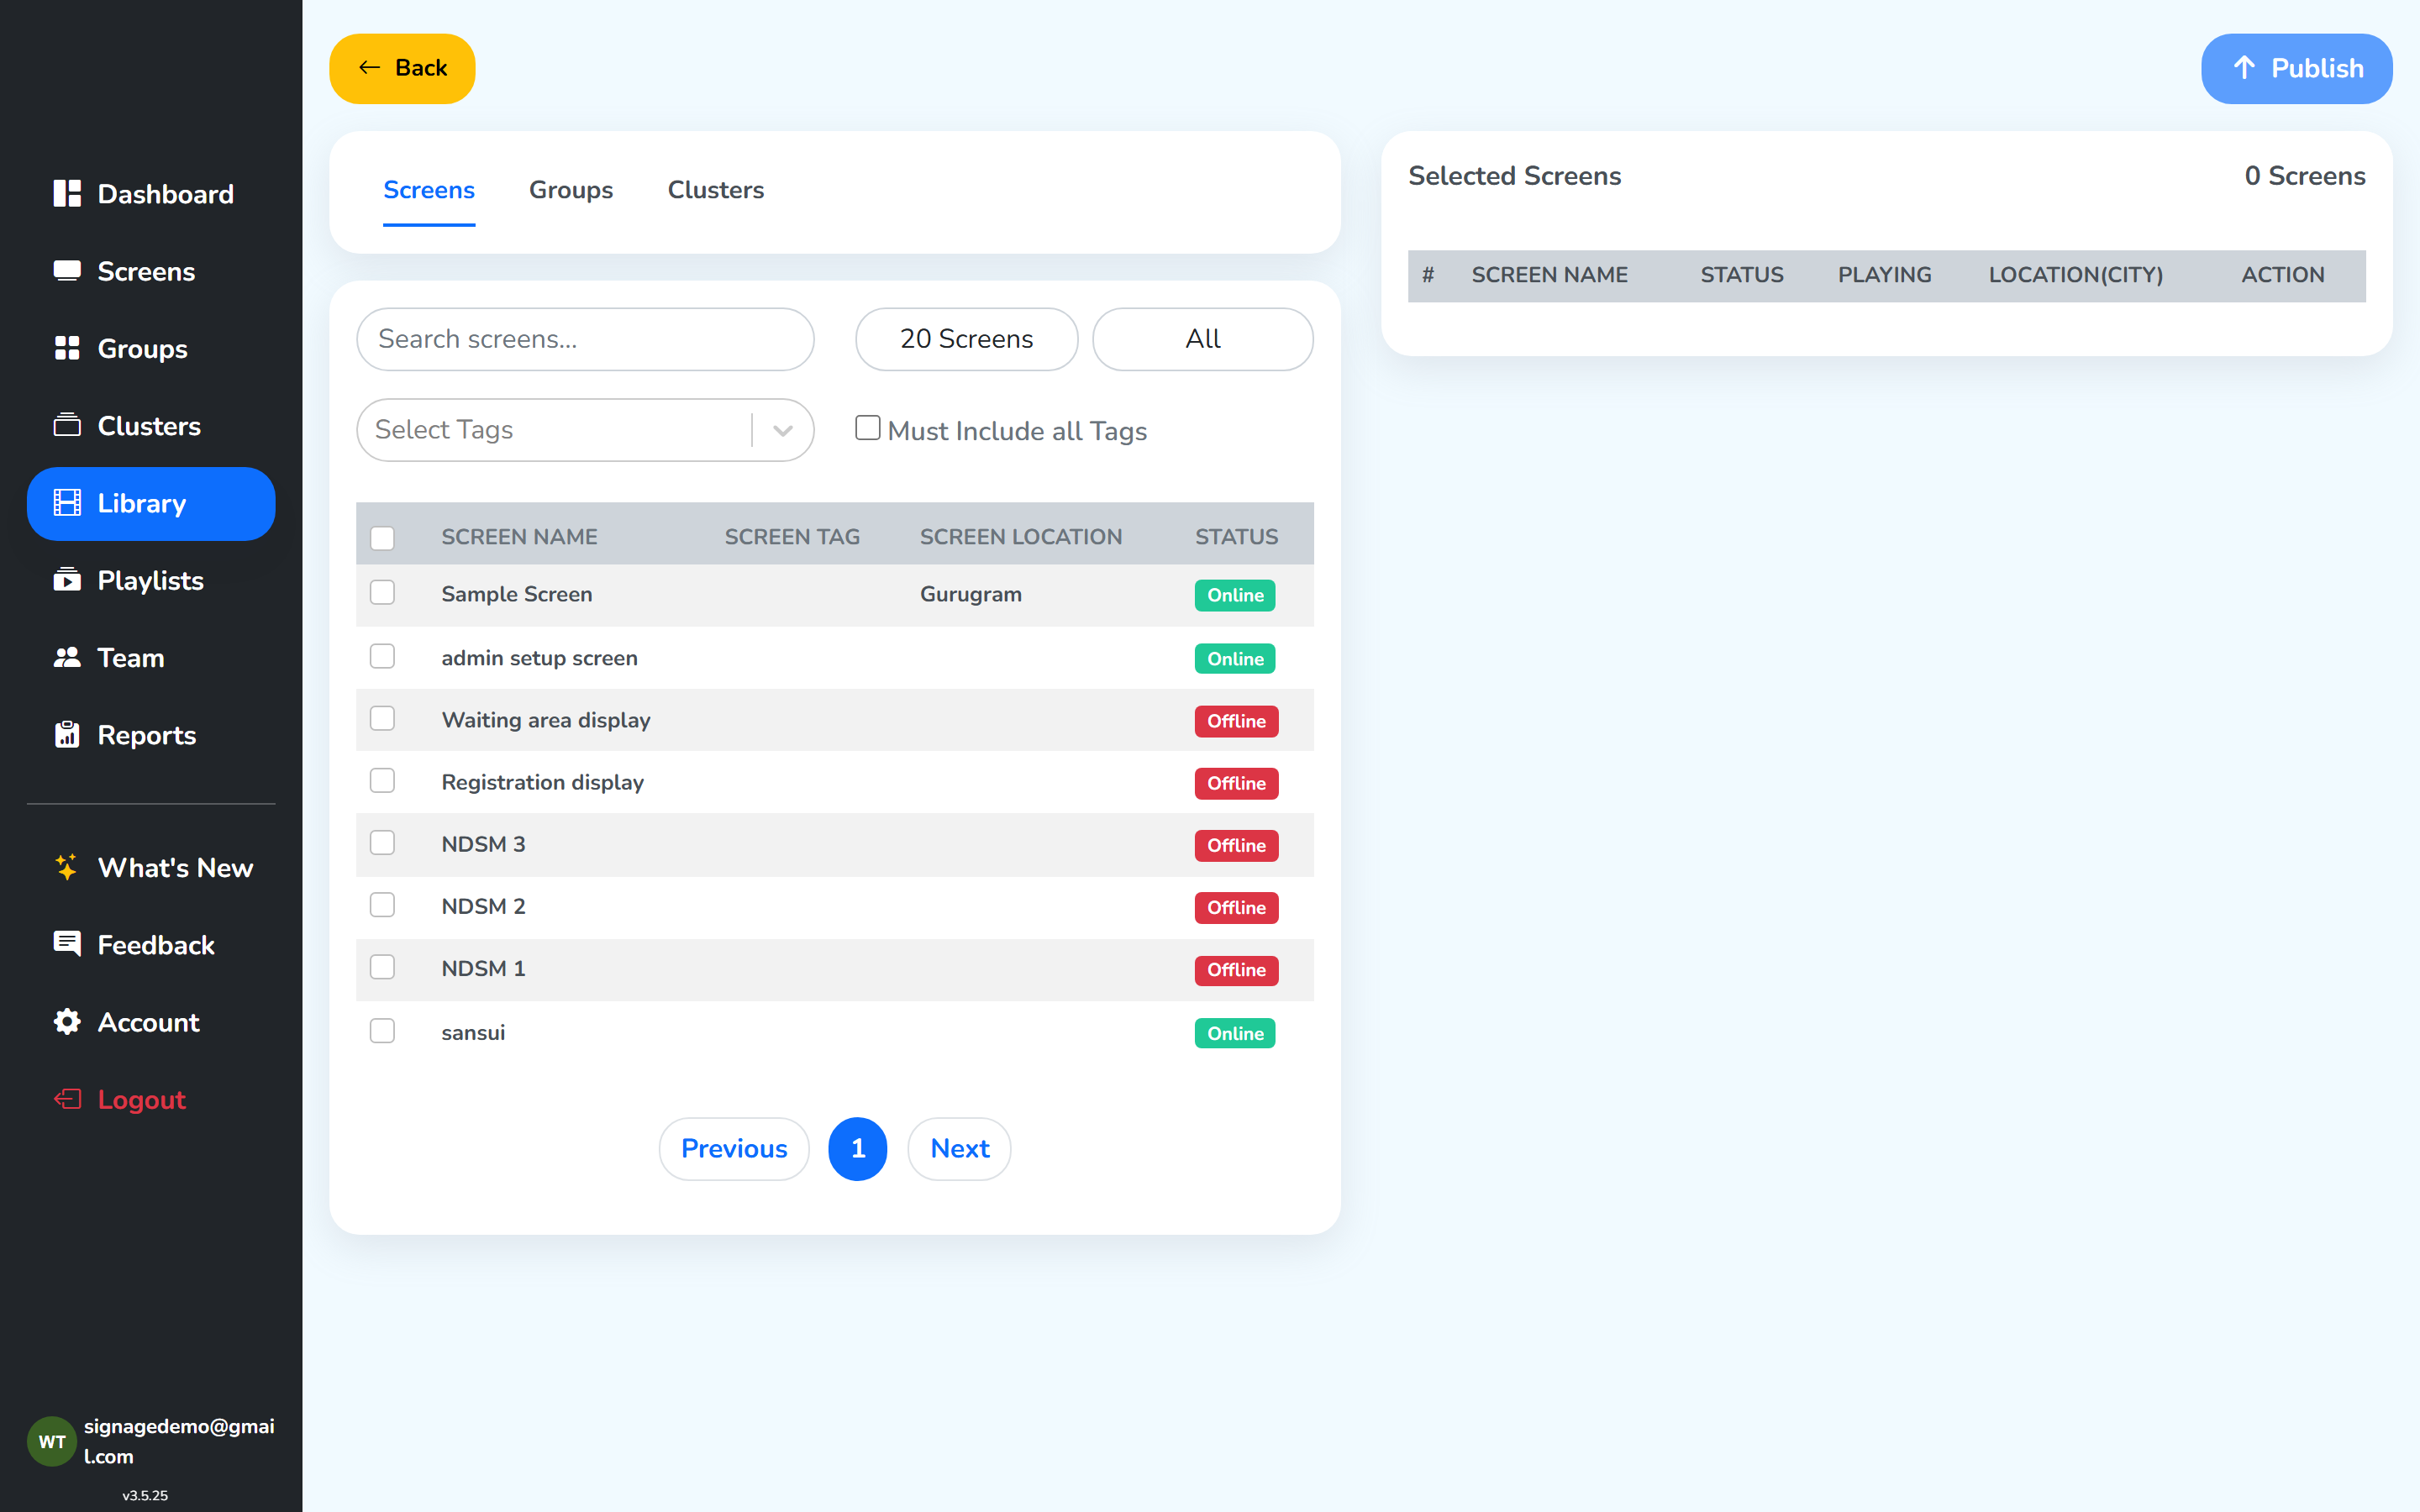 Select your screens
Step 4: Tick the checkbox of the screen you want, then click Publish at the top right.
The screen picks up the files within a few seconds and plays them one after another.
→ Full walkthrough: Media Options → Publish.
Method B – build a playlist and publish it
A playlist is what you use when you want a named, reusable series of files – either ones already stored in your Library, or ones you are about to upload.
Step 1: Click the + New Playlist button at the top right, right next to + Add Media. It opens the create new playlist dialog in the Playlists section in the left panel.
First-time users can click Create playlist, fourth of four steps in the checklist which opens the same dialog.
Step 2: Give your playlist a name (e.g. Lobby Loop). You can also add a short description, or drop it into a folder to keep things organized.
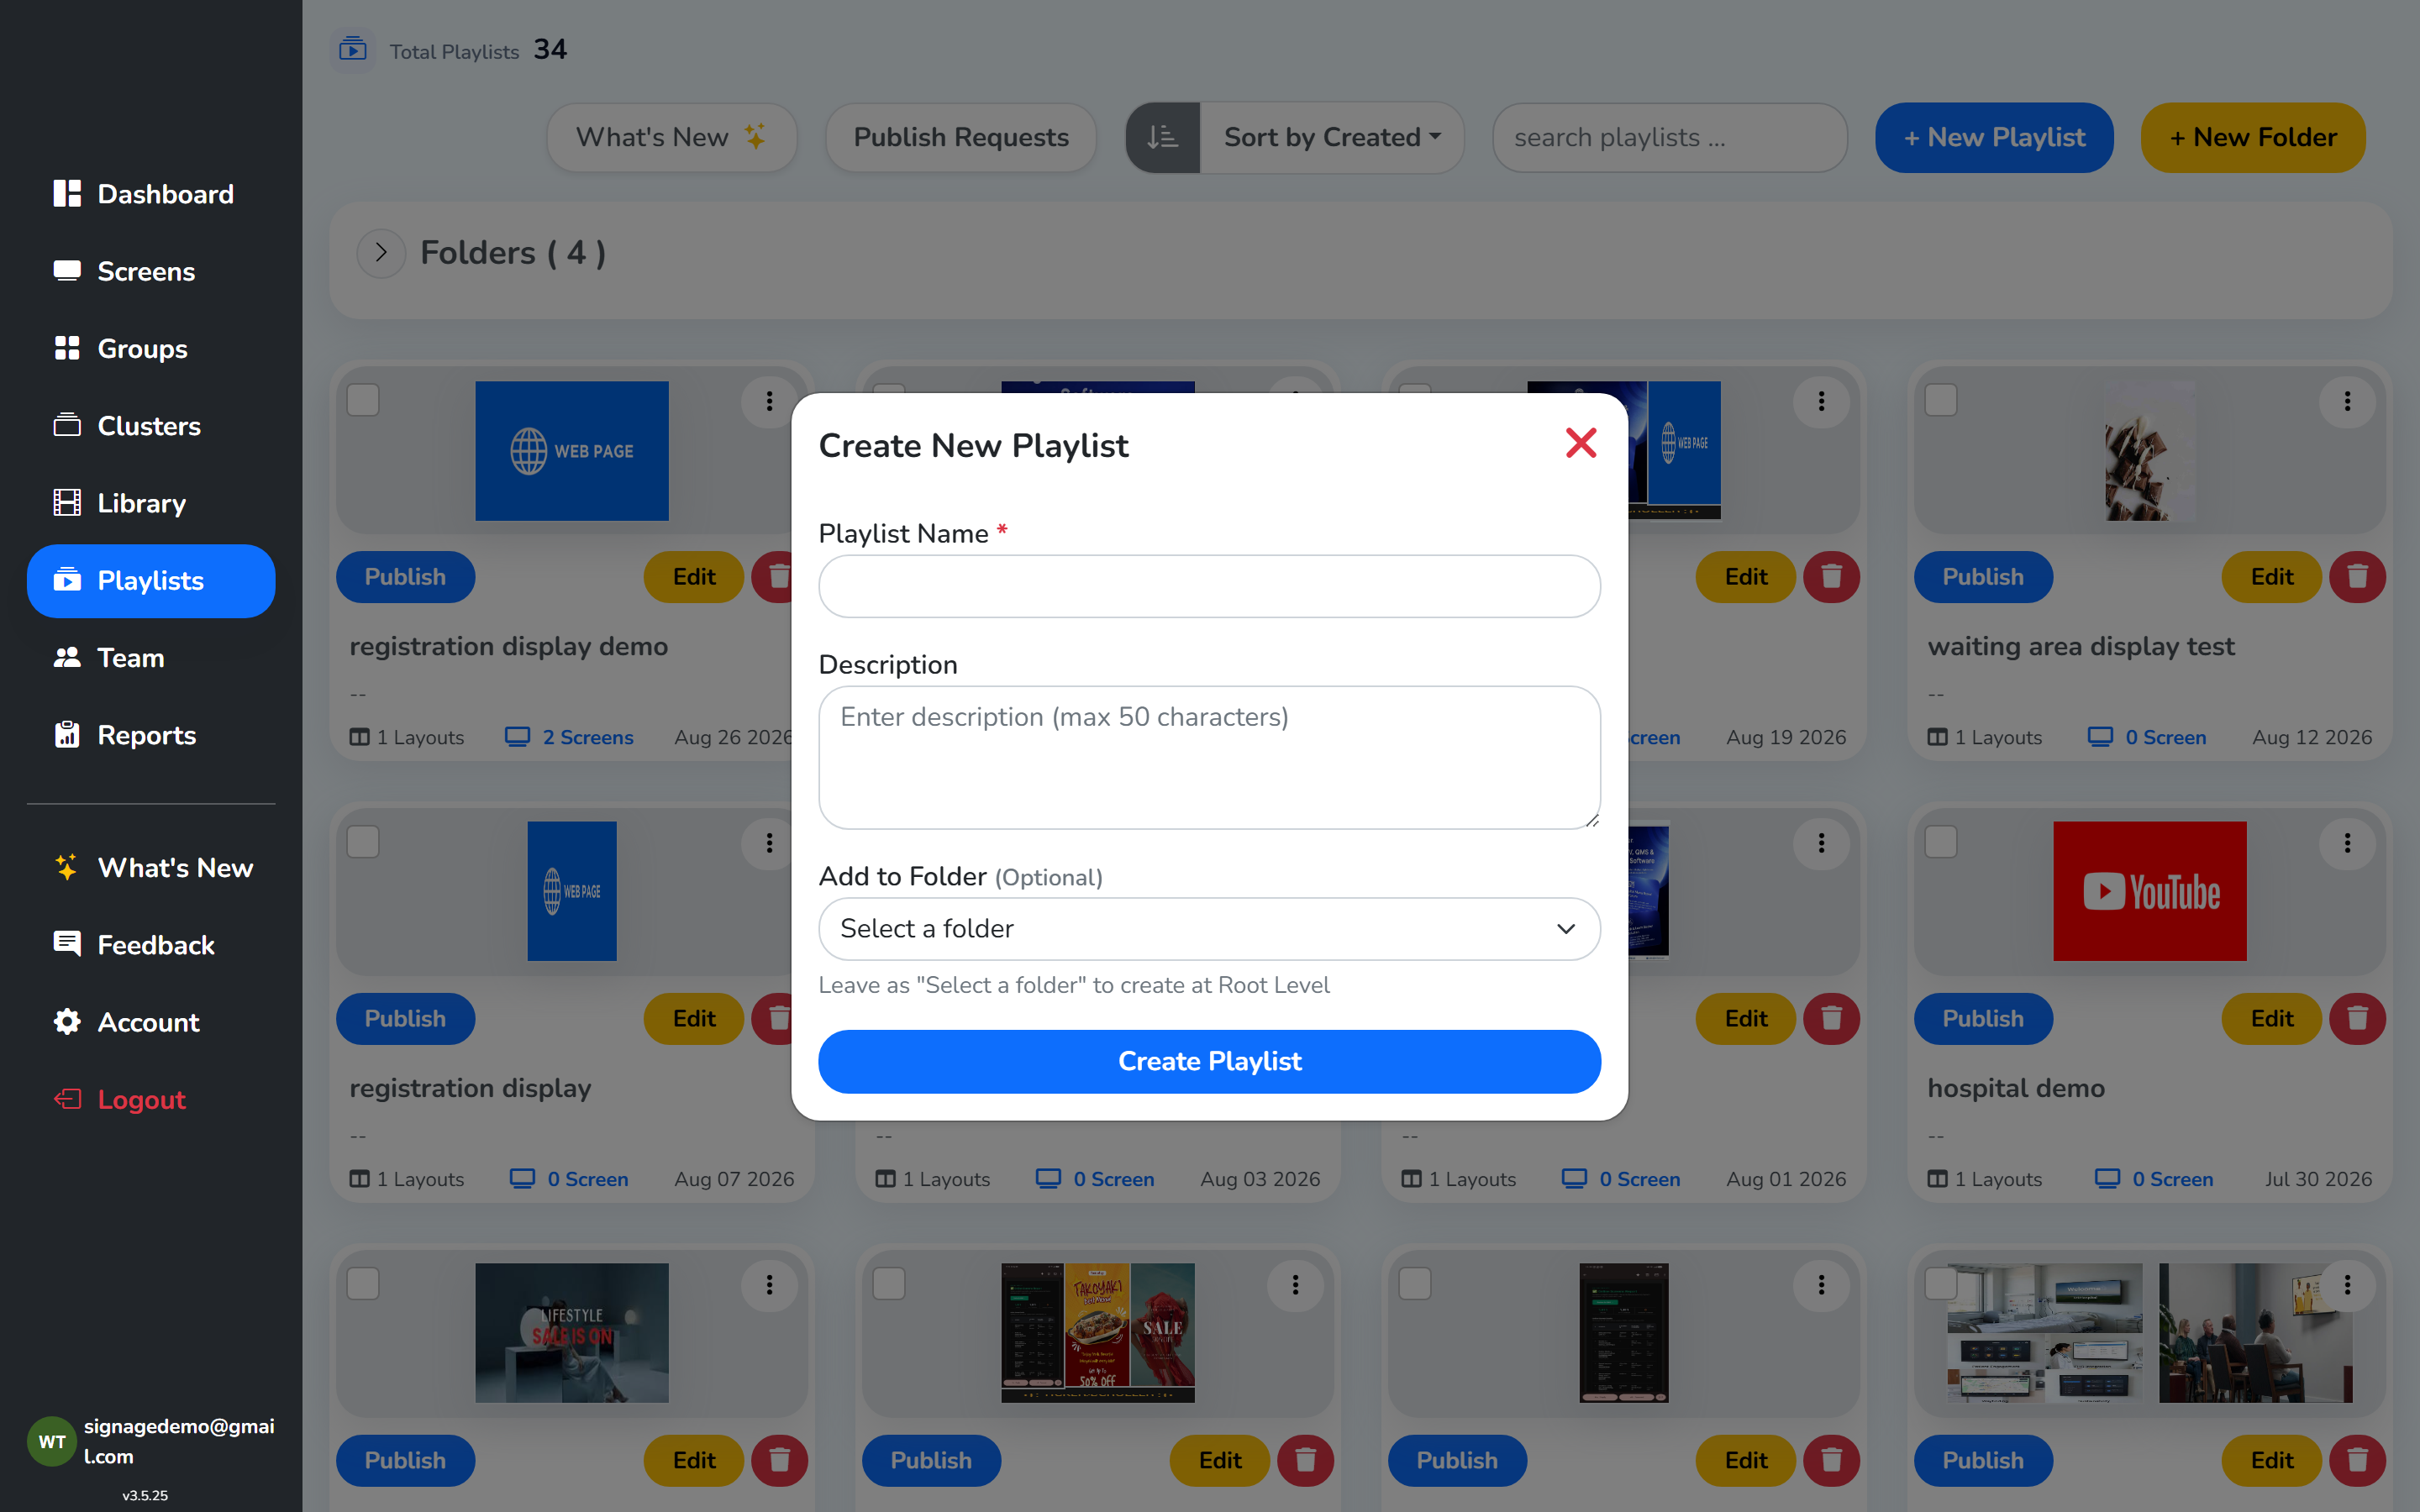
Step 3: Click Create Playlist. The Playlist Editor opens, with your Library media in the panel on the left and a canvas in the middle that represents the screen.
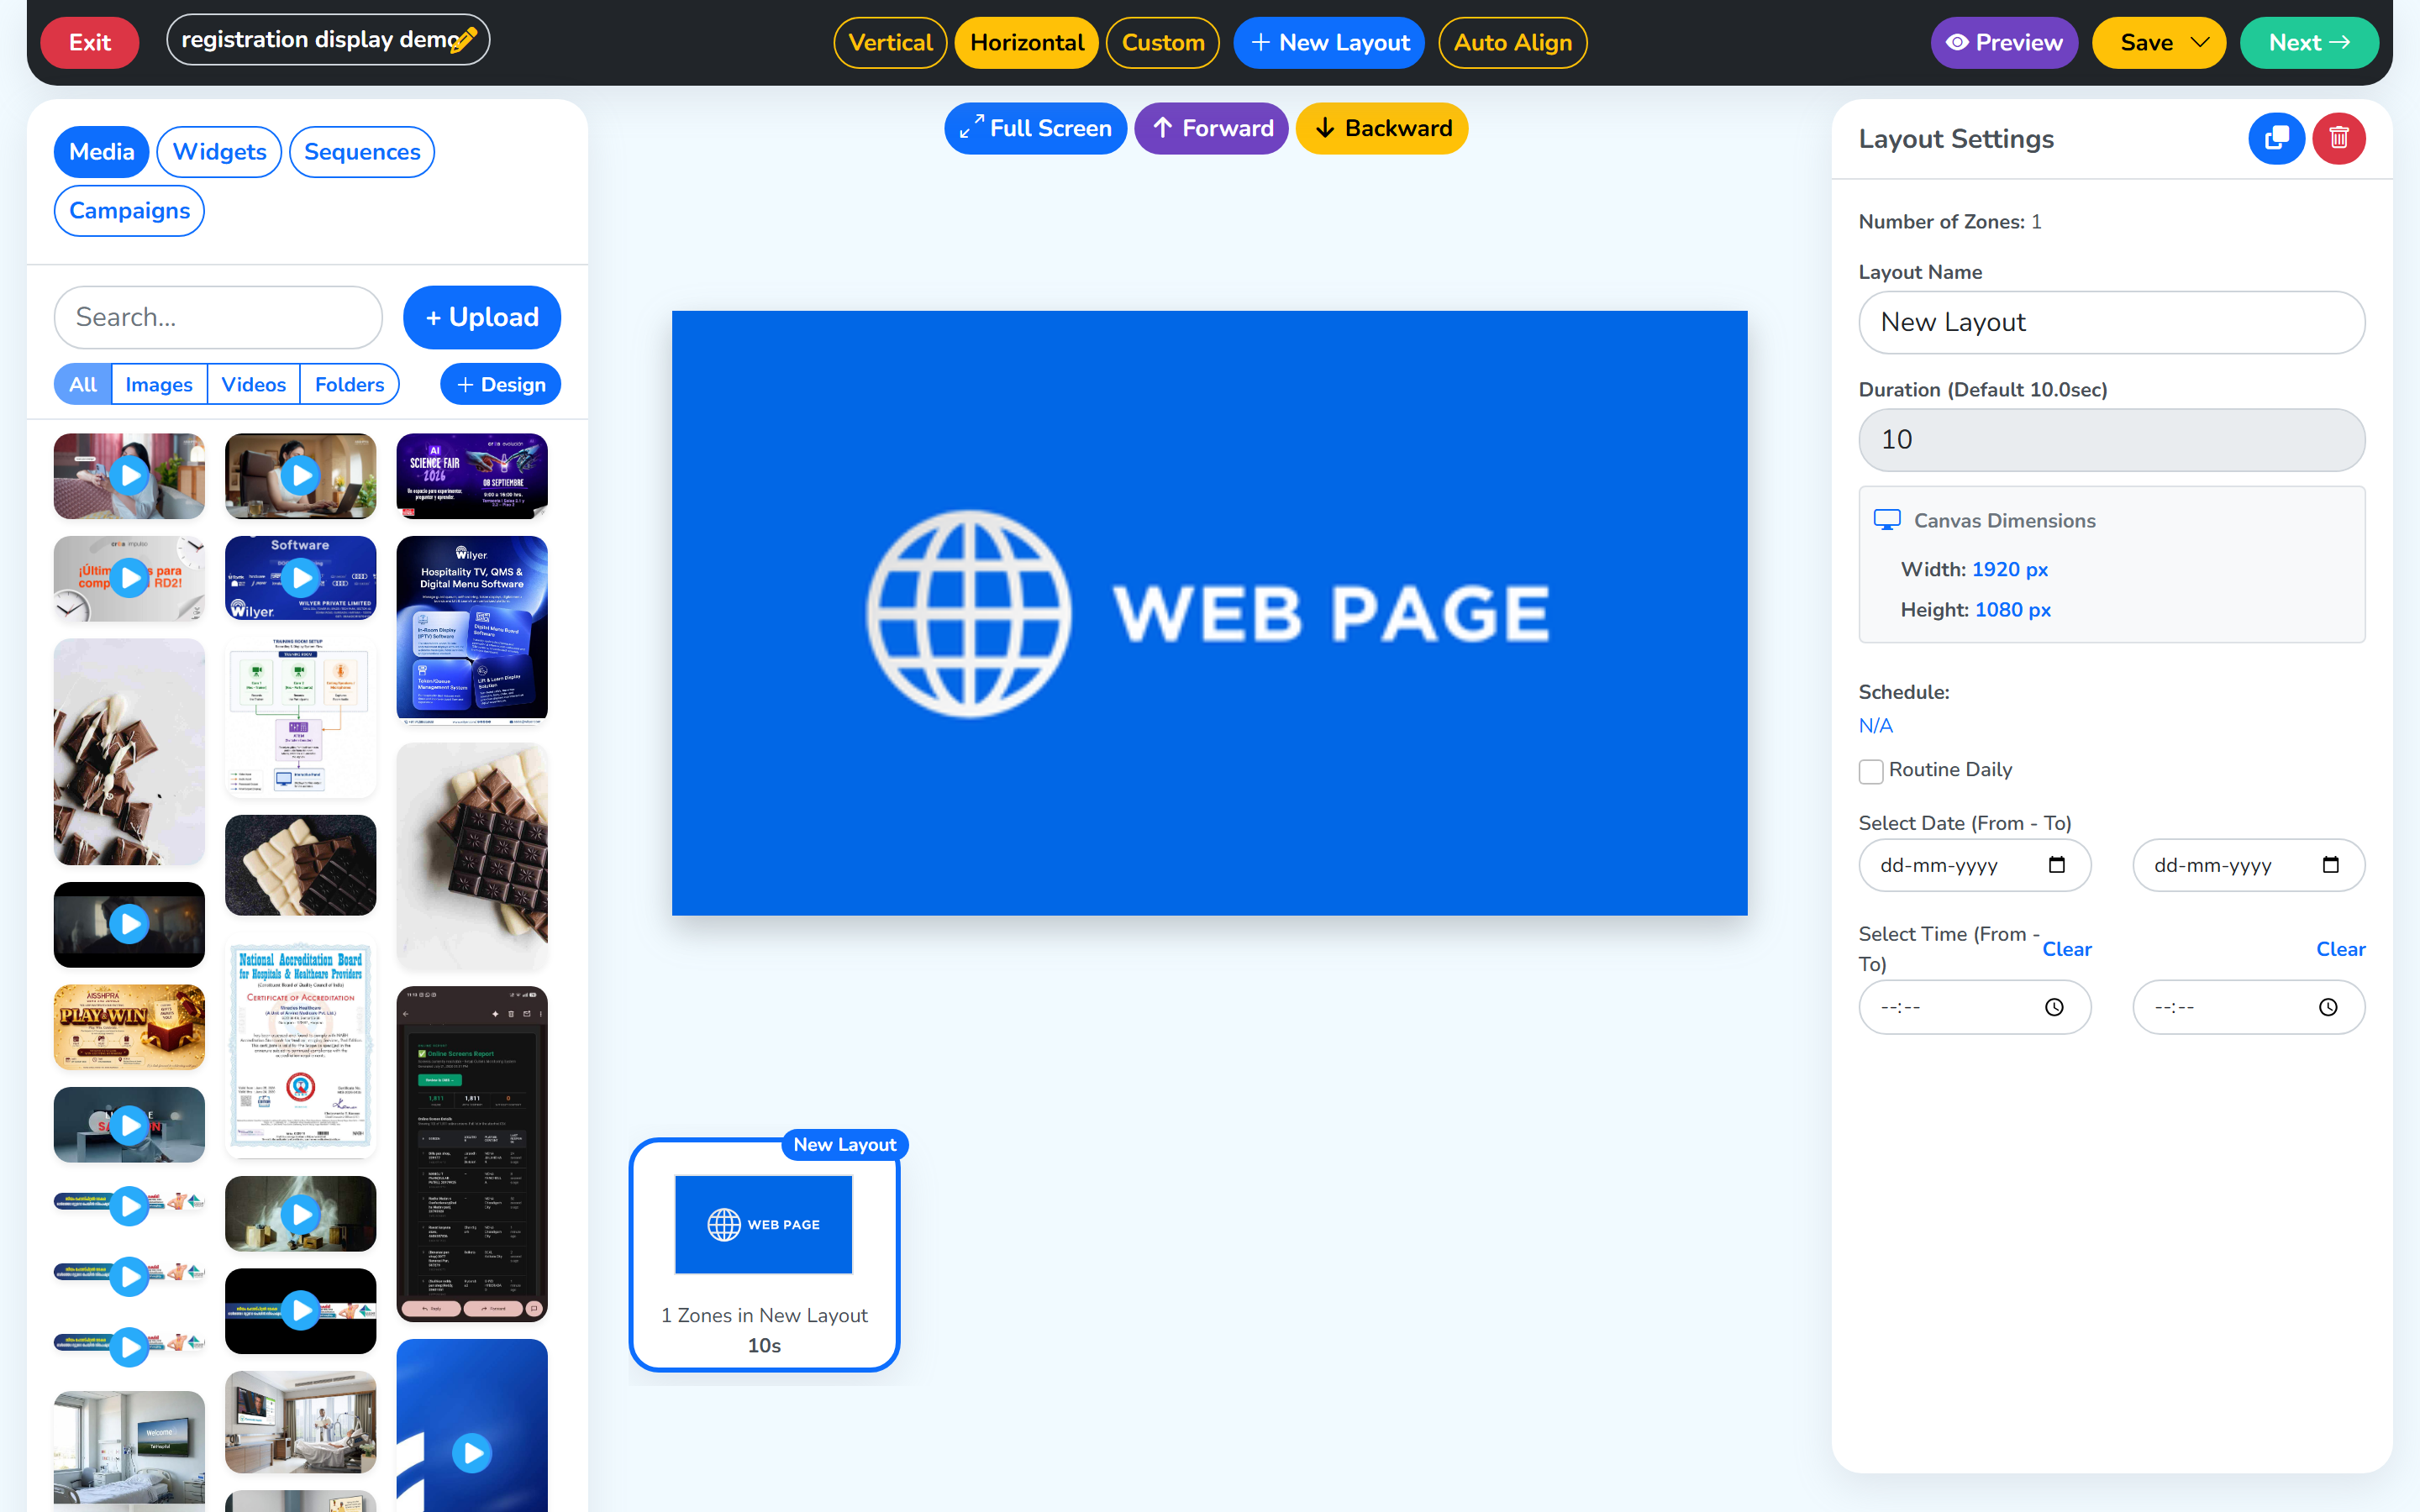
Note: the editor saves only when you click
Save, so save before you leave.
Step 4: Drag the files you want from the left panel onto the canvas. Each file you drop is added to the playlist.
Step 5: Once done, click Save at the top right.
Step 6: Click Next at the top right to publish. A list of your screens opens with a checkbox next to each name. Tick the screen you paired earlier, then click Publish at the top right.
Coming back later: if you have already closed the editor, open Playlists in the left panel. Each playlist has a
Publishbutton; click it, tick the screen you want in the same checkbox list, then clickPublishat the top right.
The screen picks up the playlist within a few seconds and starts playing.
→ Full walkthrough: Playlists → Create & Edit · Playlists → Publish to Screens.
Verify it’s live
The quickest check is the physical screen itself – your content should be playing. From the dashboard, there are four ways to confirm a screen is online.
-
On the Dashboard – the counts of Online and Offline screens are shown at the top; click either count to see which screens it covers. Scroll down and each screen name carries a green dot (online) or a red dot (offline).
-
On the Screens page – open Screens in the left panel, and every screen shows its Online / Offline status.
-
Open a screen for the full picture –
Viewbutton on a dashboard screen card andView Detailsbutton next to a screen name in the Screens section both lead to the same page, which shows the screen’s full details.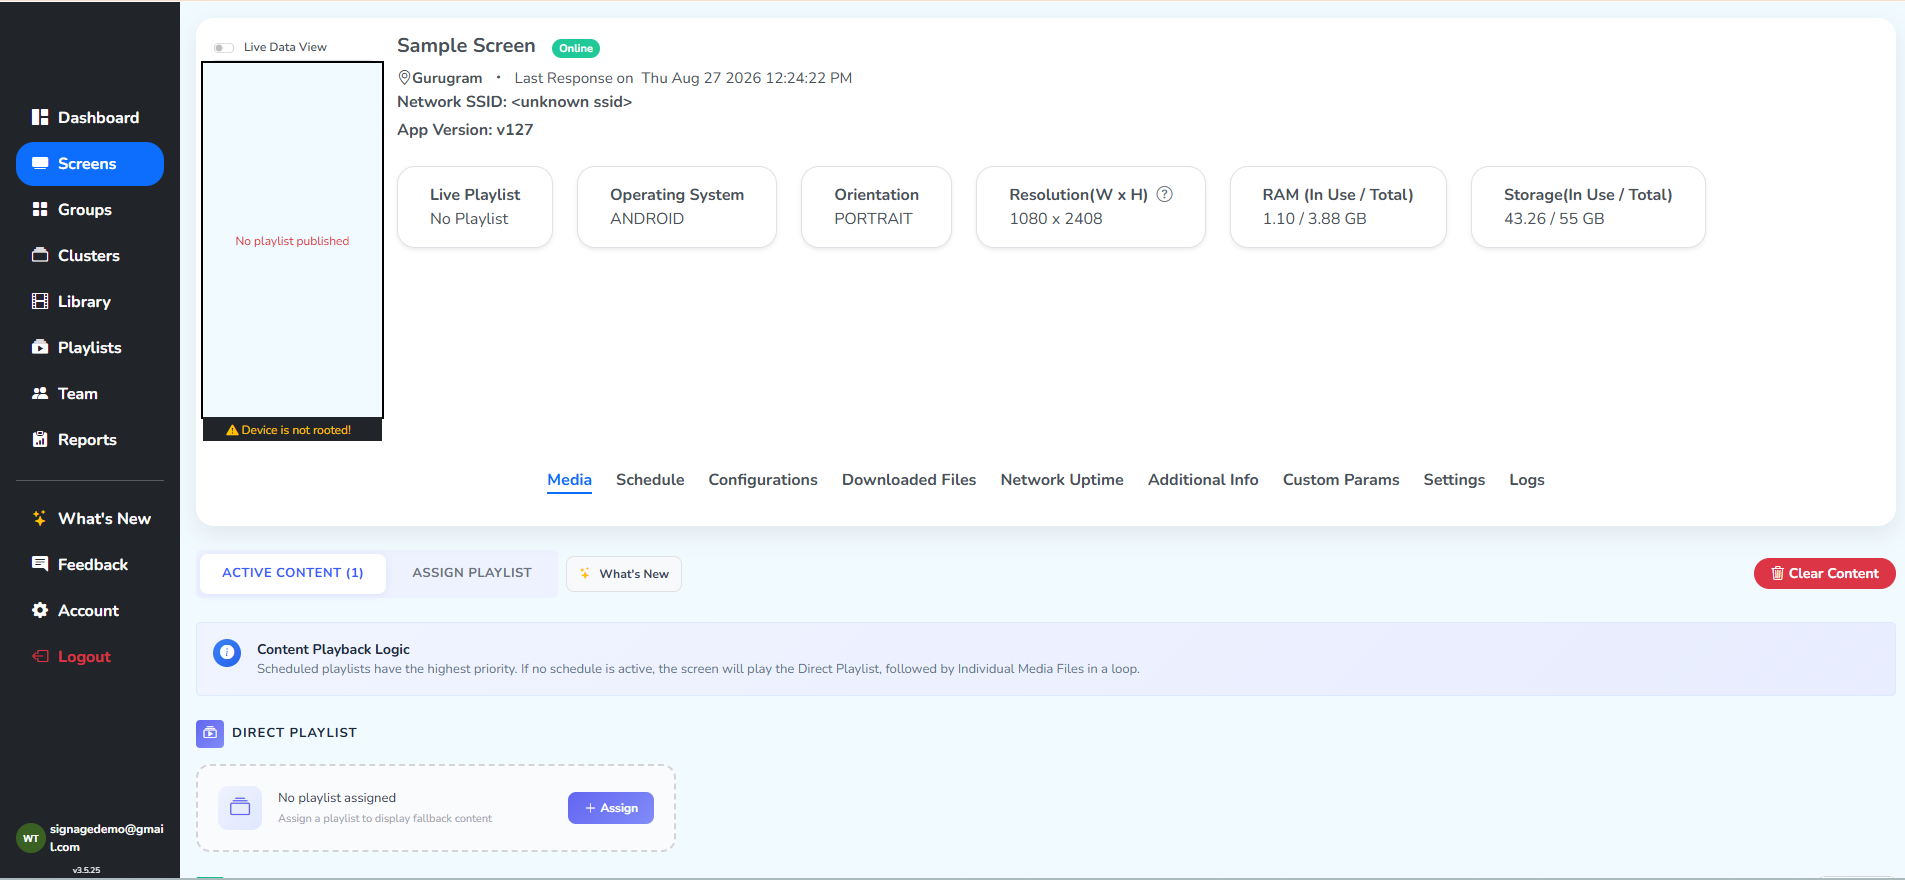 Screen settingsStatus, playlist, resolution
 -
Checking several screens at once – in the Screens section, tick the checkbox next to the screens you care about and click
Nextat the top right. The page that opens lists the online/offline status of everything you selected, and Bulk Operations opens in the left panel – from there you can, for example, Take Screenshots to confirm the Player app really rendered your content.
What to do next
Now that one screen is playing your content, pick what applies to you:
- More than one screen → set up Groups so you can publish to many at once.
- Multiple regions / branches → use Subgroups with one role per level, reporting up the chain.
- Multiple people working on content → set up Team Members and the Maker/Checker workflow.
- Time-of-day content rules → use Playlist Schedules or per-screen schedules.
- Multi-zone displays → explore Layouts & Zones.
- Reporting → Analytics once you have data flowing.
When something goes wrong
- Screen says Offline / red dot → offline means the screen is powered off or off the internet, so check it is switched on and the player app has a connection.
Restart Playerin the screen’s Settings tab reaches the screen once it is back online. - Pairing code rejected → make sure the code on the display is current (it refreshes every minute or two).
- Content didn’t update → confirm the publish succeeded (check Activity Logs) and that the file finished downloading on the screen (visible in its Downloaded Files tab).
- Permission errors / button missing → your role probably lacks the right permission. See Roles & Permissions.
Need help: These contacts are also listed in the dashboard. For plans, licenses and pricing, reach the sales team on
+91 8595119451– the same number works for both call and WhatsApp. For anything else, email the support team atsupport@wilyer.com.