Roles & Permissions
This page walks through building a custom role: its permissions, the colored tags a role card carries, and how the Reports To hierarchy works.
Open the panel
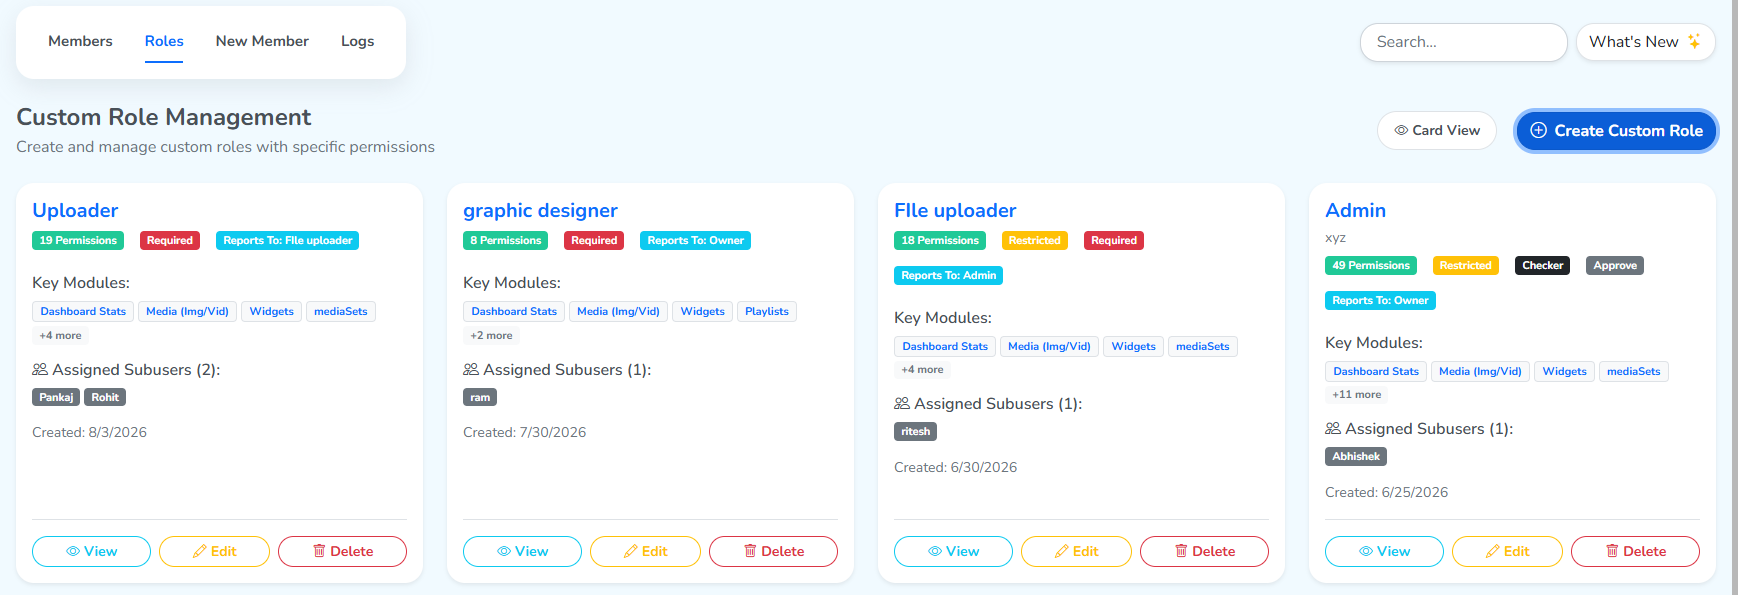 RolesCreate Custom Role
- Click the
Rolestab, then+ Create Custom Role.
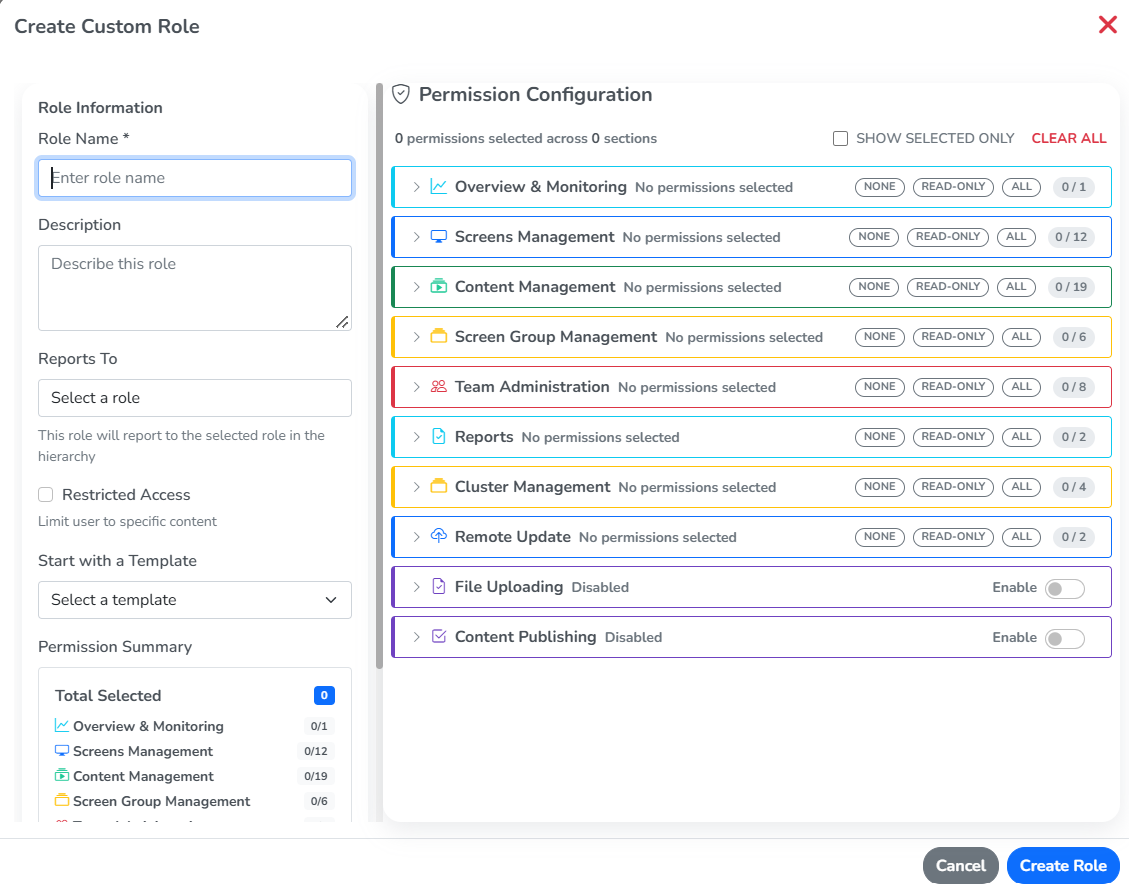
- The panel opens with two halves: Role Information on the left, and Permission Configuration on the right.
Role information
Role Information names the role and sets where it sits in the hierarchy.
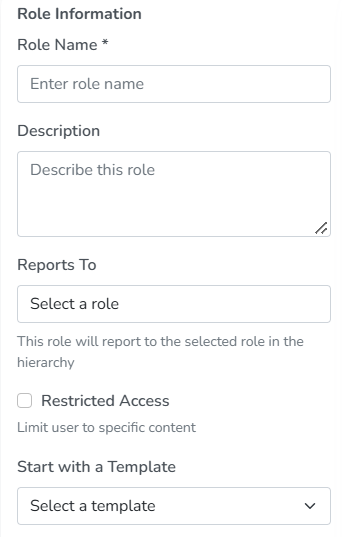
Role Name* – what you call this role, for example Designer or Receptionist.Description– optional detail about what the role is for.
Reports To
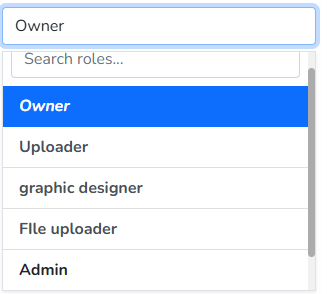
The role picked here decides where this new role sits in the hierarchy, the same hierarchy shown in Hierarchy View on the Roles tab. Click the field to see the roles already created, and pick the one this role reports to.
Owner is the root role, the one who created the account and gives every other member their access. Owner always holds every permission, permanently.
Restricted Access
Turning this on limits a member with this role to the screens, library files, playlists and clusters that belong to the groups they’re part of, or that they’ve been given access to. Team Access in Group Settings controls which members belong to which group.
Start with a Template
Opening this dropdown offers seven ready-made starting points, each with its own permission set already filled in.
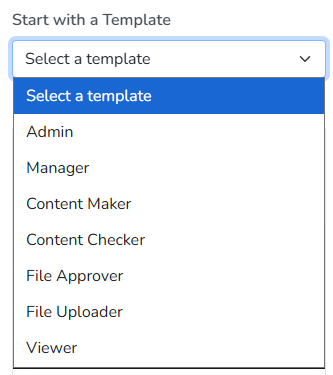
- Admin – starts with every permission Owner has. Unlike Owner, an Admin’s permissions stay open to edit here.
- Manager – starts with the same broad, editable permissions as Admin, with Restricted Access turned on automatically.
- Content Maker and Content Checker – set up the Maker-Checker flow for publishing content: a Maker’s attempt to publish creates a request in whichever queue matches what they published, a playlist’s own queue or the Library’s own publish requests queue for a direct file publish, and the Checker reviews it there.
- File Approver and File Uploader – the same maker-checker pattern, for file uploads: an Uploader’s file goes to the upload requests, where the Approver approves it.
- Viewer – sees every section as read-only.
Permission configuration
Permission Configuration, on the right, lists the different permissions and lets you choose what a member with this role gets to do on your account.
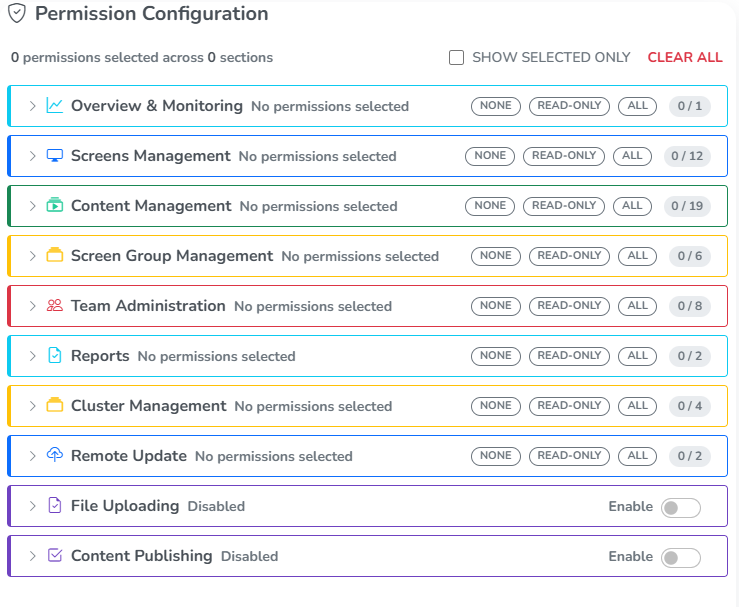
SHOW SELECTED ONLY– shows the list down to only the permissions already chosen, out of everything on the panel.CLEAR ALL– removes every permission chosen so far, across every module.- Each module also carries its own
NONE,READ-ONLYandALLoptions shortcuts, plus a running count of how many of its permissions are picked.
Every permission sits grouped under its own module, opened as its own subheading below. The description of each module is also mentioned in its card in small size letters.
Overview & Monitoring
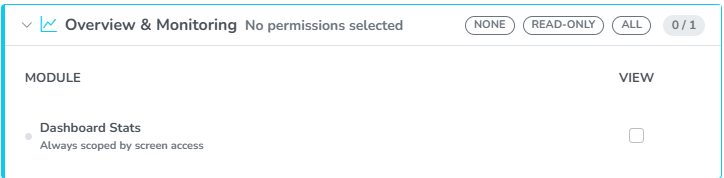
- Dashboard Stats – the only permission here is
View. On, a member sees the full dashboard layout, with everything available on this account’s dashboard. Off, their left panel doesn’t hold theDashboardsection.
Screens Management
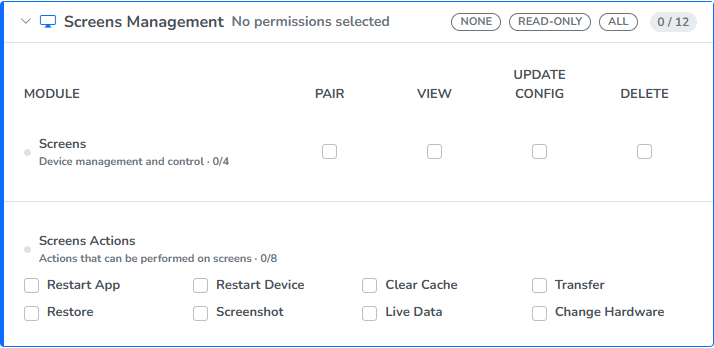
- Screens –
Pairlets a member pair a new screen.Viewlets them see a screen and its details.Update Configlets them change the Configurations tab options in Screen Settings.Deletelets them delete a screen. - Screens Actions – each of the eight permissions here unlocks one action on the Settings tab of Screen Settings. Check out that link if any option feels confusing here.
Content Management
Content Management covers the four kinds of content you build: Media (Img/Vid) and Widgets, added straight from the Library, and Playlists and Sequences, customized through the Playlists section.
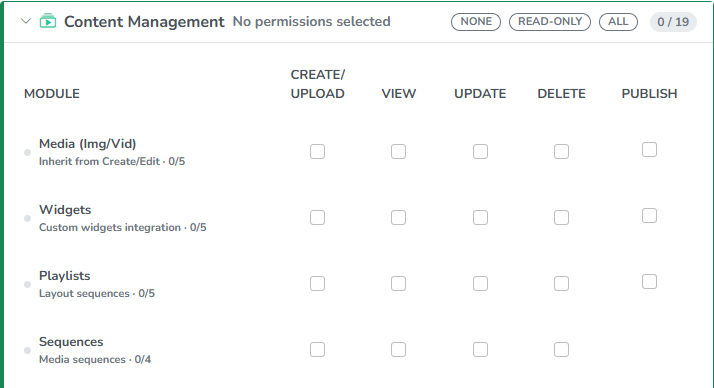
Every kind carries the same permissions:
Create/Upload– add a new one.View– open and look at it.Update– edit it.Delete– remove it.Publish– push it out to screens.
Sequences carries just the first four; it has no Publish of its own.
Screen Group Management
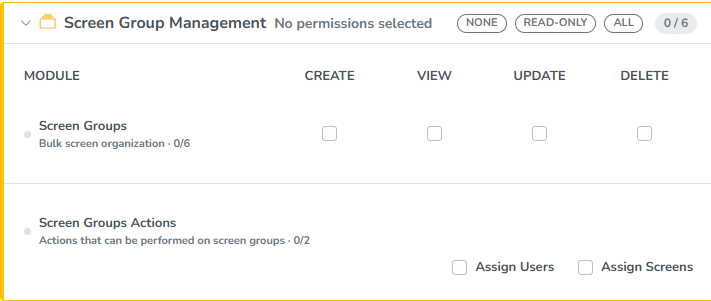
- Screen Groups – whether the member can create groups;
Create,View,UpdateandDeletecover adding, seeing, editing and removing them. - Screen Groups Actions –
Assign Screenslets a member add screens to a group.Assign Userslets them add a member to the group, from Team Access on the same page.
Team Administration
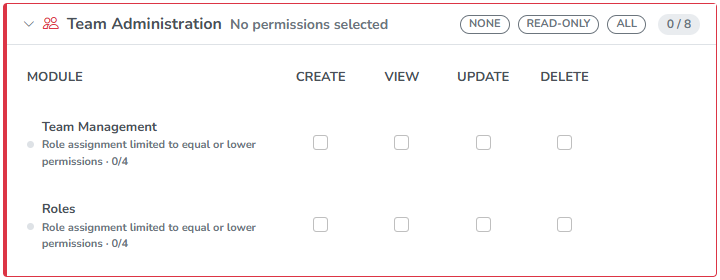
- Team Management – whether the member can create a new team member, inside the Team section only.
- Roles – whether the member can create another new role.
Both rows cap role assignment to equal or lower permissions than the member’s own.
Reports
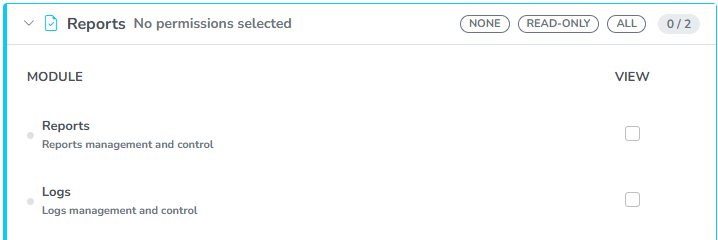
- Reports – whether the member can see the screen reports.
- Logs – whether the member can see the team logs: which action was done, by whom and when.
Cluster Management
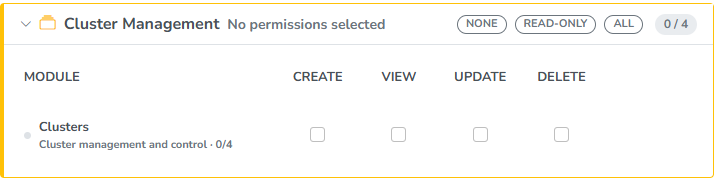
- Clusters –
Create,View,UpdateandDeletepermissions for clusters.
File Uploading
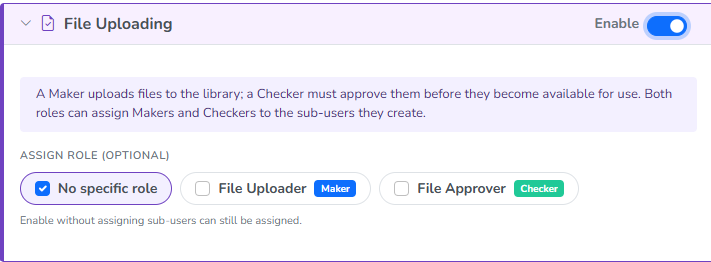
Turning this on lets the member upload files to the library. Once enabled, pick what this role becomes when a member with it uploads a file: File Uploader, the maker whose upload creates an upload request, or File Approver, the checker who reviews and approves that request. No specific role keeps file uploading enabled on its own, independent of either side of that flow.
Content Publishing
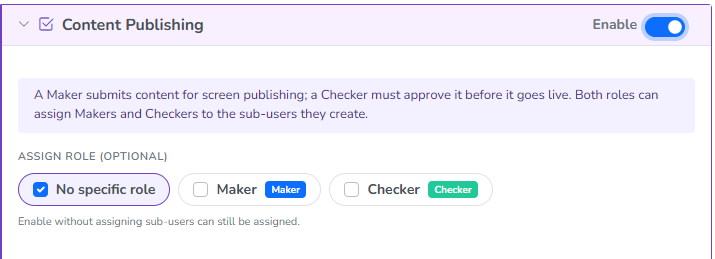
Turning this on lets the member publish content to a screen. Once enabled, pick what this role becomes when a member with it publishes: Maker, whose publish creates a publish request, or Checker, who reviews and approves that request. No specific role keeps content publishing enabled on its own, independent of either side of that flow.
Create Role, at the bottom right of the panel, creates the role with the permissions assigned above.
Colored tags
A role card carries a few colored tags beside its name. Here’s what each one shows:
- N Permissions The total number of permissions given to this role.
- Required This role is the maker for the file uploading permission, the one whose uploads need approval.
- Reports To Shows who this role reports to in the hierarchy.
- Maker This role is the maker for the content publishing permission, the one whose publishes need approval.
- Approve This role is the checker for the file uploading permission, the one who approves or rejects uploads.
- Checker This role is the checker for the content publishing permission, the one who approves or rejects publishes.
Next: Create a New User → puts it all together: build a role like this one, assign it to a new member, and see exactly what that member can then see and do.